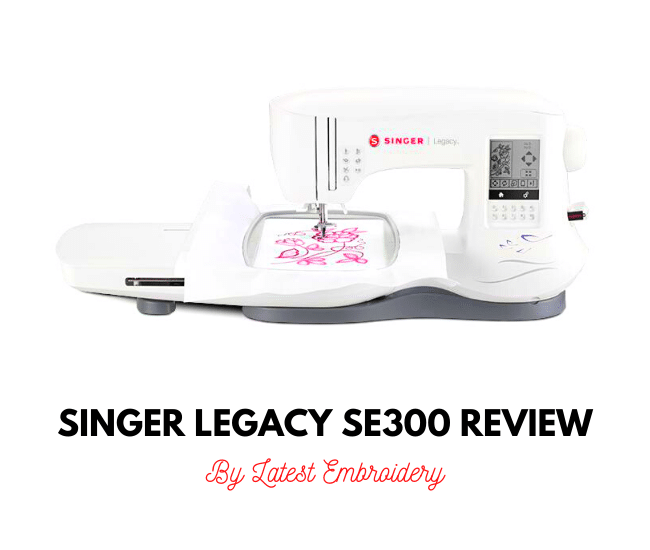
Embroidery Tension Problems 2025: Step-by-Step Fixes for 8 Brands
Are inconsistent stitches ruining your embroidery projects? If you’ve ever battled tension issues—those frustrating skipped stitches, puckering, looping, or bird-nesting under the hoop—you’re not alone. Nearly every embroiderer hits tension problems at some point, and catching them early saves you thread, stabilizer, ruined garments, and a lot of frustration. This 2026 guide is the troubleshooting hub for latestembroidery.com: we cover the eight most common machine brands (Brother, Babylock, Janome, Bernina, Singer, Husqvarna Viking, Pfaff and Ricoma), give you an at-a-glance symptom-to-fix diagnostic table, an honest per-brand tension reference, and a hands-on bobbin drop test. Whether you run a home machine or a multi-needle commercial head, the goal is the same—balanced, clean stitches in under 30 minutes. Let’s turn potential bobbin disasters into perfect stitches.
The single most important rule: when a stitch looks wrong, fix your threading first, then your top tension, and only touch the bobbin as a last resort. Most “tension problems” are actually threading problems in disguise.
What Balanced Embroidery Tension Actually Looks Like
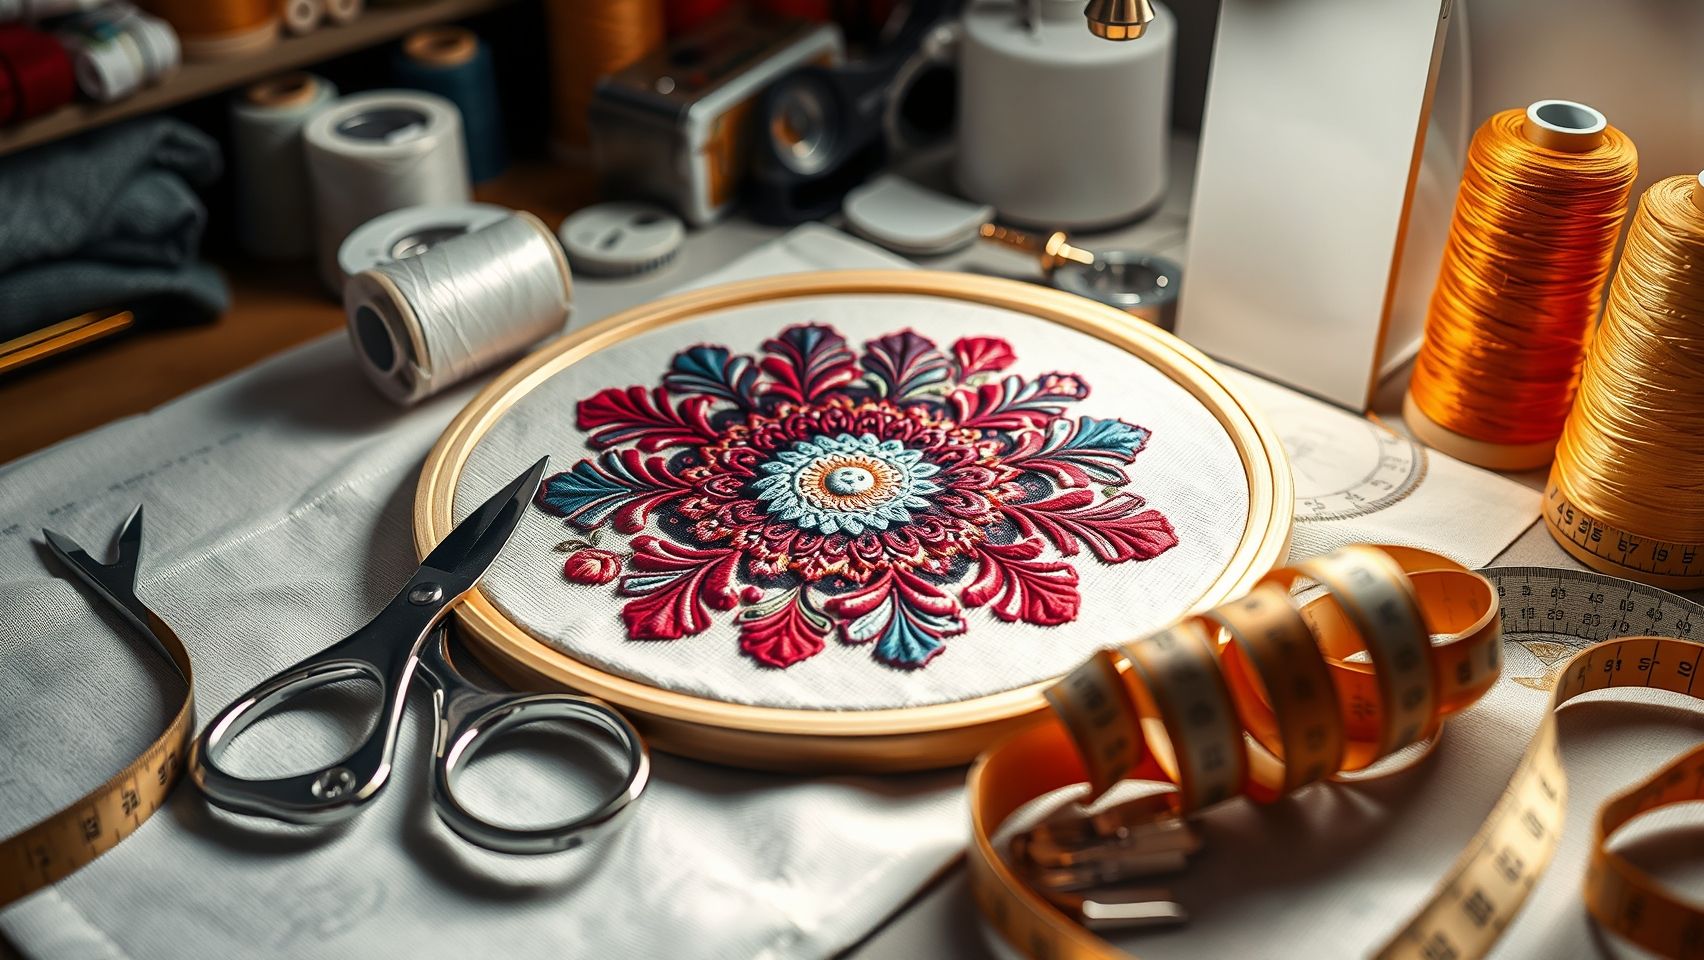
Before you change a single dial, you need a target. Embroidery tension is different from regular sewing tension: in embroidery you deliberately want the top thread to pull slightly to the back so the bobbin thread never shows through to the front of your design. Here is the standard most digitizers and machine manuals aim for:
- Front of the design: you should see only the top (needle) thread. No bobbin color peeking through.
- Back of the design: you should see a column that is roughly two-thirds top thread to one-third bobbin thread down the centre of each satin or running stitch. This “2/3 top, 1/3 bobbin” look on the back is the classic sign of correctly balanced embroidery tension.
If the back shows a 50/50 split or the bobbin thread is hugging the very edges, your top tension is too loose. If you can see bobbin thread on the front, your top tension is too tight (or the top is threaded wrong). Keep this target picture in mind—every fix below is just nudging your stitch toward it.
One honest note up front: a large share of modern Brother, Babylock, Janome, Bernina and Husqvarna Viking embroidery machines ship with automatic tension. On those machines the right move is usually to leave the tension on auto and fix the real culprit—threading, needle, stabilizer or hooping—rather than chasing a dial number that the machine is managing for you.
Why does embroidery aim for that off-center 2/3-to-1/3 balance instead of the perfectly even lockstitch you’d want in garment sewing? Two reasons. First, design density: embroidery packs hundreds of stitches into a small area, and pulling the knot slightly to the back keeps the top thread looking crisp and the colors clean on the visible side. Second, the bobbin thread is usually a fine, neutral lightweight thread (often a 60- or 90-weight) chosen to reduce bulk—you actively don’t want it competing on the front. So a stitch that would look “wrong” on a sewing project is exactly right on an embroidery design. Train your eye on the back of the work and you’ll diagnose tension faster than any dial number ever could.
Tension Symptom → Cause → Fix Diagnostic Table
This is the table competitors don’t build. Find your symptom in the left column, then work left to right. Always try the “top-tension fix” and “other” columns before the bobbin column. Test each change on scrap fabric with the same stabilizer you’ll use on the real piece.
Notice how often the answer lives in the right-hand column, not in the tension dial. If you have a thin one-off fix post bookmarked, this table is the map that points to it—see the deep-dive links below for each symptom.
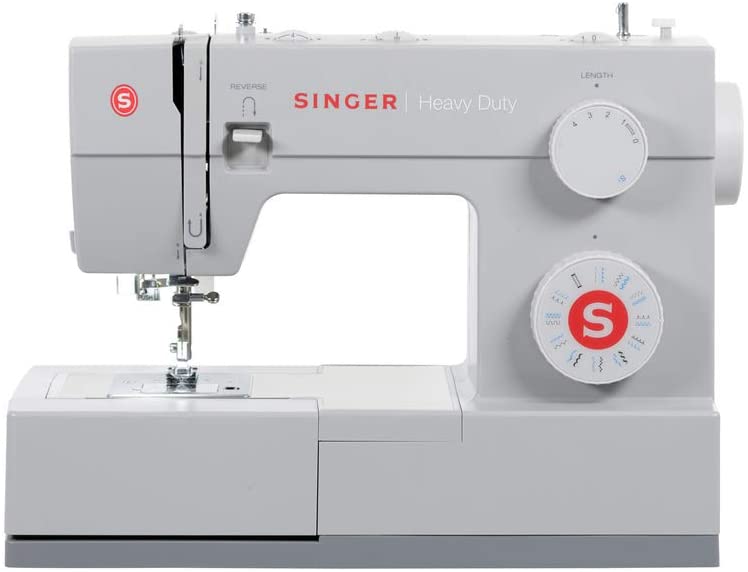
Top-Tension Dial Settings by Brand
Here is the honest, no-hype reference. We are not going to invent a precise dial number for every brand—most modern embroidery machines manage tension automatically, and a fake number does more harm than good. Where a standard manual-dial starting range exists for home embroidery (commonly around 2–4 on a numbered top-tension dial), we say so. Otherwise the right answer is “auto / follow the on-screen guidance and fix threading first.” Always confirm with your specific model’s manual.
Two takeaways: (1) if your machine is auto-tension, stop hunting for a magic number and check threading, needle and stabilizer; (2) if you have a manual dial, the low-to-mid range (roughly 2–4) is a reasonable embroidery starting point—then fine-tune by the look of the stitch, not by the number.
A word on the commercial machines in that list. Ricoma, and multi-needle heads in general, work differently from home machines: each needle has its own physical tension knob, and operators set them by feel rather than by a screen value. The traditional commercial test is the “pinch” or “pull” test—pull thread from below the needle plate and feel for steady, moderate resistance, then confirm with a stitch-out. Because there’s no auto-tension safety net, commercial operators rethread carefully and check each needle’s balance whenever they swap thread brands or weights. If you’ve moved up from a home machine to a multi-needle, this is the biggest mindset shift: you are the auto-tension system now.
It’s also worth knowing why the “v3 loose tension” type of search is so common. Many machine generations and model lines (v-series and similar) share a near-identical tension assembly, so the same loose-tension symptom—and the same fix—shows up across the whole family. If your model feels like it “won’t hold tension,” it’s almost never a unique defect; it’s the universal sequence below. Rethread top, reseat the spool cap, clean the discs, then adjust—in that order.
The Bobbin Drop Test & When to Adjust the Bobbin Case
Bobbin tension is the part beginners are most tempted to fiddle with—and the part you should touch last. Before you ever reach for the bobbin-case screw, do the drop test to find out whether the bobbin is even the problem.
The Bobbin Drop Test
This works on a removable bobbin case (front-load and most commercial machines like Ricoma). It is a quick way to feel whether bobbin tension is in the right zone:
- Wind and insert the bobbin into the case, threading it through the case’s tension slot.
- Hold the case by the thread tail and let it dangle in the air.
- Give the thread a tiny bounce. The case should slowly slide down a few inches—like a spider easing down its web—and then stop.
Read the result:
- It slides slowly and stops: bobbin tension is good. Leave it alone—your problem is the top thread.
- It free-falls / unspools instantly: bobbin tension is too loose.
- It won’t budge even with a firm bounce: bobbin tension is too tight (or there’s lint jammed under the tension spring—clean it first).
When (and How) to Adjust the Bobbin Case
Only adjust the bobbin if the drop test clearly fails and rethreading/loosening the top didn’t balance the stitch. The adjustment is the tiny screw on the side of the tension spring of a front-load or removable case:
- Quarter-turn rule: turn the screw a quarter-turn at a time—never more. A little goes a very long way.
- Righty-tighty: clockwise tightens (more resistance), counter-clockwise loosens.
- Re-test after every quarter-turn with the drop test, then stitch a sample.
- Tip: a dab of nail polish on the screw head before you start lets you see exactly how far you’ve turned and return to factory if needed. Some embroiderers keep a separate “specialty thread” bobbin case so the everyday one stays untouched.
Golden rule, restated: adjust the top tension first. The bobbin is the last resort, and a quarter-turn is the largest move you should ever make at once.
What about drop-in (top-loading) bobbins, the kind on many Brother and Babylock home machines? Those bobbin cases are built into the machine and are deliberately not meant to be adjusted by the user—there’s no accessible screw to turn, and that’s by design. If you have a drop-in bobbin and your stitch is off, the answer is essentially always top tension, threading, needle or a lint-clogged race. Clean the bobbin area thoroughly, make sure the bobbin is dropped in so it spins the correct direction (usually so the thread pulls off counter-clockwise on Brother-style machines), and confirm the thread is pulled into the bobbin tension slot. Do not go hunting for a bobbin screw that isn’t there.
One more reason to leave the bobbin alone unless you must: bobbin tension is shared across every design you stitch, while top tension is easy to re-balance per project. If you adjust the bobbin case to fix one tricky metallic-thread job, you’ve now thrown off the balance for the next hundred ordinary jobs. That’s exactly why experienced embroiderers keep a dedicated second bobbin case for specialty threads and never touch the daily driver. Mark them so you can tell them apart at a glance.
Step-by-Step: Diagnose and Fix Tension in Order
Follow this sequence every time. It’s deliberately ordered cheapest-and-most-likely first, so you rarely reach the later steps.
Step 1: Stitch a Test & Read Front and Back
Run a small test design on scrap fabric with the same stabilizer you’ll use. Compare it to the target from earlier: top thread only on the front, 2/3-top / 1/3-bobbin column on the back. Name the symptom using the diagnostic table.
Step 2: Rethread the Top Completely
Remove the top thread entirely and rethread from the spool, presser foot up, making sure the thread drops cleanly between the tension discs, through every guide, and into the take-up lever. This one step resolves a huge share of “tension” complaints—especially bird-nesting and looping.
Step 3: Change the Needle
Install a fresh embroidery needle in the correct size for your thread and fabric. A dull, bent, or wrong-size needle causes skipped stitches, breaks and ragged stitches that look like tension faults. Needles are cheap; treat them as a consumable.
Step 4: Adjust the Top Tension
On a manual dial, move one number at a time from the mid-low range. On auto-tension machines, use the on-screen fine adjustment only after Steps 2–3. Bobbin on top? Loosen. Looping on the back? Tighten. Retest after each change.
Step 5: Check Stabilizer & Hooping
Puckering and distortion are frequently stabilizer/hooping issues masquerading as tension. Use enough stabilizer for the stitch density, hoop the fabric taut and flat, and slow the machine on dense fills.
Step 6: The Bobbin Drop Test (Last Resort)
Only now do the drop test and, if it clearly fails, make a single quarter-turn on the bobbin-case screw. Re-test and stop as soon as the stitch balances.
Why this exact order matters: each step is faster and cheaper than the one after it, and each one is more likely to be the real cause. Rethreading costs thirty seconds and fixes a majority of cases. A needle costs pennies. Top tension is a non-destructive, fully reversible adjustment. Stabilizer and hooping are free changes you control. The bobbin screw is the only step that can leave you worse off than you started—which is precisely why it’s last. If you find yourself reaching for the bobbin screw on every job, that’s a signal to look upstream: a worn tension assembly, a lint problem you’re not fully clearing, or thread quality. Fix the upstream cause and the bobbin stops being a recurring battle.
Keep a small troubleshooting log next to the machine. Note the symptom, what you changed, and whether it worked. After a few weeks you’ll have your own cheat sheet—”metallic thread on the cap design needs the top dropped half a number, fresh topstitch needle, slow speed”—and most jobs will go right on the first stitch-out. That log is worth more than any generic settings chart, because it’s calibrated to your exact machine, thread and fabric.
Internal Troubleshooting Hub: Deep Dives by Symptom
This page is the pillar; each symptom has a dedicated step-by-step fix. Jump to the one matching your problem:
- Bobbin thread on top: Fix bobbin thread showing on top — quick guide
- Loose bobbin tension: How to fix loose bobbin tension in embroidery
- Looping on the back: Fix thread looping on embroidery backs fast
- Bird-nesting: How to stop bird-nest embroidery — step-by-step fixes
- Skipped stitches: Why embroidery machines skip stitches & how to fix them
- Thread fraying / breaking: How to fix thread fraying in embroidery machines quickly
- Tension + puckering crash course: 2025 embroidery troubleshooting guide: tension & puckering
- Choosing the right bobbin thread: Choosing bobbin threads for embroidery — practical guide
Tools & Parts That Make Tension Fixes Easy
You don’t need much to win at tension, but the right consumables turn a frustrating afternoon into a five-minute fix. These are the parts we keep on hand. As an Amazon Associate we earn from qualifying purchases, at no extra cost to you.
Chronically failing older machine? If you’ve rethreaded, replaced the needle, cleaned the case and you’re still fighting tension on every project, the machine may have a worn tension assembly or timing drift that’s no longer worth repairing. At that point a current auto-tension embroidery machine often pays for itself in saved thread, stabilizer and ruined blanks.
Prevention: Keep Tension Trouble From Coming Back

Most tension headaches are preventable with a short pre-stitch routine. Build these habits and you’ll rarely need the diagnostic table again:
- Always stitch a test swatch on the same fabric and stabilizer before the real piece.
- Rethread cleanly every time you change colors or thread types—foot up, into the discs.
- Start a new needle at the beginning of big projects rather than mid-job.
- Clean lint from the bobbin case and tension area regularly; lint is a silent tension-killer.
- Hoop taut and use enough stabilizer for the design’s density to stop puckering at the source.
- Record your good settings per thread/fabric combo so you can return to them instantly.
Frequently Asked Questions
What should embroidery thread tension be set to?
On a manual numbered dial, most home embroidery machines start well in the low-to-mid range, roughly 2–4, then you fine-tune by the look of the stitch—top thread only on the front, a 2/3-top to 1/3-bobbin column on the back. That said, many modern Brother, Babylock, Janome, Bernina, Husqvarna Viking and Pfaff machines use automatic tension; on those, leave it on auto and fix threading, needle and stabilizer rather than chasing a number.
Why is my bobbin thread showing on top?
Bobbin thread peeking onto the front almost always means the top tension is too tight—or the top thread isn’t seated in the tension discs because of a threading miss. Rethread the top completely (presser foot up), then loosen the top tension a step at a time until the bobbin color disappears from the front. Don’t touch the bobbin for this one.
How do I fix looping on the back of embroidery?
Loops on the back mean the top tension is too loose, or the top thread skipped a guide or the take-up lever. First rethread the top carefully—this fixes it more often than not—then tighten the top tension slightly and retest until the back shows a clean, balanced column instead of loops.
Should I adjust bobbin tension on an embroidery machine?
Adjust the top tension first, always. The bobbin is the last resort. Only if the bobbin drop test clearly fails (free-fall = too loose, won’t move = too tight) and rethreading/top adjustments didn’t balance the stitch should you touch the bobbin-case screw—and then only a quarter-turn at a time, righty-tighty, re-testing after each turn.
Why does my thread keep breaking during embroidery?
Repeated breaks come from a combination of three things: tension too tight, a needle that’s dull, bent or the wrong size, and a rough or wrong thread path (or old, brittle thread). Loosen the top tension a touch, install a fresh embroidery needle, rethread along a smooth path with quality thread, and slow the machine on dense fills. Clear lint from the bobbin case too—a binding bobbin can snap the top thread.
Conclusion
Mastering embroidery tension in 2026 comes down to a simple order of operations: read the stitch front and back, rethread, change the needle, adjust the top tension, check your stabilizer and hooping—and only then, as a last resort, do the bobbin drop test and make a single quarter-turn. Whether your machine is a manual-dial Singer or an auto-tension Bernina, the target never changes: top thread on the front, a 2/3-top column on the back.
Bookmark this page as your troubleshooting hub, jump to the symptom-specific deep dives when you need them, and keep a fresh needle and a spare bobbin case on the bench. Do that and you’ll spend your time stitching beautiful designs instead of fighting your machine. Happy stitching!