How to Stop Bird Nest Embroidery: Step-by-Step Fixes
This post contains affiliate links. As an Amazon Associate, Latest Embroidery earns from qualifying
purchases, at no extra cost to you. Learn more.
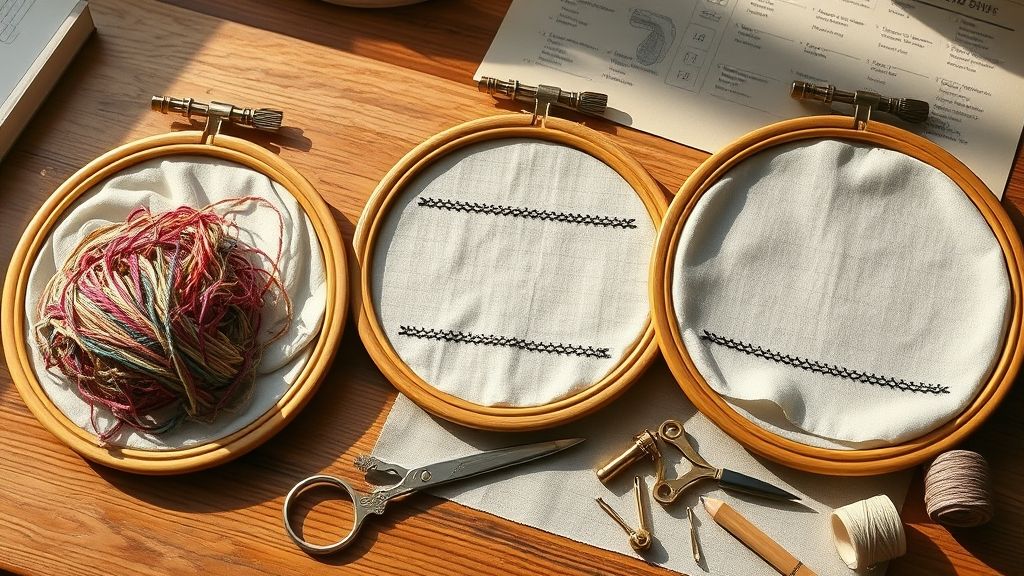
Tired of bird nests ruining your embroidery projects? This practical guide gives you ready-to-implement fixes, a prevention checklist, and salvage methods you can use today. Common culprits include bobbin tension, top-thread misthreading, and loose take-up levers, all things you can verify in minutes. For quick background, see What Causes Bird Nests from Superior Threads.
Step-by-step salvage starts with a clean re-thread and bobbin check. Re-thread the upper path, reseat the bobbin, and test with a scrap piece. Tighten bobbin tension a touch if nests persist, then verify the take-up lever moves freely. For more specifics, see Ricoma Support: Bird nesting troubleshooting.
Prevention is the best fix: hoop tightly, choose the right stabilizer, and use a fresh needle. Keep stitches on the correct path and run a quick test on scrap fabric to confirm smooth operation. Learn more about stabilizers here: Kimberbell: Troubleshooting Stabilizer Issues and Ultimate Embroidery Stabilizer Guide.
Upgrade your threads for stable stitching:
Shop embroidery thread on Amazon →
How to Stop Bird Nest Embroidery: Step-by-Step Fixes
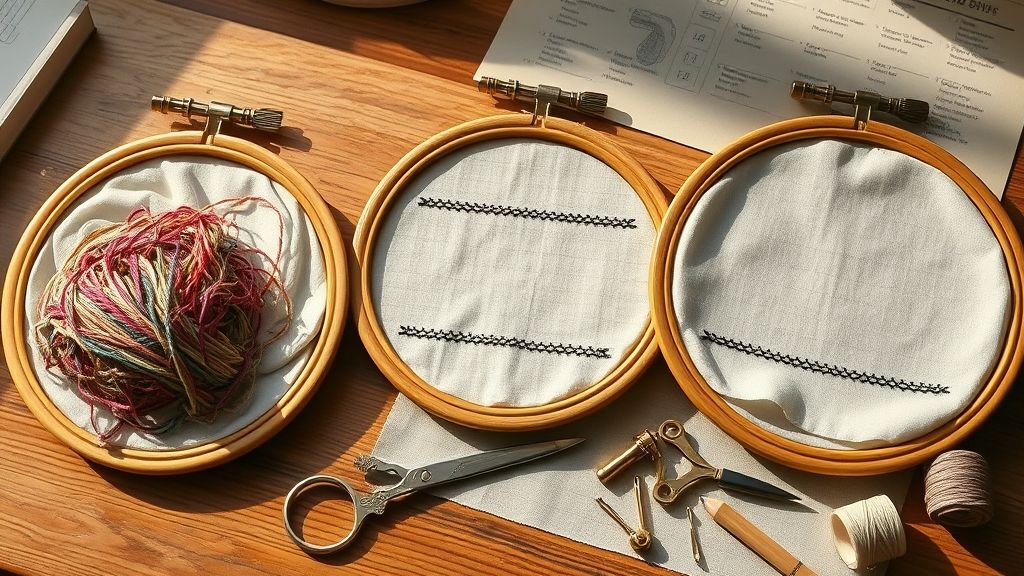
Preventing bird nests in embroidery starts long before a stitch is made. A clean machine, mindful thread paths, and proper stabilization set the foundation for smooth, professional results. Industry data show ongoing growth in the craft market and related equipment, underscoring the importance of reliable setup habits: global embroidery market size was about USD 3.2 billion in 2023 and is forecast to reach roughly USD 6.2 billion by the early 2030s, while embroidery equipment markets have grown into the hundreds of millions of dollars with steady year‑over‑year gains. This section pushes beyond general advice to a concrete, implementable prevention workflow you can apply to every project. It also aligns with practical guidance from professionals who emphasize stability, test stitching, and the right needle–thread–fabric combinations for consistent results.
Throughout this workflow, prevention relies on machine cleanliness, mindful thread paths, and quality needles and threads; use stabilizers to secure the fabric and avoid slippage. For common embroidery weights, recommended needle sizes are 70/10, 75/11, and 80/12, with 90/14 reserved for heavier threads or very dense designs. Design density around 4.2 guides your design choice and can inform whether you need extra stabilizer. Before you embark on the final piece, run a test on scrap fabric to confirm you’ve balanced tension, stitching, and fabric support.
Preventing bird nests: a step-by-step checklist
This checklist translates best practices into actionable steps you can follow in sequence. Prepare your workspace, gather the tools listed, and follow the numbered steps to minimize stitching errors and nests during production.
-
Step 1: Clean the machine and remove lint from bobbin area before starting a project
Begin with a thorough cleaning: unplug the machine, remove the bobbin case, and clear lint from the bobbin race, feed dogs, and the underside of the needle plate. Use a lint brush, compressed air, and a microfiber cloth to pick up stubborn particles. A clean bobbin area reduces lint migration into the hook and tensions, which is a common nest cause. Keep spare bobbins and a gentle cleaning solvent (as recommended by your machine’s manual) on hand for quick maintenance between projects.
Why it matters: even tiny lint fibers can disrupt thread paths, impacting tension harmony and causing looped stitches. A routine clean before every project aligns with professional practice and helps prevent nests from forming mid-stitch.
-
Step 2: With presser foot up, thread machine and disengage tension discs as you thread to ensure smooth tension
Threading with the presser foot up opens the tension discs, ensuring the thread feeds cleanly through the path. As you thread, gently disengage the tension discs so the top thread can seat evenly and thread tension isn’t pulled tight or misaligned. Re‑engage the discs after threading, then pull the thread tail to check that the thread glides smoothly without snagging.
Tip: a smooth threading path reduces the risk of tangled tails that can be pulled into the fabric and create nests. A consistent threading routine supports balanced tension across stitches.
-
Step 3: Set balanced tension: adjust top thread tension so it matches bobbin tension; run a small test to verify
Balance top and bobbin tensions by aiming for an even pull: the top thread should pull slightly against the bobbin thread without strangling the fabric. After adjusting the top tension, run a small test stitch on scrap fabric. If the top thread sits on the top surface with minimal bobbin show-through, you’re in the right range. If you see excessive bobbin thread on the top or looped threads underneath, tweak the top tension and re‑test.
Context from industry practice: test stitching is a recommended step before committing to the final piece to avoid surprises such as bird nests caused by tension mismatch. For many projects, a moderate top tension paired with a correctly wound bobbin yields the most reliable results.
-
Step 4: Wind and insert bobbin correctly; ensure bobbin is wound evenly and seated properly
Wind the bobbin evenly without overspin, and verify that the bobbin case seats correctly in the shuttle race.Insert the bobbin in the correct direction for your machine, ensuring the thread unwinds in the correct path. A bobbin wound off‑center or tight in one area can feed irregularly, causing thread breaks or nests. Check that the bobbin is fully seated and that the bobbin case clicks into place with no play.
Needle and thread compatibility: pair the bobbin thread with the appropriate top thread and needle size, 70/10 to 80/12 for most lightweight to midweight fabrics, scaling up to 90/14 for heavier threads or dense designs. When in doubt, start tests with 75/11 or 80/12 needles on midweight fabrics and adjust as needed.
-
Step 5: Hoop fabric with appropriate stabilizer; choose cut-away or tear-away based on fabric weight and design density
Secure the fabric in a properly sized hoop with an appropriate stabilizer. Stable fabrics and dense designs generally benefit from cut-away stabilizers, while lighter, non‑stretch fabrics suit tear-away stabilizers. The stabilizer should support the fabric without overly stiffening the project, and it should be matched to the stitch density (density around 4.2 is a common guideline for many designs). If your design is heavily dense or has a lot of fill stitches, consider a heavier stabilizer and a slightly lower hooping tension to prevent fabric distortion during embroidery.
Stabilizer quick reference: tear-away works well on non‑stretch fabrics; cut-away is preferred for stretchy fabrics (like knits or jersey) to maintain stitch integrity after removal. Stability decision should reflect fabric weight and stitch density to reduce shifting and slippage.
-
Step 6: Perform a test stitch on scrap fabric and inspect for loose stitches or thread tails before proceeding to the main fabric
Always run a test stitch on scrap fabric that matches the final material as closely as possible. Inspect the test, look for loose stitches, skipped stitches, or tails. If you see nests or looping, adjust tension, rethread, and re‑test until the stitch formation is clean. Only proceed to the main fabric once the test stitch consistently hits the desired results.
Quality control mindset: testing saves time and materials and aligns with industry practices that emphasize verification before production. A quick scrap test reinforces correct needle size (70/10 to 90/14 as appropriate), stabilizer choice, and tension balance for a reliable final piece.
By following these steps, you create a robust prevention workflow that minimizes bird nests and improves embroidery consistency. The emphasis on cleanliness, mindful thread paths, stabilizer choice, and targeted test stitching mirrors how professionals approach machine embroidery in a market continuing to grow: the embroidery sector remains dynamic, with stable demand for reliable equipment and expertise. With the right setup, you’ll consistently achieve smooth starts, balanced stitches, and durable designs that stand up to wear and washing, keeping your projects crisp and nest‑free from start to finish.
How to Stop Bird Nest Embroidery: Step-by-Step Fixes
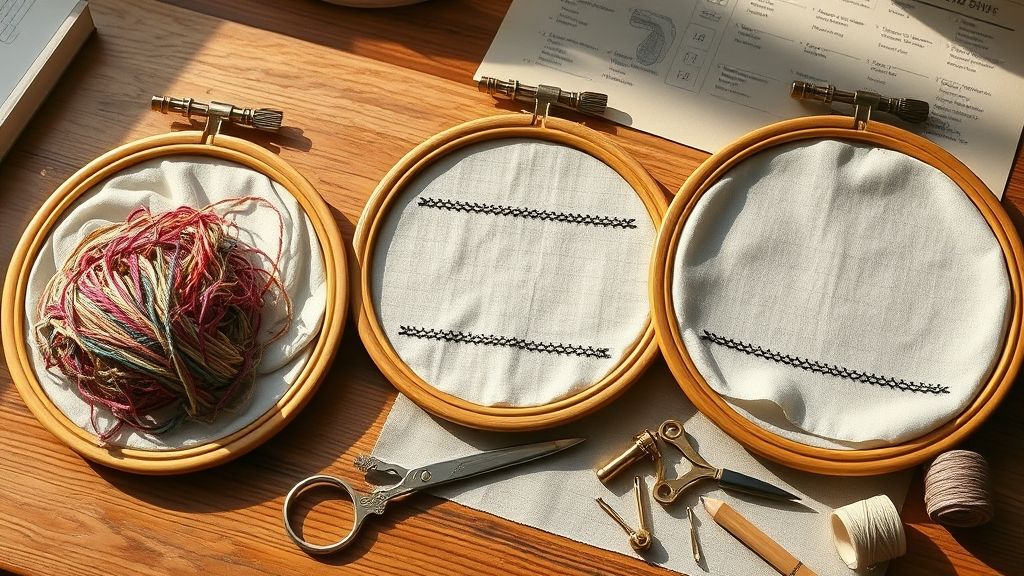
When a bird’s nest forms under the needle, it can feel like a meltdown in the middle of a cherished design. The good news is that you can salvage most embroideries without starting from scratch if you move quickly, stay methodical, and use the right in-place techniques. The embroidery market continues to expand as machines, software, and accessories evolve, making it more feasible for hobbyists and pros to recover projects mid-flight rather than redoing them from the hoop up. Market analyses note steady growth in the industry, with estimates placing the scale of embroidery-related activity in the low-to-mid billions of dollars in recent years and a projected healthy CAGR as new software and hardware updates emerge. Among those updates are recent advancements in embroidery software and tools that emphasize precision, stability, and easier troubleshooting, which can support nest-prevention strategies as you resume stitching.
This section focuses on actionable salvage steps you can perform at the machine, using common nest-clearing tools and careful threading decisions. You’ll learn how to pause correctly, clear the nest in place when possible, and re-stitch with a plan that minimizes risk of re-nesting. By integrating current technique guidance and practical tips, you’ll be able to recover a project quickly while preserving alignment and fabric integrity.
Pause immediately and assess the situation
As soon as you notice a nest forming, stop the machine and calmly assess. Do not pull the fabric toward you or yank the hoop; aggressive motion can worsen the loop under the needle plate. If the design is still on-screen and the machine is seated, back the needle away gently and raise the presser foot to relieve tension. Inspect the area around the nest for loose threads, bird-nest bights, or threads that have looped toward the feed dogs. If you can see a clear path to the exit points of the loops, keep the hoop in place and prepare to address the nest without dislodging the fabric from its current alignment. This approach aligns with best practices in machine embroidery where maintaining hoop stability helps preserve stitch registration for the rest of the design. Industry observers note that maintaining consistent hoop pressure and thread tension is a key factor in reducing nest formation during restitching attempts, especially as newer machines bring higher stitch densities and more aggressive designs to the hoop.
Action steps you can follow now:
- Stay calm and stop the machine immediately.
- Do not pull or yank the fabric toward or away from the needle plate.
- Lock the neck of the needle in position if your model allows, to prevent further unraveling.
- Nodes of thread near the needle plate should be left in place until you’re ready to clear them with the proper tool.
Clear the nest in place using the right tools
Clear the nest without unhooping if possible. Nest-clearing tools like a bird’s nest kit or a standard metal fork can help you tease and remove the tangled threads from the needle plate area with minimal drama. Work slowly and methodically to extract visible tails and loops. Avoid aggressive cuts that might create new loose ends or push the nest deeper toward the bobbin area. If you can see a clear exit channel for loose threads, pull them gently away from the bite area rather than ripping them out in short, forceful motions. When using a nest kit or fork, prop the tool at a shallow angle to lift and guide threads away from the needle plate and under the presser foot, not toward the feed dogs or bobbin area. This careful approach is echoed by experienced embroiderers who emphasize patience and gentle elevation of tangled threads to minimize additional knots or thread breakage.
- Tools: Bird’s nest kit or a clean metal fork (with tines) for lifting threads from the needle plate.
- Technique: Gently lift and tease threads, removing the most visible tails first. If a thread is stubborn, pause, reorient, and approach from a different angle rather than forcing it.
- Cutting: Avoid blind cuts; trim tails gradually to reduce the risk of leaving unstitched bits that could trigger a re-nest during restitching.
Decide whether unhooping is necessary
Unhooping should be a last resort. If you can clear the nest in place and re-sew without shifting the fabric’s alignment, leave the work hooped to preserve registration with the original design. Unhooping can disrupt the precise alignment established by the hoop, especially if the fabric has stretched or shifted during stitching. If the nest persists and threatens the next stitches, plan a controlled unhoop and rehoop sequence, but do this only after you confirm you cannot clear the nest in place. This decision aligns with professional guidance that emphasizes preserving stitch registration and minimizing fabric movement when mid-project cleanup is required. When you do unhoot, re-hoop the fabric evenly and securely before continuing to restitch to minimize the chance of another nest forming during the remaining segments of the design.
Trim tails to about 1 cm and apply stabilizer before restitching
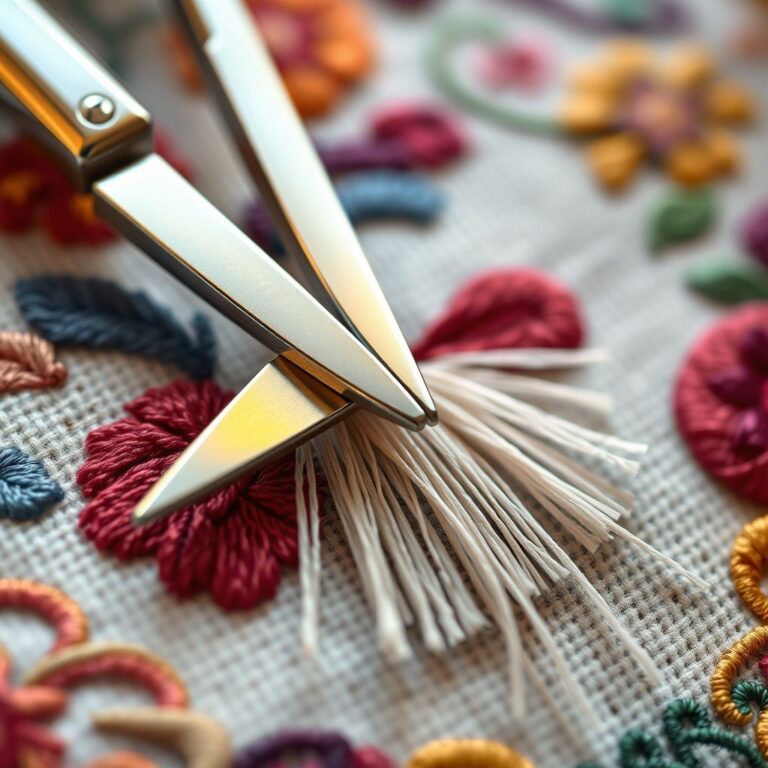
Once the nest is cleared, trim thread tails to about 1 centimeter. This reduces the risk of short tail threads catching under the needle or catching in the needle plate area as you resume stitching. Apply an iron-on stabilizer over the cleared area to reinforce the fabric and improve stitch definition, especially if you are working with lightweight or stretchy fabrics. The stabilizer helps prevent the renewed nest by offering a stable base for the next stitching pass and can be removed later if needed after the rest of the design completes. After applying stabilizer, trim any remaining loose threads and inspect the area to ensure no stray threads remain that could tangle with the next pass.
- Trim tails to ~1 cm before restitching.
- Apply an iron-on stabilizer to the cleared area to reinforce the fabric.
- Remove visible loose threads and recheck the area for any stray knots or fiber ends.
Re-thread, re-hoop, and test stitch on scrap fabric first
Re-thread the machine with the correct path and tension for the rest of the design. Re-hoop securely and perform a test stitch on a scrap piece of fabric that matches your project’s weight and fiber content. This test helps confirm nest prevention and reveals any tension or density issues before you resume the actual design. Pay attention to stitch density and needle choice during the test; a dense design on a thick fabric can encourage nesting if tension isn’t balanced. Recent machine and software updates emphasize improved nest prevention through smarter density control and better thread pathing, but a test run remains the most reliable safeguard. If the test shows a re-nest tendency, adjust tension or density settings and run another short test until the stitches lay cleanly.
- Re-thread using standard 40-weight thread with a needle size of 80/12 (for typical fabrics) or 90/14 for heavier threads.
- Re-hoop securely and run a test stitch on a matching scrap fabric.
- Check for any signs of crowding, loops, or new nests; tweak density and needle size as needed.
Density, needle size, and alignment considerations
Density and needle selection play a large role in nest prevention. For standard 40-weight thread, a needle size of 80/12 is typically recommended, with 90/14 used for heavier threads or denser designs. If you are using specialty threads or fabrics, consult the thread weight guide provided by your needle manufacturer and your machine’s manual to ensure proper compatibility. Newer embroidery software and hardware updates, from EmbroideryStudio 2025 features to updated digitizing tools, offer refined density controls and smarter pathing, which helps prevent nests by reducing abrupt sharp changes in stitch direction and by distributing stitches more evenly across the fabric. For best results, perform a final test stitch on scrap fabric after any adjustment and confirm that the nest does not recur before resuming the full design.
In practice, you’ll want to verify that density levels are appropriate for the fabric weight and hoop size, and that the stitch sequence avoids abrupt thread breaks or abrupt jumps in direction. Modern machines continue to push higher-density designs, so combining smart software settings with careful physical handling, such as controlled tail trimming and stabilizer use, provides a reliable path to nest-free restitching. Through careful stepwise action, you can salvage most designs without starting over, while preserving registration and fabric integrity.
Essential tools and supplies for nest prevention and salvage
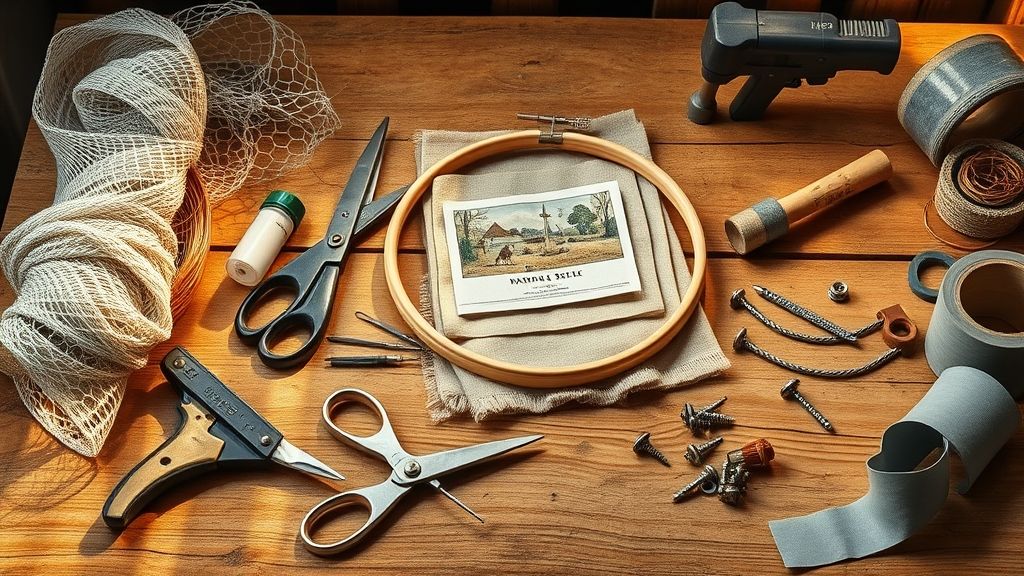
Bird nests in embroidery machines can derail projects, but the right toolkit makes prevention and salvage straightforward. This section outlines precise tools, fabrics, stabilizers, and needles that directly tackle nesting issues, along with nest-salvage methods. As the industry continues to grow, 2024 market estimates place embroidery demand in the multi‑billion range with steady single‑digit growth into the next decade, investing in quality stabilizers, hoops, and needles pays off in fewer nests and cleaner finishes. Reports track the embroidery market around the USD 5 billion to USD 11 billion range in 2024, with a projected CAGR near 6% through the 2030s, while the embroidery machine market hovers near USD 1–1.2 billion in the mid‑2020s and is expected to grow modestly in the coming years. These trends underscore the value of durable supplies and up‑to‑date technique when nest issues arise.
In practice, pairing the right stabilizers with appropriate hooping and needle choices reduces fabric movement and thread entanglement, making nest formation far less likely. Embroidery Central, for example, highlights bird motifs available in 4–5 sizes, which influences design choice and stabilizer weight. For nest salvage, dedicated kits and simple metal forks remain effective, while tweezers and small scissors trim tails cleanly without disturbing surrounding stitches. Modern hardware and software updates, along with digitizing advances, continue to streamline setup and reduce nest risk, reinforcing the value of a well‑stocked workshop and a repeatable salvage workflow.
Stabilizers: tear-away, cut-away, and iron-on techniques
Stabilizers are the first line of defense against nests. Choose stabilizers to match fabric weight and density, then pair with the right needle and thread. For standard 40‑weight threads, use 80/12 stabilizers on woven or light‑to‑medium fabrics; for heavier weights, upgrade to 90/14 to maintain stitch integrity without suffocating the design. Tear-away stabilizers are ideal for non‑stretch fabrics, while cut-away stabilizers offer superior support on knits or dense designs that tend to grip the fabric. When salvage is needed after a nest, an iron‑on stabilizer can be used to secure the salvaged area and prevent back‑stitch migration.
For salvage work, keep a fusible iron‑on stabilizer handy to secure the salvaged area before rehooping, especially on slippery fabrics. Always test the combination on a scrap swatch to confirm that the stabilizer supports the design without ghosting, puckering, or migration. Keeping a small stash of tear-away and cut-away options in light, medium, and heavy weights ensures you can respond to nest issues as they arise without reconfiguring your entire setup.
Hoops: appropriate size and fabric tautness
A taut fabric in a properly sized hoop minimizes movement that invites nests. Start with a hoop that securely frames the design area with even tension across the hoop frame. For delicate or large designs, use a larger hoop to avoid over‑stretching any single area, but always align the hoop size to the design footprint. Ensure the stabilizer is fully adhered and the fabric is taut before you start stitching; a loose fabric invites threads to slip into the needle plate and form nests. After placing stabilizer and fabric, recheck tension by gently lifting the fabric at the center of the hoop, if it lifts more than a few millimeters, tighten or rehoop before stitching.
Needles and threads: precise weights for standard and heavy threads
Match needle size to thread weight and fabric. For standard 40‑weight embroidery threads, use needles in the 70/10, 75/11, or 80/12 range; for heavier threads, step up to 90/14. This helps maintain a clean stitch path and reduces thread breakage, which can contribute to nest formation as tails accumulate. Use high‑quality poly or cotton embroidery threads to minimize filament migration and tension shifts; low‑quality filaments are more prone to creep and tension inconsistencies that encourage nests. When possible, thread the machine with the same brand and weight in both top and bobbin to maintain uniform tension across stitches.
Nest-salvage tools: kits, forks, tweezers, and trimming tools
Equipping yourself with dedicated nest-salvage tools speeds up recovery and reduces fabric damage. Bird’s nest kits or a simple metal fork are handy for gently lifting tangled tails and freeing fabric from caught threads. Tweezers and small scissors let you trim tails cleanly without disturbing nearby stitches. For stubborn nests, use a seam ripper with care to avoid lifting surrounding stitches. Establish a quick salvage routine: isolate the nest area, gently lift and unwind threads, trim tails, then re‑stabilize and rehoop as needed. This reduces downtime and preserves fabric integrity during salvage sessions.
Auxiliary tools: brushes, tension tweaks, and dampening aids
A few careful tools can prevent nests before they form. A lint brush helps remove stray fibers from the hoop area and platen; a tiny screwdriver is invaluable for micro‑adjustments to tension on some machines; and a spray bottle dampens fabric to reduce fraying and static. Lightly damp fabrics when needed to calm the fibers and encourage even stitching. Build a short, repeatable pre‑stitch routine that includes lint removal, a tension check, and a fabric‑calming spray if required. A smooth, prepared workspace contributes to consistent stitches and fewer nests.
Market context and tech updates
Industry dynamics influence how nest prevention tools fit into workflows. Market research indicates a robust embroidery sector with rising demand for high‑quality stabilizers and compatible tools as consumers pursue more home and small‑business embroidery. The embroidery‑machine market has seen steady growth, with multiple sources noting continued demand for reliable hardware and software updates that improve stitch quality and reliability. Digitizing and software enhancements, driven by trends toward AI‑assisted design and faster workflows, help embroiderers optimize nests by enabling tighter control over stitch type, density, and underlay. As these technologies mature, professionals report fewer nests and easier salvage thanks to smarter design‑to‑stabilizer matching and more precise tension management.
Practical takeaway: pair sturdy stabilizers (80/12 for standard 40‑weight threads, 90/14 for heavier weights) with correctly chosen hoop sizes, high‑quality threads, and dedicated nest‑salvage tools. By maintaining a targeted toolkit and a repeatable salvage process, you minimize nest occurrences, improve stitch clarity, and shorten project turnaround times. For designers exploring Bird motifs, consider using 4–5 size options to match fabric weight and hoop constraints, ensuring your nest prevention strategy scales with project complexity.
Post-embellishment care: finishing without fuss
After embroidery is complete, a concise finishing routine helps prevent new nests and keeps the design looking neat. The embroidery market remains healthy and growing, with industry analyses placing the 2024 market around the mid‑single digits to low billions and projecting steady growth into the next decade. That context underscores the value of reliable finishing steps that protect the work and speed up production, especially for hobbyists and small studios working on multiple runs. By applying a quick, repeatable post‑embellishment routine, you reduce nest risk on future projects and preserve fabric integrity.
Advances in embroidery hardware and software, such as smarter tension control, improved feed stability, and more compatible stabilizers, support these finishing practices. Iron‑on stabilizers and reinforced backing are commonly recommended to re‑stabilize areas after nests, while designers benefit from pre‑stitch tests on scrap fabric to fine‑tune tension, stabilizer weight, and stitch density before resting the final piece. Adopting these updates helps you finish with confidence and keeps results consistently tidy across fabrics and designs.
Restitch or patch: choosing the finishing approach
If nests appear after stitching, restitch the affected area with the original density and thread, aligning stitches to resecure the seam line. If re‑stitching risks distortion on delicate fabrics, cover the damaged zone with a patch or redesign the motif to integrate the area more cleanly. After trimming tails, re‑stabilize the repair to prevent future loops. Restitching is ideal for small, contained nests, while patching or a thoughtful redesign works best for larger or irregular damage that could otherwise compromise the overall look.
Trim tails and re-stabilize before further stitching
Trim all thread tails flush with the fabric to prevent tails from catching on subsequent passes. Then apply a compatible stabilizer to reinforce the area before any extra stitching. If the fabric or design area is sensitive, consider a light steam press to set the stabilizer and threads. Always test the repair on a fabric scrap that matches weight and weave to ensure the stabilizer and stitching will behave under the final project conditions.
Inspect fabric for puckering; adjust stabilizer as needed
Before any restitching, inspect the surrounding fabric for puckering near the repair. If puckering is present, increase stabilizer weight or add an additional stabilizer layer in the area and re‑test on scrap. This proactive check helps prevent the issue from migrating into the completed piece. Modern designs and stabilizers are designed to work together; confirm compatibility to minimize distortion and to keep the finish crisp.
Quick-start routine for future projects
Adopt a pre‑stitch test on scrap fabric as a standard quick‑start routine to minimize nest risk across projects. Build a small swatch that mirrors your base fabric, stabilizer, and thread, run the design at normal speed, and observe for nests or looping. If issues appear, adjust stabilizer type or weight, tension, and backing before proceeding to the final fabric. This simple ritual reduces post‑embellishment touch‑ups and keeps the final result clean and professional.
Case studies and real-world context for nest prevention
In the field of machine embroidery, nest prevention is as much about process discipline as it is about hardware. Real-world casestudies show that a broad motif library, paired with a standardized workflow, lowers the incidence of nests and rework. The data point-rich approach helps shops scale from hobbyist projects to high-volume orders with predictable outcomes. As designers and technicians experiment with tension, stabilizers, and stitch density, measurable improvements emerge even before a single new machine is purchased.
Key design data guide practical decisions: Embroidery Central offers a motif catalog with over 2, 000 bird designs in 4–5 sizes and about 8, 000 stitches per design, using a three-color palette. This breadth enables consistent reproduction across product lines and reduces guesswork during preflight. Concurrently, market signals show strong demand for fast relief, providers frequently advertise a 50% first-order discount and a five-minute quote to capture quick-turnaround orders, underscoring that customers expect speed without sacrificing stitch quality. These data points form the backdrop for our case-study lens on nest prevention.
Motif library and design planning
Case studies highlight that a rich motif library supports more accurate planning and fewer redesigns mid-production. With Bird motif catalog details from Embroidery Central, shops can standardize sizing choices across projects, selecting among 4–5 sizes per design and managing stitch counts near 8, 000 stitches per motif. The three-color palette constraint simplifies thread management and reduces color-change errors, which are common nest culprits when color changes are mishandled. Designers who preflight density around a 4.2 density guideline can anticipate how fills will perform on typical fabrics, avoiding overfill that pulls fabric inward and creates underlying thread loops.
- Leverage a consistent sizing matrix to minimize variance between small and large appliqués.
- Match stitch count to fabric weight to keep nest risk stable across orders.
- Plan color stops to reduce rhythm changes that can cause loose threads beneath the workpiece.
Workflow and nest risk reduction in practice
Across beginner to advanced projects, a standardized workflow cuts nest risk by aligning design intent with machine setup. Start with a preflight: verify motif size, stitches, and color palette; run a scrap-test to confirm tension and stabilizer choice. Use balanced upper and bobbin tension, and select a stabilizer that matches fabric weight. Then execute a staged stitching pass, pausing to verify that density and stitch length stay within the 4.2 guideline. In practice, teams that document these steps see smoother production runs and fewer unexpected nests when switching between designs from the same motif family.
Materials and needle considerations
Concrete planning starts with fabric and thread compatibility. Typical projects use needle sizes 70/10, 75/11, 80/12, and 90/14 for a range of weight classes, from light cottons to heavier blends. When densities hover around 4.2, designers can forecast stitch behavior and fabric pull more reliably. For heavier threads or denser fills, pair larger needles with appropriate stabilizers to avoid skipped stitches and nest formation. Emphasizing a consistent toolkit, tension, needle choice, and stabilizer weight, helps keep nests from forming in the first place.
Pricing and service context
Market signals point to strong demand for quick relief in embroidery services. Some providers advertise a 50% first-order discount and a five-minute quote, signaling a consumer expectation for rapid turnaround. This pricing context encourages shops to implement a standardized, repeatable workflow so that new customers experience immediate quality alongside speed, without necessitating repeated design adjustments that can trigger under-hoop nests.
ROI mindset and measurement
An ROI-minded approach for nest prevention centers on quantifiable scrap-test results and time saved on rework. Standardized workflows and documented case studies provide benchmarks to close gaps between intended design and actual stitching outcomes. By tracking scrap rates, repeat rework time, and setup-to-prod time, shops can quantify nest reductions and justify ongoing process improvements. The motif library breadth described earlier supports repeatable planning, while the density guideline of around 4.2 helps maintain consistent stitch behavior across fabric types, contributing to measurable efficiency gains over multiple jobs.
Frequently asked questions about bird nesting
Bird nesting under embroidery can derail a project, but understanding the how and why makes it much easier to prevent and fix. Across the industry, embroidery remains a booming field with steady growth and ongoing tooling advances, underscoring the value of reliable techniques and up-to-date methods. Industry data indicate the embroidery market reached about USD 3.2 billion in 2023 and is projected to rise to around USD 6.2 billion by 2032, driven by personalization trends and new software and machine capabilities. In North America alone, the market was around USD 0.58 billion in 2024 and is expected to edge higher in the coming years. As software updates roll out, such as EmbroideryStudio 2025 and other modern digitizing tools, it’s easier than ever to optimize thread handling, tension, and stabilizers while testing on scrap fabrics.
Use testing on scrap fabric as a core habit. Practicing with cotton, denim, and blends helps you dial in tension, needle size, and stabilizer choices before you commit to a finished piece. This way you can measure real-time progress and clearly see improvements over time rather than guessing when nests will occur.
Why do nests form and how can I prevent them on cotton, denim, and blends?
Nests form when below-needle thread loops bunch up, often due to tension mismatches, incorrect threading, or inadequate stabilization. The result is a loose tangle beneath the needle plate that sabotages stitches. Actionable prevention steps you can apply right away include:
- Test first on scrap fabric of your target type (cotton, denim, and blends) to see how the stitches behave.
- Re-thread the machine with the presser foot up, recheck the bobbin path, and ensure the top thread seats neatly through all guides.
- Pair fabrics with appropriate stabilizers: light stabilizers for delicate fabrics and heavier stabilizers for dense designs.
- Hoop evenly and avoid shifting the fabric during stitching; use a stable hoop and a flat, clean workspace.
- Set a conservative tension baseline and adjust gradually while testing on scrap; document the settings that yield clean stitches.
For cotton, a light stabilizer or tear-away paired with a standard design usually works well; for denim, go with a sturdier stabilizer such as cut-away or a dense tear-away plus a backing; for blends, begin with a mid-weight stabilizer and test because blends can behave like either woven or knit fabrics depending on the fiber mix. The goal is to keep fabric distortion minimal while maintaining stitch integrity across the design.
What needle size should I start with for most 40-weight threads and what signs indicate the need to switch to a heavier needle?
Start with a needle size around 80/12 for most 40-weight threads, which balances sharpness and a large enough eye to prevent fraying. If you see persistent issues after several stitches, such as frayed thread strands, frequent skipped stitches, or frequent nest formation, consider moving up to 90/14 for denser designs or heavier fabrics. In very delicate fabrics or fine details, you might temporarily test a smaller option like 70/10 or 75/11 to reduce fabric perforation. Keep an eye on fabric perforation and thread pile-up; the right needle size should reduce nests, not create new ones.
When testing, document results per fabric and design density. Use scrap samples to compare stitching quality side by side, then apply the best combination to the actual project. This testing habit is reinforced by industry guidance and common practice among professionals who tune needle size to thread weight and fabric type for optimal results.
What stabilizer should I use for delicate fabrics versus dense designs?
Stabilizer choice is the most practical lever to reduce nests. Delicate fabrics (sheers, knits, and light weight silks) benefit from lighter stabilizers that wash away or dissolve, leaving a clean finish. Dense designs on sturdy fabrics usually require stronger backing, cut-away or heavy tear-away, to provide the necessary support and to prevent distortion during stitching. A topper or stabilizer combination can further improve stitch quality on curved or densely stitched areas.
In practice, keep one scrap per fabric type as a quick reference and test a small design on each fabric with your chosen stabilizer before starting the full project. For delicate fabrics, consider wash-away stabilizers for the least residue; for dense designs, cut-away or heavy tear-away provides robust support. These practices align with current industry guidelines and studies on stabilizer effectiveness across fabric types.
Can I fix a nest without unhooping, and how do I safely remove thread tails?
Yes, you can often salvage a nest without unhooping, especially if the nest is small and accessible from the top. Start by stopping the machine and lifting the needle. Gently pull the top thread tail away from the fabric using clean tweezers, keeping the loop contained. If you can reach the nest from the top, snip the tail close to the surface and carefully unwind the tangled thread with your fingers or tweezers. If the nest is larger or lodged near the hoop edges, unhooping and removing the fabric may be quicker and safer for the piece.
To remove thread tails safely:
- Trim tails close to the stitching with sharp embroidery scissors.
- Gently lift and untangle the loose threads from the underlay using tweezers; avoid pulling threads from the needle plate.
- Inspect the bobbin area after any tail removal to ensure no loose threads remain that could pull under the needle in subsequent stitches.
- Re-hoop or re-tension only after confirming a clean path for stitching; test on a scrap sample first.
These steps are in line with common practice among embroidery professionals who emphasize careful handling and scrap testing to preserve project integrity while correcting nests on the fly.
How long does a typical nest salvage take and how can I measure improvement over time?
A small nest salvage on scrap fabric can take as little as 5–15 minutes, depending on nest size and fabric. Larger nests or nests near hoop edges may require 15–30 minutes, especially if re-hooping is needed. To measure improvement over time, track two metrics on scrap tests: total time to fix per nest and the number of nests encountered per 100 stitches. If your average salvage time drops and you encounter fewer nests across three consecutive scrap tests, you’re improving. Additionally, maintain a quick log of needle size, stabilizer, fabric, and tension settings that yielded the best results for each fabric type.
Professional practices emphasize repeated, small experiments: you’ll steadily reduce nest frequency as you refine needle size, stabilizer choice, and threading accuracy. With the market’s ongoing advances in embroidery hardware and software, including updates like EmbroideryStudio 2025 and related digitizing tools, a disciplined testing routine becomes even more valuable for consistent, nest-free embroidery outcomes.
Conclusion
Nest-free embroidery is achievable through a steady routine: correct threading, balanced tension, and secure hooping with stabilizers, plus regular machine cleaning and a disciplined salvage routine. By adopting a scrap-test protocol before every project, you catch issues early and avoid nests before they begin.
- Threading and tension must stay aligned for consistent stitches.
- Stabilizers and proper hooping protect fabric and prevent jams.
- Cleaning and quick checks keep the machine ready for action.
- Always test on scraps before committing to a final project.
Download the quick nest-prevention checklist, gather stabilizers and a bird’s nest kit, and run a 5-minute scrap test on your next project to start reducing nests today.
Stitch with confidence, nest-free embroidery is within reach.