What Causes Thread Breaks in Embroidery?
This post contains affiliate links. As an Amazon Associate, Latest Embroidery earns from qualifying
purchases, at no extra cost to you. Learn more.
Thread breaks ruin momentum, waste time, and compromise stitch quality, here’s how to stop them in their tracks. This quick guide identifies eight root causes: needle size/type mismatch; thread tension; needle deflection; hooping shifts; fabric puckering; stabilizer misfit; thread quality; and timing issues. You’ll see exact fixes you can implement today, plus a step-by-step setup and testing method to verify everything runs smoothly. Expect practical tool tips and cost considerations that actually move needlework forward, with market context from industry leaders: Fortune BI Embroidery Market, top embroidery machine manufacturers, and Stabilizer Guide. Keep reading to master the eight fixes and a practical setup you can run today.
If you’re choosing threads for reliability, consider this:
Shop embroidery thread on Amazon →
Eight common causes of thread breaks and fixes
Short on time? If you only take one thing from this guide: Machine oil & cleaning kit — most “faulty machine” problems are lint and a dry hook race.
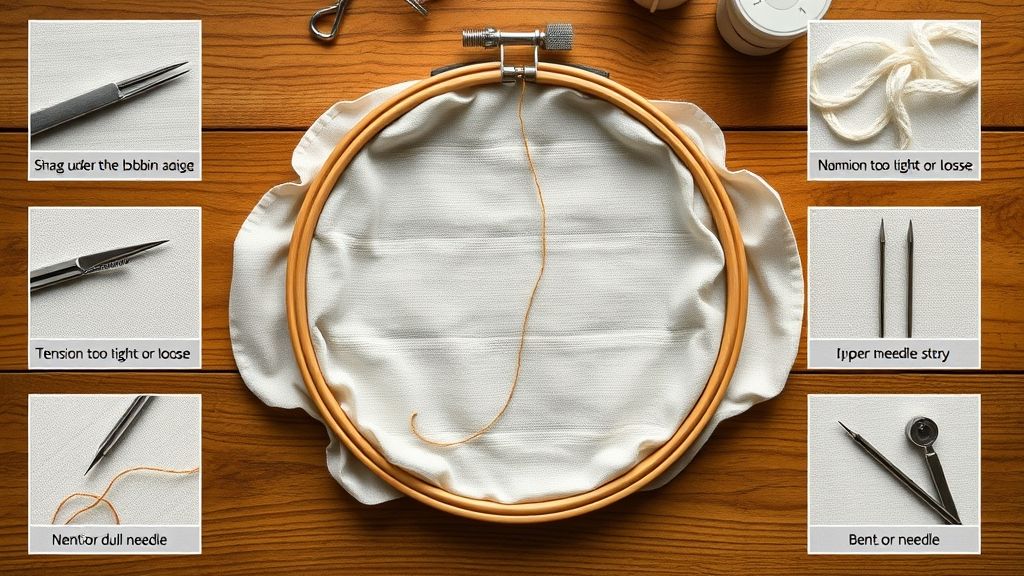
Thread breaks are a frustrating roadblock in embroidery flow, but most problems have simple, repeatable fixes you can apply right away. This section breaks down eight concrete causes, each with two-sentence summaries and immediate, real-world action steps you can implement on your next session.
The embroidery market is evolving with more demand for customization and faster, more reliable finishes. Industry insight suggests steady growth driven by consumer interest in personalizing apparel, home decor, and gifts, with threads, stabilizers, and machine workflows all playing key roles in achieving crisp results. With that in mind, choosing the right thread and setup matters as much as the design itself, especially when it comes to avoiding thread breaks and ensuring color consistency across projects.
Cause 1: Improper threading and tension
About 70% of embroidery machine issues stem from improper threading or tension, which shows up as skipped stitches, bird-nesting, or inconsistent top and bobbin stitches. A full re-thread and a controlled tension test on a scrap fabric are your first line of defense to confirm even stitches.
- Rethread both the top thread path and the bobbin completely, ensuring there are no snagged fibers or misrouted guides.
- Use a tension gauge to compare bobbin and top thread tensions and adjust until the bobbin cover stitch sits evenly.
- Clean the thread path and tension discs to remove any lint or old spool wax that can alter tension.
- Run a controlled test on scrap fabric, checking for balanced density and no looping or shredding.
- Confirm spool placement and guide orientation match the machine’s threading diagram.
- Document a quick thread-path checklist for future sessions to prevent habitual mis-threading.
Cause 2: Bobbin winding and feeding issues
An unevenly wound bobbin or incorrect bobbin tension disrupts feeding and stitch formation, leading to rare but impactful breaks. Rewinding with care and validating tension on scraps helps ensure consistent fabric feeding and stitch alignment.
- Re-wind bobbins evenly using a dedicated bobbin winder, avoiding loose or tight spots that cause uneven feed.
- Verify bobbin tension with a gauge and adjust to the manufacturer’s recommended range for your thread type.
- Double-check that the bobbin is seated correctly in the case and that the thread unwinds smoothly without catching.
- Inspect the bobbin case for burrs or lint that could grip the thread during rotation.
- Test on a dense fabric scrap to confirm consistent stitch formation before proceeding with an actual project.
Cause 3: Incorrect needle size or type for fabric/thread
Using the wrong needle can nick thread, abrade fibers, or cause skipped stitches that mimic breaks. Matching needle size and type to fabric weight and thread brand, then testing on scraps, prevents many issues before they escalate.
- Match needle size to fabric weight and thread brand, consulting manufacturer needle charts for guidance.
- Choose needle type appropriate for the fabric (sharp for woven, ballpoint for knits, embroidery needles for decorative threads).
- Test stitch on a scrap with the same fabric and thread combination to observe any snagging or missed stitches.
- Replace visibly dull or bent needles to avoid fabric damage and thread fraying.
- Keep a small reference notebook of the needle type used for each project to speed up setup next time.
Cause 4: Inadequate hooping and stabilizers
Shifting fabric inside the hoop is a frequent cause of needle-side thread breaks, especially with dense designs. Use proper stabilizers for fabric type, tighten and align the hoop, then test with a scrap before committing to the final embroidery.
- Choose a stabilizer that supports the fabric weight and embroidery design density and correctly hooped without sagging.
- Secure the fabric evenly in the hoop and verify alignment with the hoop’s marks before stitching.
- Check that the hoop is tightened to avoid rotation during stitching and adjust if the frame feels loose.
- Test on a scrap to confirm there’s no fabric shift or puckering under the needle line.
- Inspect the fabric edge for hoop burn or stabilizer migration that could snag threads mid-stitch.
Cause 5: Thread quality and brand differences
Thread cost and color range influence both performance and budget decisions in real-world work: Madeira costs about €0.145 per meter versus DMC at €0.119 per meter, with Madeira offering roughly 379–380 color shades but at a premium. Choose brand and shade based on fabric and density needs, then validate with tension tests on representative scraps.
- Weigh cost versus color availability for your project, more colors aren’t always necessary if you’re printing or applying simpler designs.
- Test thread brands on scraps that mirror your final fabric to observe how they feed, cut, and sew under your machine’s tension settings.
- Document which brands perform best on specific fabrics to streamline future material choices.
- Match thread thickness and core construction to your needle and fabric to minimize snagging and break risk.
- Run a focused tension test across a small color palette to ensure consistent response across shades and reels.
Cause 6: Infrequent needle changes
The practice of 8–10 hours between needle changes can lead to dull or bent needles, increasing the likelihood of thread breaks. Schedule regular needle changes based on machine usage and stitch counts to keep the needle sharp and alignment precise.
- Set a maintenance cadence that includes needle changes aligned with your typical daily stitch count.
- Log stitch counts to determine realistic replacement intervals rather than relying on time alone.
- Keep spare needles on hand and rotate them to avoid stitching with a compromised tool.
- Inspect the needle visually after every few hundred stitches for nicks or bends before continuing a design.
- Record which needle types and sizes you used for each project for quick reference in the future.
Cause 7: Lack of thread control accessories
Without thread nets, spool caps, and thread stands, feeding can be unstable and prone to snagging or looping during long runs. Incorporating these controls reduces tangles and helps maintain consistent tension across the hoop.
- Add thread nets or spool caps to stabilize spools and minimize thread slipping and wobble.
- Use thread stands for stable feeding, especially with larger reels or multiple colors in a design.
- Incorporate a lint brush into your routine to keep the thread paths clean and free of fibers that can snag.
- Position flux-guides and guides to ensure a smooth, straight path from spool to needle with minimal friction.
- Periodically reassess thread path during a long session to catch minor shifts early.
Cause 8: Design and machine settings
High-density designs and running at top speeds can escalate break risk, especially on delicate fabrics. Reduce stitch density on sensitive fabrics, test at slower speeds on scraps, and use a tension settling test such as a 14-stitch satin test to balance tensions, aim for about one third bobbin showing at the center and one third top thread showing on each side.
- Lower stitch density for delicate fabrics and gradually increase as the fabric handles the design.
- Test slower speeds on scraps before running the final piece to observe thread behavior and stitch regularity.
- Perform a satin or I-test to settle tensions and confirm both threads form even, aligned rows.
- Aim for a balanced center bobbin display and symmetrical top thread visibility on both sides of the fabric to gauge tension accuracy.
- Document design density settings and speed combinations that yield clean stitches for future projects.
Step-by-step: set up your machine to minimize thread breaks
Thread breaks are often the result of small misalignments and overlooked details in the setup, not just the thread itself. As the embroidery market continues to grow, valued at about USD 1.54 billion in 2024 with projections toward USD 2.6–2.8 billion in the coming years, the margin for error in workflow has shrunk. Modern machines and stabilizers have raised reliability, but the foundation remains a deliberate, repeatable setup that you can trust at every project.
This workflow focuses on actionable, replicable steps that reduce breaks by addressing feeding paths, re-threading, bobbin winding, needle selection, hooping, and tension testing. Each stage includes clear checks to perform before moving on, so you can build confidence from the first stitch to the final pass.
Step 1: Prepare the workspace and inspect all feeding paths
Clear a bright, clean workspace and inspect every feeding path from spool to needle, and from bobbin to stitches. A well-lit area helps you spot burrs, kinks, or misaligned guides that commonly cause thread snagging and breaks. This stage is about making the hardware behave as predictably as possible.
Checklist
- Remove lint and threads from the upper thread path, thread guides, and tension discs.
- Check the spool holder for wobble and ensure the spool feeds smoothly without looping or uncoiling.
- Inspect each thread guide for nicks, burrs, or sharp edges; replace any damaged guides.
- Confirm the bobbin case path is clear and there is no lint or stray thread in the bobbin area.
Tip: Many tension issues begin here. A clean feeding path minimizes friction that causes sudden thread breaks mid-stitching.
Step 2: Re-thread from start to finish on both top thread and bobbin
Remove all current threads and re-thread with deliberate, smooth movements. Re-threading from start to finish ensures the thread engages each guide and the tension disc correctly, reducing the chance of jumpy or inconsistent tension that leads to breaks.
Checklist
- Thread the top path slowly from the spool, through every guide, and into the needle bar.
- Install a fresh needle before re-threading; ensure the needle eye aligns with the thread path without forcing threads.
- Unwind the bobbin and re-wind it (see Step 3) before loading it into the bobbin case; thread the bobbin path smoothly.
Note: If you notice skip stitches or frequent breaks after re-threading, double-check the needle size against the fabric weight in Step 4 before proceeding.
Step 3: Wind and load an evenly wound bobbin
A bobbin with uneven wind or loose loops can cause inconsistent lower-thread feed, which often shows up as bobbin thread breaks or invisible tension issues. Wind a new bobbin evenly and seat it correctly in the bobbin case, ensuring no loose threads remain.
Checklist
- Remove old bobbin; wind a new bobbin evenly with no gaps or bulges.
- Check that the bobbin is wound under consistent tension, no loose threads on the outside.
- Load the bobbin correctly into the case, ensuring the thread feeds in the intended direction.
Observation: Even winding reduces the risk of unpredictable bobbin tension that can cause gear-like breaks during dense fills.
Step 4: Choose the correct needle type and size for fabric and thread
The needle and thread pairing is the quiet workhorse of a smooth stitch. Use a needle size appropriate for your fabric weight and thread brand; mismatches are a common cause of thread fraying and breaks. Modern needles come with coatings and point geometries designed for stability in common fabrics, which helps keep stitches even under load.
Checklist
- Select a needle type and size aligned with fabric weight (e.g., lighter fabrics: smaller needles; dense fabrics: larger needles).
- Inspect the needle for burrs or a bent shaft; replace if any damage is found.
- Test a sample stitch on a scrap fabric to confirm that the needle does not cut threads or cause skipped stitches.
Context: If you’re using specialty threads (glassy, metallic, or polytwist), verify you’re matched with a compatible needle and consider a finer needle for delicate fabrics to minimize risk of thread breakage.
Step 5: Hoop securely with appropriate stabilizer
Hooping is about preventing fabric movement and puckering under stitch density. Use a stabilizer appropriate for the fabric and design density; stabilize to prevent distortion. A properly hooped project reduces thread drag and prevents the needle from encountering fabric fibers mid-stitch, which frequently causes breaks.
Checklist
- Choose stabilizer weight that matches fabric density and design complexity; use tear-away for woven fabrics and cut-away for knits when needed.
- Hoop with the stabilizer and fabric as a single, flat layer; avoid tension that causes micro-stretches.
- Use a light spray adhesive to keep layers from shifting if your hooping method requires it; ensure even adhesion.
Note: Stabilizer choices have shifted with faster, higher-density designs; using the right weight reduces puckering and keeps thread tension stable throughout the run.
Step 6: Run a tension test on scraps using an I-test or 14-stitch satin test and adjust gradually
A tension test is the best way to quantify balance between top and bobbin threads before committing to a project. The I-test and the 14-stitch satin test reveal where tension needs tweaking, and adjustments should be made in small increments guided by the test results.
Checklist
- Place a scrap fabric under the hoop and run an I-test or a 14-stitch satin pattern to observe stitch balance.
- Record top and bobbin tension settings; adjust by small increments (e.g., +/− 0.5 or 1 unit) and re-run the test.
- Continue until stitches lay evenly with minimal bottom thread showing and no visible top thread on the underside.
- Document final settings and perform a final test on another scrap before beginning the final project.
Tip: Documenting settings lets you reproduce success across future projects and helps with troubleshooting when you switch fabrics or threads. In today’s market, where customization is driving growth, having a dependable tension profile on a scrap helps you scale from hobby to small business with confidence.
Tools and equipment that reduce thread breaks
In busy embroidery environments, reducing thread breaks and downtime starts with having the right toolkit on hand. Investing in purpose-driven tools can translate to faster setup, steadier feeding, and fewer stoppages during production runs. Market data shows the embroidery sector remains robust, with steady growth and a push toward efficiency-enhancing hardware and software. For example, industry research places the embroidery market in the USD billions range with a healthy compound annual growth rate, underscoring the value of upgrading tooling to stay competitive. Alongside hardware, software like TruE 3 helps you manage inventory and workflow, making it easier to keep thread stocks, stabilizers, and needles aligned with demand. These tools aren’t just luxuries; they’re productivity levers that protect against costly errors and downtime.
Below is a practical, procurement-oriented guide to the tools most proven to cut thread breaks and shorten downtime. Each subsection explains how the tool works, the measurable impact you can expect, and quick notes on buying and setup. The goal is a cohesive kit you can assemble or expand as your operation scales.
MaggieFrame magnetic hoops
MaggieFrame magnetic hoops are designed to speed hooping and improve consistency, with claims of up to a 90% reduction in hooping time and about a 15% drop in embroidery defects. In high-volume studios, the uptime gained from faster hooped setups compounds across the day, translating into tangible productivity gains. Per the manufacturer’s data, durability can be up to 40x longer than traditional plastic hoops, reducing replacement cycles and downtime tied to hoop wear. For shops juggling color changes and frequent rehooping, these hoops can be a game changer. Consider pairing MaggieFrame with a robust thread management plan to maximize efficiency gains.
Note: The MaggieFrame data is frequently cited in industry literature and by practitioners as a strong ROI driver for studios processing multiple garments per day. When used with a coordinated thread-management system, the time savings compound into meaningful throughput improvements.
Thread nets or spool caps
Thread nets and spool caps stabilize thread flow, guiding loose tails and reducing the tendency for threads to snag on spool rims or feeders. By keeping the thread feeding consistently off the spool, you minimize tension irregularities that can cause thread breaks mid-stitch. In practice, dedicating a few spare nets or caps to each thread family (especially metallics and specialty fibers) helps maintain steady color changes and reduces the risk of sudden tension spikes that end in a broken loop. Simple spindle accessories often yield outsized improvements in reliability.
Stabilizers chosen for fabric type
Stabilizers are the backbone of stitch integrity. Fabric type, stitch density, and design complexity determine
Cost, gear, and performance comparisons you can act on
Decisions about thread costs, hoop systems, and software don’t just affect the bottom line; they shape production speed, quality, and return on investment (ROI). In today’s market, thread pricing, color availability, and hoop tooling are converging with software-enabled workflow improvements to drive measurable gains. Market analyses project steady growth in embroidery materials and services, with thread spend forming a meaningful portion of total production cost as demand remains robust across customization and short-run runs. For practitioners, it’s worth weighing premium components against fabric types, project complexity, and throughput targets.
Recent market research indicates embroidery and thread segments are expanding, with multi-year CAGR estimates commonly landing in the 5–6% range, underscoring why investing in efficient tools can compound ROI as volumes rise and color demands diversify.
Price and color range: Madeira vs DMC
Price-per-meter and color availability are the two levers that most shops tune first. Madeira thread runs €0.145 per meter, versus DMC at €0.119 per meter, roughly a 22% premium. Madeira also offers an expansive color spectrum, with about 379–380 shade options that can simplify color matching on complex designs. In practice, the premium should be weighed against project needs, fabric choice, and the value of fewer substitutions or rework due to color gaps.
Choosing Madeira for premium projects can reduce substitutions on color-critical designs, while DMC remains attractive for cost-sensitive runs. The color depth and shade consistency of Madeira may justify the premium for branding or high-end apparel where exact hues matter.
Hoop systems: speed, defects, and durability
Hoop technology matters as much as thread choice: MaggieFrame magnetic hoops claim up to a 90% reduction in hooping time and about a 15% drop in defects due to steadier fabric hold. They also tout durability up to 40x that of traditional hoops, which translates into lower replacement costs and less downtime across busy production days.
When evaluating ROI, convert time saved in hooping and defect reductions into minutes per job and then multiply by monthly volumes. The result often beats out incremental thread savings alone, especially for multi-color designs or frequent fabric changes.
Software and workflow: TruE 3 ROI considerations
TruE 3 adds inventory management and workflow capabilities that can unlock efficiency gains beyond thread and hardware. For shops with steady SKU lists, the software can reduce stockouts, automate reorder points, and streamline job routing from design to production to delivery. The resulting reductions in downtime and material waste contribute to ROI that compounds with higher day-to-day throughput.
ROI from tension testing and reduced reworks is documented in practice: fewer interruptions and smoother color transitions translate into measurable time savings and lower labor variance, especially on high-mix, low-volume runs.
Overall, a price-and-feature comparison helps determine if the premium for premium thread, magnetic hoops, and workflow software yields meaningful project gains. Current market data supports cautious premium investments where color fidelity, speed, and defect reduction align with project goals and fabric choices.
What Causes Thread Breaks in Embroidery?
Thread breaks during embroidery are common but typically solvable with practical checks. It’s helpful to remember that 70% of issues stem from improper threading or tension, so the fastest fix is usually a full re-thread and a tension test before re-seat checks. The embroidery market is growing, with stronger demand for reliable hardware and stabilizers, which pushes workflows toward steadier, lower-defect production. Integrating magnetic hoops like MaggieFrame can reduce hooping time and defects when incorporated into your routine.
Beyond threading, using the right stabilizers for delicate fabrics and monitoring needle wear are essential. Lighter stabilizers paired with slower speeds can protect fabric integrity, and keeping needles fresh helps minimize breaks during heavy-use sessions.
Q: How do I know if I should re-thread or just re-seat the bobbin?
A: If you see skipped stitches, inconsistent tension, or sudden breaks, re-thread fully and verify the path. Start with a full re-thread and tension test, then re-seat the bobbin and ensure the bobbin case is clean and threaded correctly. A quick test on scrap fabric confirms balance.
- Check the top thread path from spool to needle for snags or misrouting.
- Re-thread completely, ensuring the thread seats correctly through all guides.
- Test tension on a small scrap before reloading a full design.
Q: How often should I change needles for heavy use?
A: Consider needle changes every 8–10 hours of operation or after any dulling signs. Dull or bent needles can cause skips and breaks, so inspect points for burrs and replace promptly.
Q: Do I need special stabilizers for delicate fabrics?
A: Yes, use lighter stabilizers and test on scraps to avoid fabric distortion. For delicate or stretchy fabrics, pair a lighter stabilizer with slower stitch speeds to maintain fabric integrity and stitch quality.
Conclusion: quick wins and next steps
Thread breaks in embroidery are a common hurdle, but they respond quickly to a disciplined, test-first approach. In real-world setups, documenting scrap-test results and iterating small changes delivers reliable gains in consistency and throughput. The embroidery market continues to grow, with 2024 estimates around $1.5B and a healthy CAGR that supports investing in resilient hardware and software to keep pace with demand.
Key tools matter: magnetic hoops, stabilizers, nets, and tension gauges can dramatically improve control and results. For teams seeking structured gains, MaggieFrame hoops offer even fabric pressure, while TruE 3 software can streamline inventory and workflow, with databases supporting thousands of thread palettes and rapid reflow of colors through your line.
1. Improper threading path
Fix: re-thread completely and verify the thread path from spool to needle.
- Re-thread from start to finish
- Test tension with a quick sample stitch
2. Bobbin tension or wind issues
Fix: wind bobbins evenly and confirm bobbin tension matches top thread requirements.
- Wind consistently to reduce slack
- Run a scrap test to confirm stability
3. Needle type/size mismatch
Fix: choose needles matched to fabric weight and thread type.
- Select appropriate needle size
- Replace dull or bent needles promptly
4. Thread quality and lint
Fix: use quality threads and remove lint from the path to prevent breaks.
- Audit thread cones for consistency
- Clean guides and tension areas regularly
5. Stabilization and hooping integrity
Fix: hoop securely with appropriate stabilizers; consider nets or cut-away stabilizers for tricky fabrics.
- Use MaggieFrame magnetic hoops for even pressure
- Choose stabilizers aligned to fabric and design density
6. Tension control across color changes
Fix: use thread control tools and verify uniform tension through color changes.
- Check top and bobbin tensions during transitions
- Calibrate with a test run on scrap fabric
7. Stitch density and speed settings
Fix: test density and speed with standardized tests (I-test and 14-stitch satin tests) and adjust accordingly.
- Run density tests on scrap fabric
- Document results to guide future runs
8. Fabric movement and hoop distortion
Fix: stabilize fabric with appropriate nets and stabilizers; optimize hooping pressure.
- Start with MaggieFrame hoops for consistent grip
- Document improvements with scrap tests
Next steps: begin scrap-test logging, apply the eight fixes, and evaluate gains. Consider piloting TruE 3 to improve inventory visibility, reduce waste, and accelerate reorders, empowering a smoother, data-driven workflow.
- re-thread completely and test tension
- wind bobbins evenly
- match needles to fabric
- hoop securely with stabilizers
- choose quality threads with cost considerations
- replace needles regularly
- add thread control tools
- test density and speed with I-test and 14-stitch satin tests
Conclusion
Thread breaks drop dramatically when you first fix threading and tension, then layer in the right tools and test protocols. Start with scrap tests to pin down exact settings and build a small, repeatable baseline you can reuse on every project.
Proceed with confidence: pick one or two high-impact changes this week, re-thread completely with a test pattern, and try MaggieFrame magnets for your next project. Track results on a simple log (time saved, defects reduced, thread usage) to quantify your ROI over a month. You’ve got this.