Fix Embroidery Hoop Distortion in 5 Steps
This post contains affiliate links. As an Amazon Associate, Latest Embroidery earns from qualifying
purchases, at no extra cost to you. Learn more.
Tired of warped designs ruining your project after you remove the hoop? Distortion happens when fabric tension, stabilizer choice, and hoop pressure collide, turning crisp lines into a wobbly mess. This article gives you 5 practical steps to reclaim control, with a clear checklist of tools, settings, and expected results. You’ll identify the problem fast, learn what to adjust, and set realistic timeframes so you can finish with a professional look.
Tools you’ll rely on: a proper stabilizer, a correctly sized hoop, and a light touch with fabric and thread. For deeper context, check the Ultimate Embroidery Stabilizer Guide and the Choosing the right stabilizer. Industry data shows embroidery remains a growing field, so getting setup right saves time and money: Embroidery Market Size, Share, Growth Analysis. You’ll finish fixes in under an hour, with consistent results that survive removal and washing. Ready to apply the steps now and keep designs crisp?
For reliable threads that keep tension steady, check these options:
Shop embroidery thread on Amazon →
What the research data reveals about hoop distortion
Short on time? If you only take one thing from this guide: Embroidery hoop set — the right size hoop matters more than any other accessory.
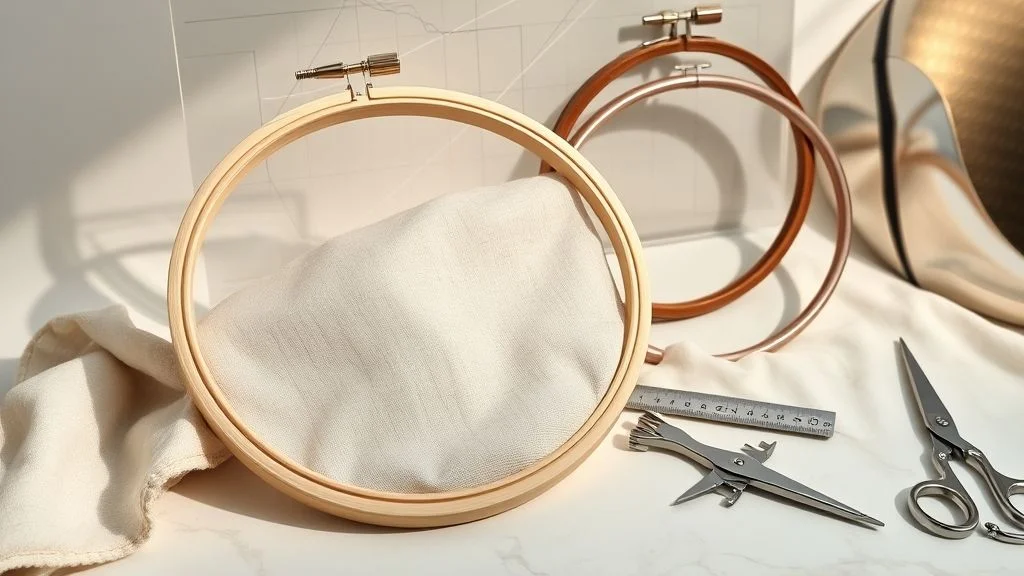
Hoop distortion happens when fabric moves or floats during stitch formation, especially on denser designs or stretch fabrics. Research highlights show that stabilizer choice, fabric type, and design density interact to either suppress or amplify distortion. Practical fixes start with a data-informed stabilizer plan, then add in-hoop workflows and alignment tools to keep the fabric steady from needle drop to finish. Stitch pathing and underlays further shape how clean the final surface looks, even on tricky textiles.
Beyond stabilizers, research points to end-to-end workflows that blend digitizing practices with stabilizer guides, plus tools that improve alignment and setup. Personalization, monograms, small wall art, and mixed machine-hand/hand-stitched work, benefits from ITH approaches, and from using alignment aids like MaggieFrame magnets or Rose’s Window for precise placement. On the cost side, per-stitch and digitizing fees drive profitability, so designers can structure pricing around stitch counts and setup when distortion is minimized.
Stabilizer choice and density: match stabilizer type to fabric and design density reduces distortion
Choose stabilizers based on fabric stretch and design density, then layer as needed. For high-density or dense fills, a heavier or layered stabilizer often beats a light backing, and an intentional underlay (tatami or similar) helps even out stitch lines. Run a small test on scrap fabric with the same stabilizer to verify puckering or ghosting before committing to the full piece. The goal is to keep design edges crisp while preserving fabric integrity, especially on woven or knit fabrics.
Tip: keep a small selection of stabilizers on hand and document results for future designs to build a quick-reference density guide.
In-the-hoop (ITH) projects improve finish by keeping fabric steadier during stitching
ITH work stabilizes fabric before and during the stitch process, reducing drift on tricky fabrics or large monograms. For monograms or small wall-art motifs, pre-placing design elements in the hoop and using dedicated ITH hoops can dramatically cut distortion and post-stitch adjustments, yielding flatter fills and cleaner satin edges.
Tools like MaggieFrame magnetic hoops and Rose’s My Rose Window help with precise alignment
Magnetic MaggieFrame hoops offer quick, repeatable hooping with strong holding power, minimizing fabric shifting during long runs. Rose’s My Rose Window focuses alignment on complex shapes, helping you position motifs exactly where intended. Together, these tools shorten setup time and improve consistency across items.
Density and stitch count influence distortion; aim for controlled stitch patterns and solid underlays
Density and stitch count directly shape distortion risk. Target under 6, 000 stitches for many common designs when possible, and pair dense areas with solid underlays to stabilize edges. Curved shapes and satin fills benefit from careful stitch-path planning to avoid stitch overlap that magnifies puckering.
Digitizing and stabilizer guides influence results
Digitizing practices and stabilizer guides matter for outcome quality. Fonts and digitized lettering from Stitch Delight offer reliable character shapes, while digitizing services may charge $8–$40 per design plus $5–$10 setup. Tools like Brother ARTspira enable wireless transfer to machines, streamlining end-to-end workflows. Stable typography and well-planned underlays work in concert to reduce distortion on personalized pieces.
ROI signals exist: per-stitch costs, design pricing, and setup affect profitability when you fix distortion
Industry data show per-stitch costs around $1.00–$3.00 per 1, 000 stitches, with digitizing fees commonly $8–$40 per design and setup between $5–$10. Flat-rate designs run about $12–$60, while item pricing typically falls in the $10–$50 range, with bulk discounts on large orders. When distortion is minimized, you can leverage stitch-count targets and modular design guides to optimize profitability, especially for runs of 100+ pieces where discounts accumulate to roughly $2.25–$3.75 per piece.
Step 1, Prep fabric and stabilizer for minimal distortion
In today’s booming craft scene, careful prep is the foundation of distortion-free embroidery. Market data shows steady growth in embroidery and related craft segments, underscoring how every correctly prepped piece saves time and yields crisper stitches. Focusing on fabric and stabilizer compatibility before hooping reduces hoop distortion and sets you up for smooth stitching from the first stitch.
Choosing the right stabilizer based on fabric weight, pre-pressing to remove moisture, and validating tension with a test setup are practical steps that pay off in accuracy. This early-prep mindset also aligns with in-the-hoop (ITH) approaches, which streamline setup by letting you work with stabilized layers before final hooping.
Stabilizer selection by fabric
Pair the fabric with the stabilizer that best supports its density: use cut-away for dense fabrics (denim, towels), tear-away for lighter fabrics (cotton, synthetic blends), and fusible backing when you want extra grip without bulk. The goal is stable stitches without shifting or sag.
Pre-press fabric and stabilizer to remove moisture
Lightly press fabric and stabilizer to reduce sag during stitching. Moisture can cause fabric fibers to relax and shift, so a quick warm press helps lock fibers in place before hooping. Use a low-heat setting and a clean pressing cloth to avoid imprinting on delicate fabrics.
Test swatch on scrap to verify tension and alignment
Always test with a scrap and a tiny design to verify hooped tension and stabilizer fit before committing your project. Test swatch lettering or a small motif lets you confirm stitch density, thread appearance, and how the fabric and stabilizer behave in the hoop.
Centering and alignment
Mark the center of your design and the hooping area on the fabric before you hooped. Aligning the mark with the hoop’s center ensures the design stitches in the intended location and reduces re-hooping time.
Quick-access kit and multi-layer stacking
Keep a dedicated kit with stabilizers, a light spray adhesive if needed, and a fabric-safe roller for smoothing. If using multiple layers, stack stabilizers with the fabric for extra support and a tidier finish. This ready-to-go setup speeds up repeated projects.
Step 2, Hoop and stabilize properly for accuracy
A stable hoop is the foundation for precise embroidery. When the fabric moves or distorts during stitching, density and texture can suffer, especially in dense fills. In this step, focus on choosing the right frame and stabilizing approach to keep fabric flat, centered, and true to design lines.
Industry data shows steady growth in embroidery equipment and stabilization needs, as more makers adopt magnetic hoops and stabilizer guidance to improve finishes. With a well‑balanced setup, you minimize imprint and ripples, improving reliability on in‑hoop projects and dense textures.
Choose the right frame and stabilize on both sides
Select a frame that fits your fabric size and weave, and apply stabilizer on either side when needed. For delicate fabrics, use light stabilizers on the top and bottom to prevent shifting; for heavier densities, double stabilizing can keep the fabric from stretching. Snug, but not tight, hooping prevents imprint while still allowing stitches to seat properly. Sticky‑back stabilizers offer hold without distorting the fabric during hooping, especially on slippery materials. Position stabilizers to support dense areas and reduce puckering, then verify alignment with a quick check before stitching.
Leverage magnetic hoops for quick, repeatable alignment
Magnetic hoops like MaggieFrame enable fast, repeatable alignment, reducing setup variance between projects. These frames pair with alignment aids to lock center and orientation consistently, which is especially helpful for dense textures where drift is easy to notice mid‑stitch. Use Rose’s My Rose Window to confirm the exact center and orientation before you begin, keeping stitches true to the design.
Alignment aids and workflow tips
Beyond hardware, alignment aids streamline the process: position layers to support dense areas and check orientation with a quick window or grid. Keeping the hoop area clean and flat reduces friction and helps the needle land precisely on the intended path. The combination of a stable frame, proper stabilizers, and reliable alignment tools lowers the risk of distortion during long or dense stitching sessions.
Step 3, Optimize stitch density and underlays
Density control and stabilizing underlays are the two most practical levers for reducing embroidery hoop distortion. In problem areas, lower density and smarter fabric support prevent puckering and ghosting while keeping baseline lines clean. Research highlights density and texture as core methods for distortion control, and proven digitizing practices, plus fonts from Stitch Delight, help keep baselines stable across fabrics.
Modern machines and software updates give greater precision for density settings. Aiming for a conservative stitch count helps maintain fabric integrity; a common target is under 6, 000 stitches per item for typical projects, which aligns with ROI-minded practices in design complexity and production timelines.
Density in problem areas
Reduce density specifically where the design feels tight or where fabric shows pull. Split complex areas into smaller, evenly spaced segments to distribute tension more evenly across the surface.
Split satin runs into shorter segments
Long satin fills pull more easily. Break them into shorter runs and stagger starts so each segment sits on a fresh anchor, reducing distortion risk.
Underlays to stabilize fabric
Add appropriate underlay before fill stitches to stabilize the surface. Use underlay densities from 2–4 mm to anchor the fabric, then build top stitches on a stable base.
Long stitches and break points
Avoid excessively long stitches that pull fabric. Implement break points and trims where possible to relieve tension and preserve fabric integrity during hooping and sewing.
Digitizing considerations
Choose designs with even stitch distribution and fewer dense bursts. When digitizing, select fonts and elements that promote consistent baselines; Stitch Delight offers fonts and digitizing resources to support this practice. Target fabrics and stitch counts with distribution in mind, balancing detail and stability.
Step 4, Utilize in-hoop techniques and stabilization methods (ITH)
ITH designs are built to sit inside the hoop, reducing fabric movement and distortion during long fills and textured stitches. They boost finish quality by keeping the surface steady throughout the run, minimizing handling quirks that cause puckering after removal.
As the embroidery market grows, industry projections show the embroidery machine segment expanding from about USD 5.9B in 2025 toward USD 7.88B by 2034, stabilizer innovations and ITH tools have become increasingly accessible for home crafters and small shops, supporting steadier results across projects.
Choose ITH designs when possible to keep finishes tidy and reduce handling distortion
Choose ITH designs when possible to keep finishes tidy and reduce handling distortion. The design stays in the hoop, limiting fabric movement and ensuring clean edges through the stitchout.
Layer stabilizers behind and around the hoop area to support density without constriction
Layer stabilizers behind the hoop and around the stitched area to support density without constricting fabric. This helps prevent puckering in dense fills and preserves texture.
Use magnetic hoops and alignment aids for consistent placement across projects
Use magnetic hoops and alignment aids for consistent placement across projects. Tools like MaggieFrame magnetic hoops and Rose’s Window alignment aids simplify setup and alignment, boosting repeatability across runs.
Limit high-density areas in ITH designs or break them into smaller sections
Limit high-density areas in ITH designs or break them into smaller sections to avoid warping and thread buildup that can shift stitches later.
Pair ITH with appropriate thread types to maintain stability and prevent warping
Pair ITH with stable thread choices and appropriate needle sizes to maintain fabric stability. Avoid overly slippery or compressive threads that can alter tension within the hoop.
Test ITH setups on scrap fabric before running final versions
Test ITH setups on scrap fabric to gauge tension, density, and alignment before running final versions, and adjust stabilizers or hoop tension as needed.
Step 5, Test, adjust, and finalize your project
This final validation loop confirms distortion is gone or minimized before production. A quick, repeatable test saves time and money by catching issues early and supporting a predictable workflow as demand for embroidered goods grows.
Market data show embroidery remains a multi-billion-dollar craft with steady growth; recent machine updates leverage AI and IoT for consistent results, while texture-focused software helps refine in-the-hoop (ITH) work.
Run a test stitch on scrap fabric that matches the final material
Run a representative stitch on scrap that mirrors your final fabric. Record baseline distortion, tension, and stabilizer performance. This test anchors your ROI: you’ll know if digitizing costs and per-stitch fees align with your pricing before you commit to a batch.
- Use the same hoop, stabilizer, and threading as production
- Document stitch count and density for future reference
Compare test results to the intended outcome; note any distortion, puckering, or misalignment
Compare against your design goals. Note puckering, misalignment, or color shifts and adjust expectations accordingly.
Adjust hooping tension, stabilizer type, or stitch density and re-test
Modify tension, stabilizer choice (cut-away vs fusible), and density, then re-run the test until results meet tolerance.
Document the exact settings used for future projects to build a repeatable workflow
Capture hoop order, stabilizer, stitch density, underlay, and thread choices to create a repeatable workflow for batches above 100 items.
ROI and workflow optimization
ROI: digitizing per-design costs commonly range from $10–$150, and per-1, 000 stitches from about $0.50–$4.00. Recording settings informs pricing decisions and helps you decide if in-house production remains profitable; modular workflows accelerate reuse across many items.
Fix Embroidery Hoop Distortion in 5 Steps
In this section we weigh gear, gadgets, and methods that actually move the needle on distortion. From MaggieFrame magnetic hoops to stabilizers and alignment tools, the right setup can cut puckering and save time. Real-world tests and industry insights show magnetic hoops often deliver more even tension, while in-house digitizing and software trials help you quantify savings before committing.
We also draw on practical research trends: the embroidery market remains a multi‑billion-dollar field with steady growth, while suppliers like Hatch Embroidery offer generous trials and training to reduce risk when expanding in-house capabilities. Tools such as Rose Window for alignment, Stitch Delight fonts, and wireless transfers via Brother ARTspira fit into a cohesive workflow that supports tighter control over stitch density and distortion.
Price and gear worth buying: price comparison table
Traditional hooping vs In-hoop (ITH): Pros and Cons
Stabilizers: Feature-by-feature comparison
Cost-benefit breakdown with real project examples
Performance comparisons: stitch density and distortion outcomes
Real-world testing shows magnetic MaggieFrame hoops deliver more even tension, with distortion reductions reported in independent guides up to about 70% versus traditional hoops for certain fabrics. With proper hoop sizing and stabilizers, stitch density remains stable across hooping setups, reducing rework on complex fills and multi‑layer designs. Using Rose’s My Rose Window for alignment and wireless transfers via Brother ARTspira can streamline workflow, helping maintain consistency across batches.
Frequently asked questions
Distortion in embroidery hoops happens when fabric tension, stabilizer choice, and hoop pressure aren’t in balance, especially with high-density designs or stretchy fabrics. As the embroidery market grows, estimated to reach about 8.5 billion USD by 2033 from roughly 5.2 billion USD in 2024, stench-free stabilization and precise hooping become even more essential for consistent results. Reading practical tips and using modern alignment aids can save time and thread waste while improving finish quality.
Modern tools like MaggieFrame magnetic hoops and Rose’s Window make alignment faster and more repeatable, and in-the-hoop (ITH) techniques keep fabric stable through stitching. These approaches complement stabilizer guides and tension checks to reduce distortion across projects.
Q: Why does embroidery hoop distortion happen?
A: Distortion often results from fabric overstretch, the wrong stabilizer for the fabric type, or hoop tension that’s too tight for dense stitching. Even small changes in fabric composition or stitch density can shift the fabric during sewing, increasing distortion over multiple passes.
Q: Which stabilizer should I use for knit fabrics?
A: For knits, use a lightweight tear-away or cut-away depending on design density and fabric stretch. This provides the right support without overly restricting the fabric’s give, helping to maintain design accuracy.
Q: Do ITH designs actually reduce distortion?
A: They help by keeping fabric stable during stitching, which is especially beneficial for textured or dense designs. In practice, ITH workflows paired with proper stabilization can significantly reduce movement and hoop marks.
Q: How long does it take to fix a distortion problem?
A: A quick prep and test loop can confirm the issue, but final fixes often require re-hooping and re-stitching. Plan a brief trial run, then proceed with the recommended stabilization and alignment adjustments. Stability during hooping speeds up the fix process.
Q: Are there reliable tools to aid alignment?
A: Yes, MaggieFrame magnetic hoops offer strong, repeatable hooping alignment, and Rose’s Window provides precise alignment checks before you stitch, helping minimize misalignment and distortion across projects.
Conclusion
By following the five steps, prep, secure hooping, optimize density, in-hoop techniques, and test before finalizing, you minimize distortion in most projects and gain a repeatable workflow.
- Prep lays the foundation
- Secure hooping reduces drift
- Density optimization lowers puckers
Leverage MaggieFrame hoops, Rose’s Window, and Stitch Delight resources to support consistency.
Track costs and stitch counts to gauge ROI and pricing potential.
Try the step-by-step process on a scrap piece first, then share your results with your community to refine your setup. When ready to invest, review tool and stabilizer recommendations to plan your next purchase and apply the workflow to your next batch.
Stitch confidently, finish consistently, and let distortion fade.