How to Align Multi-Hoop Embroidery Efficiently
This post contains affiliate links. As an Amazon Associate, Latest Embroidery earns from qualifying
purchases, at no extra cost to you. Learn more.
Tired of misaligned multi-hoop designs wasting fabric, time, and materials? You’re not alone. Common problems include marker drift, hoop slippage, and uneven stitches across hoops. This guide promises actionable steps, a practical 3-hour workflow, and concrete tool recommendations to cut hooping time and stabilizer waste. You’ll learn how different machines handle multi-hoop layouts and what to adjust for reliable centers, with checklists and tips to keep fabric flat and designs centered.
Along the way, see what experts say and what software can do for you: Multi-Hooping tips from Bernina, Embrilliance Essentials for automatic splitting and alignment, and alignment techniques for split designs.
Industry context matters: the embroidery market is growing, with insights from Embroidery Market Size and Trends. If you’re evaluating gear decisions, you’ll know what setup works best and how to apply a 3-hour workflow to your projects: keep reading to master alignment steps.
For hardware upgrades that handle multi-hoop layouts, check options:
Shop embroidery machines on Amazon →
Stay with us to apply a proven 3-hour workflow and cut waste.
How to Align Multi-Hoop Embroidery Efficiently
Short on time? If you only take one thing from this guide: Embroidery hoop set — the right size hoop matters more than any other accessory.
In multi-hoop embroidery, achieving reliable alignment from the first stitch to the last requires a deliberate prep routine that minimizes distortion and movement. The market for embroidery goods and equipment continues to grow, with industry insights highlighting steady expansion in both home and professional segments. Reports repeatedly cite healthy demand for customized textiles and rapid-turn projects, signaling that precise alignment workflows save time and reduce waste across varied runs. Innovations in hardware, such as multi-position hoops and stronger magnetized frames, emphasize repeatable positioning and repeatable results, making a rigorous setup more valuable than ever. By following a concrete, repeatable routine, you can translate these market gains into consistent, quality outcomes across projects.
Use this step-by-step guide to prep fabric, stabilizers, and templates for dependable multi-hoop alignment. The workflow centers on pre-washed fabric, grain alignment, tear-away stabilizers, and grid templates, all paired with a carefully chosen layout system and hoop setup. Recent equipment updates support this approach: for example, multi-position hoops like MaggieFrame offer broad hoop-size compatibility and strong hold when magnets and connections are clean, which helps keep the fabric steady during the first stitch and beyond.
1. Pre-wash fabric and align to the grain
The foundation of reliable alignment starts before fabric ever touches the hoop. Begin with a pre-wash to minimize shrinkage and puckering, then iron the fabric to set a crisp crease that reveals the true grain. The grain should run parallel to the warp and weft edges, helping embroidery stitches land where intended rather than skew as the fabric relaxes. After washing, dry the fabric flat and press with a hot steam setting to remove wrinkles that could throw off the alignment during hooping.
Practical steps you can follow:
- Pre-wash all fabrics used in multi-hoop projects to reduce unpredictable shrinkage.
- Dry flat or tumble-dry with low heat, then press with a high-heat iron to set the grain lines cleanly.
- Lay the fabric on a flat, distraction-free surface and visually verify that the warp and weft lines run straight along the edges.
Grain integrity is your first line of defense against distortion during hooping, so invest a few extra minutes here for big payoff later in the process.
2. Stabilizer selection and stick-on gridded templates
Stabilizer choice and grid templates are the core of accurate placement in multi-hoop projects. Use tear-away stabilizers paired with sticky-back options to secure fabric temporarily while you set the grid and center marks. For consistent layout, follow the guidance that recommends 4.5 inch finished swatches and 5.5 inch pre-cuts, these sizes harmonize with common hoop configurations and grid templates, enabling predictable spacing across passes. Align tear-away stabilizers with the fabric and template, ensuring the sticky backing adheres firmly without gumming the magnetics or edges of the hoop.
Key actions to implement:
- Choose a tear-away stabilizer that suits the fabric weight and embroidery density, applying it to the wrong side of the fabric as needed.
- Pair stabilizer with a gridded template to guide placement and keep stitches aligned with the grid origin.
- Prepare 4.5 inch finished swatches and 5.5 inch pre-cuts for layout consistency in multi-hoop projects.
Industry professionals emphasize that grid templates simplify repeatable positioning across hoops and passes, reducing the likelihood of drift when switching from one position to another. This approach aligns with current hardware updates, where stable, grid-guided systems are becoming standard in professional workflows.
3. Cut stabilizer to fit the hoop with clean edges
Cleanly cut stabilizer to match the inner hoop dimensions, leaving no excess material that could shift or rub in the hoop area. Sharp edges prevent snagging and misalignment as you reposition the fabric between passes. If the stabilizer extends beyond the hoop boundary, trim it away to a precise fit after positioning the fabric. A precise cut also helps magnets and hoop hardware contact points stay clean and effective for a strong hold.
Actionable steps:
- Trace the hoop inner boundary onto the stabilizer and cut with sharp scissors or a rotary cutter for crisp edges.
- Inspect edges for any stray fibers or fraying; trim smooth for a neat edge that sits flush with the hoop.
- Place the cut stabilizer onto the fabric and verify there is no excess material protruding into the stitching area.
Keeping edges clean and edges aligned reduces the chance of shifting as the machine advances to the next motif or hoop position, a critical factor in multi-hoop consistency.
4. Place grid templates inside the hoop area and align center marks
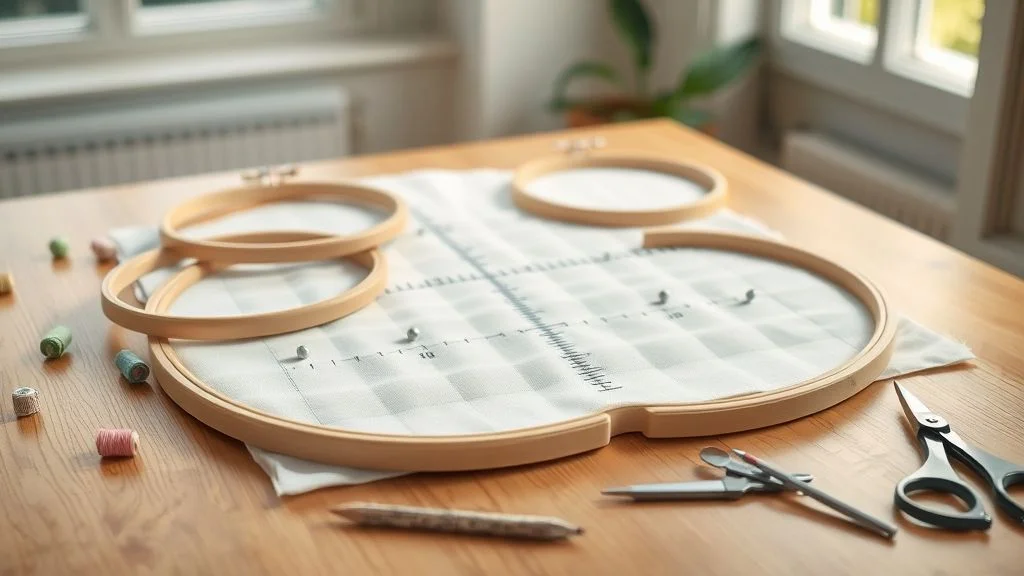
Grid templates are your internal alignment engine. Position them inside the hoop so the template origin coincides with the fabric’s center, then align the center marks on the fabric with the template origin. This practice creates a repeatable reference point for each hoop position, ensuring that designs align across passes rather than drifting over time. The templates also help you verify that the layout remains square to the hoop, which is especially important when stacking color blocks or motifs across multiple hoops.
Practical steps:
- Slide the grid templates beneath the fabric in the hoop area, ensuring gridlines are fully visible and centered.
- Align the center marks on the fabric with the template origin; adjust until the marks meet precisely at the origin point.
- Check that the fabric remains taut and flat as you secure the template and stabilizer, preventing any slack that could cause misalignment later.
5. Attach tear-away stabilizer securely and prepare the hoop
With the grid aligned, attach the tear-away stabilizer firmly to the fabric using its stick-on backing or an adhesive spray designed for embroidery. The goal is a stable, wrinkle-free surface that won’t shift during the first stitch or subsequent passes. Next, prepare the MaggieFrame or other multi-position hoop by selecting the appropriate hoop size and ensuring all magnets or connections are clean and free of debris. A clean magnetic surface provides a stronger hold, reducing the chance of movement as you proceed through the multi-hoop sequence.
Take these steps for a solid setup:
- Secure the tear-away stabilizer along the fabric edges, ensuring it lays flat with no bubbles or wrinkles.
- Inspect magnets/connections on the hoop; wipe away dust or lint that could reduce grip.
- Place the fabric-stabilizer combo into the hoop, gently tightening or securing as your system requires to avoid shifting during stitching.
Experts note that aligned grids and firmly attached stabilizers create a reliable baseline for multi-pass designs, minimizing re-hooping and waste while maintaining stitch quality across the layout.
Step-by-step: splitting large designs with the Hatch Multi-Hooping Toolbox
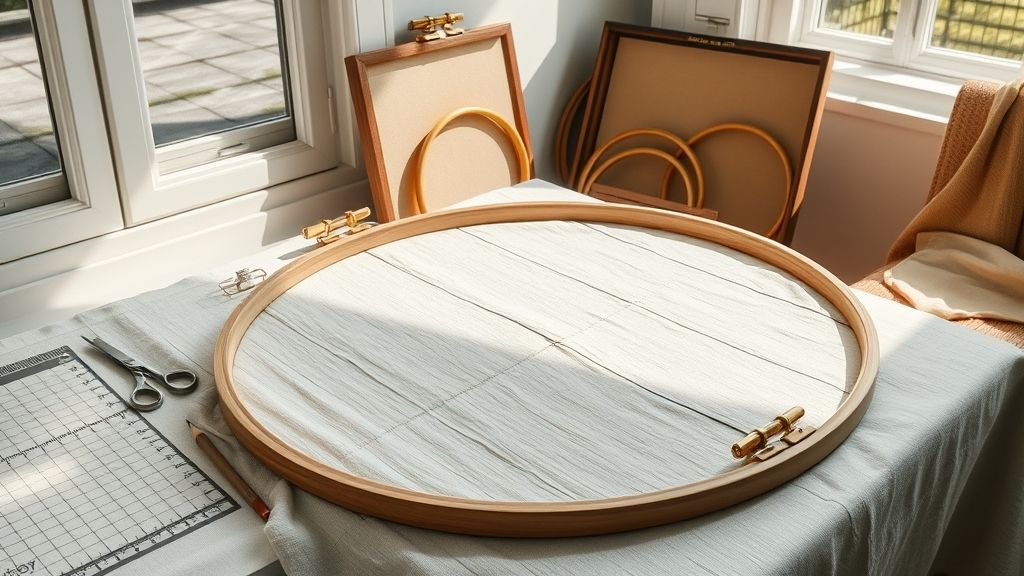
The Hatch ecosystem has evolved to make large embroidery designs practical across multiple hoops. Market analyses show steady growth in the embroidery space, with software tools driving efficiency and output quality as demand for customized textiles rises. In 2024, industry reports placed the embroidery market well into the billions of dollars, with embroidery software forming a key segment expected to continue expanding into the coming years. This context underpins why a robust multi-hooping workflow, like the Hatch Multi-Hooping Toolbox, is essential for reliable segmentation, registration, and production throughput. The method described here is designed to be implemented with Hatch Embroidery Composer or Digitizer, leveraging their integrated workflows to minimize gaps and ensure precise alignment across hoops.
In practice, the approach reduces the risk of misregistration by formalizing a sequence that stitches a large field in linked, overlapping zones. By combining anchor points, controlled overlaps, and connector sections, designers can extend from a small, economical hoop (5×7) to larger fields (up to 9.5×14) without sacrificing seam continuity. Recent industry developments emphasize software-assisted multi-hooping as a core capability for shops of all sizes, enabling repeatable results and faster setup times, which is especially valuable for complex or high-volume runs. The workflow below provides a hands-on, stepwise path that you can adapt to your design and preferred Hatch configuration.
Open the design in Hatch Embroidery Composer or Digitizer
Begin by loading the design into your Hatch environment (Composer or Digitizer). Verify that all color layers, outlines, and fill elements are intact and that the artwork is suitable for stitching on multiple hoops. Save a backup copy before you start segmentation, and confirm that the design’s bounding box fits within your target hoop progression. This initial check helps avoid surprises once you begin the multi-hooping process, and it sets the stage for clean registration across zones. If you’re working from a high-resolution vector or raster source, you can rasterize or convert elements to stitch types that optimize coverage in subsequent steps.
Select the Multi-Hooping Toolbox and choose the target hoop sizes (5×7, 9.5×14, etc.)
Access the Multi-Hooping Toolbox from the Hatch toolbar and select the target hoop sizes that match your production plan. Typical progressions run from a compact 5×7 field up to larger 9.5×14 or similar configurations; you can often tailor the sequence to the exact hoops you own. The toolbox will map the design space across the chosen hoops, preparing the framework for anchor points and overlap zones. If you anticipate future runs on different hoop sizes, consider saving multiple templates within Hatch so you can switch quickly between production setups without reconfiguring from scratch.
Define anchor points and set 2 3 overlapping stitching zones
Place anchor points around the design’s perimeter to establish registration references that will hold across all hoops. Then configure 2 3 overlapping stitching zones to ensure seamless alignment where zones meet. The overlaps provide redundancy so that minor fabric shifts or hoop positioning errors don’t create gaps, while still preserving clean transitions between adjacent stitched areas. Think of the overlapping zones as stitching “bridges” that keep the field contiguous while allowing each hoop’s unique stitch path to execute independently. When you position anchors, aim for evenly distributed points that mirror the design geometry (corners, mid-sides, and any salient internal features).
Create 3 4 connection parts to join successive stitched zones
Next, design 3 4 connection parts that link each stitched zone in sequence. These connector segments act as the seams between zones, guiding the embroidery machine from one hoop’s field to the next with precise transitions. You’ll want these connectors to be clear enough to register accurately on the fabric, yet not so dominant that they appear as obvious seams in the final piece. Use stitch types and densities that align with your design’s fills and outlines, ensuring that connector paths are smooth and do not create puckering at hoop boundaries. This step is the core of ensuring a continuous field when stitching across multiple hoops, and it directly influences the final alignment accuracy during production.
Generate the stitched sequence and export per-hoop files
With the anchors, overlaps, and connectors in place, instruct Hatch to generate the stitched sequence across the defined zones. Review the tool’s pathing to confirm that each hoop’s segment begins and ends cleanly at the designated borders. Export per-hoop files in the standard DST/VP3/EXP formats your shop uses, naming them consistently (for example, Hoop1, Hoop2, Hoop3) to simplify loading into the embroidery machines. This step yields production-ready files that preserve the designed overlaps and connector logic, ready for testing and validation.
Run a test on scrap fabric to verify alignment before final production
Always validate the setup on scrap fabric before committing to a live run. Load the per-hoop files onto a test setup and stitch a short length across the hoop chain to observe registration and seam integrity. Check for feathering in the overlaps, gaps at seam lines, and any distortion at anchor points. If misalignment is detected, adjust anchor placement, overlap width, or connector geometry in Hatch and re-export. This testing loop minimizes waste and reduces the risk of costly errors in production, a practice increasingly emphasized by embroidery professionals seeking reliable multi-hooping results.
Why this workflow matters in today’s embroidery landscape
The integration of multi-hooping workflows aligns with broader industry trends that highlight the importance of software-driven efficiency, scalable automation, and high-precision registration. Market analyses indicate steady growth in embroidery demand, with software and equipment innovations expanding the practical capabilities of studios and shops. Embroidery software markets are projected to broaden into the billions, with users prioritizing tools that deliver repeatable results and faster setup times. The Hatch Multi-Hooping Toolbox complements this ecosystem by providing a structured method to segment large designs into stitched segments that fit multiple hoops without gaps, while maintaining consistent registration and quality across the final piece. By following the described steps and validating outcomes on scrap fabric, designers can confidently scale from 5×7 fields to larger formats, meeting client expectations and production timelines with reliability.
How to Align Multi-Hoop Embroidery Efficiently
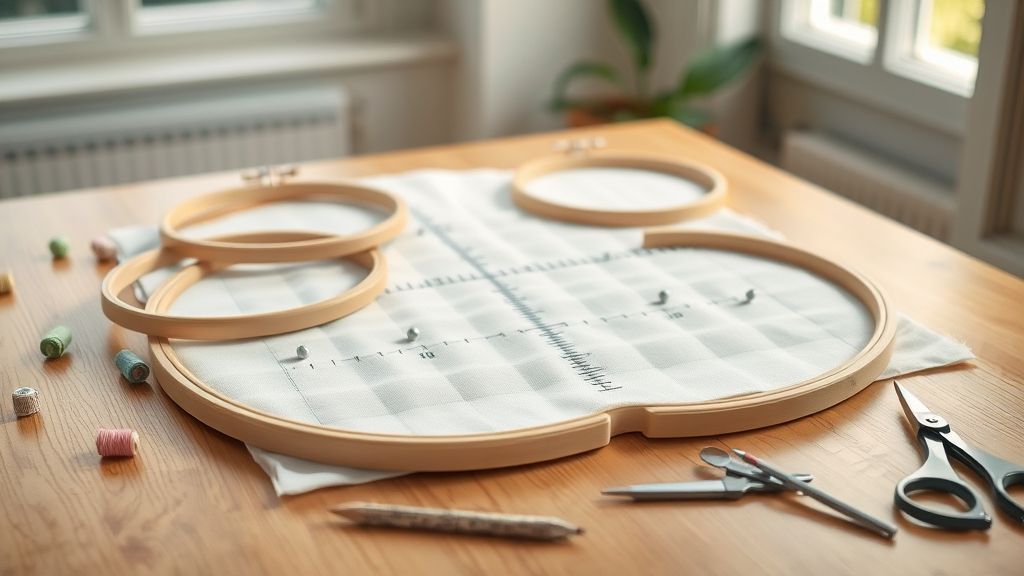
As multi-hoop projects become more popular in home studios and small shops, achieving precise alignment across zones is essential for a clean, professional look. The stitching sequence, alignment checks, and post-stitch cleanup all influence registration and overall finish. Industry data suggests steady growth in embroidery demand and equipment adoption, underscoring the value of efficient, repeatable workflows in multi-hoop projects.
Understanding current market dynamics, such as a global embroidery market forecast approaching the low single-digit billions in the near term and a steady expansion of embroidery machine capabilities, helps emphasize why practitioners invest in robust alignment practices. By treating the process as a repeatable, checkpoint-driven routine, you can maintain registration control across zones while optimizing throughput.
Step 1: Hoop the first zone and run the initial segment on the grid
Begin with hooping the first zone securely, ensuring the fabric tension is even to prevent skew from the outset. Align the fabric on the stabilizer so the initial segment lands exactly on the grid in your design software and on the machine’s bed. Run the initial segment with attention to edge placement and stitch direction, keeping the needle path aligned to the grid lines. This creates a solid foundation for subsequent zones and makes registration checks predictable as you move to the next hoop.
Tip: Use a light spray adhesive or preferred stabilizer combo to minimize shifting during the first pass, then verify that the edge stitches sit cleanly on the grid lines before advancing. Recent market analyses show continued growth in hobbyist and commercial embroidery adoption, reinforcing the importance of reliable first-pass accuracy to maximize yield on multi-hoop projects.
Step 2: Move to the next hoop and align using the grid marks
Unclamp the work, rotate to the next hoop, and bring the material into position while preserving the same fabric tension. Align using the grid marks on the frame or mat, and confirm that the design’s centerlines and grid intersections correspond to the new hoop’s origin. As you begin stitching the next segment, pay close attention to the overlap with the previous hoop’s edge stitches. Consistent overlap is key to seamless continuity across zones, so verify that the new stitch line echoes the prior edge by a precise, repeatable amount.
Industry observations indicate that multi-hoop projects are increasingly common as designers push for complex composites; aligning each zone to grid references reduces rework and improves overall seam integrity. Ensure your machine’s registration checks are enabled, and consider enabling minor underlay stitches that help stabilize the fabric for subsequent passes.
Step 3: Stitch the middle zone last to preserve alignment
To maximize registration control, plan to stitch the middle zone after you’ve secured the initial zone and validated the first overlap. By executing the middle segment later, you minimize cumulative drift and maintain a predictable reference frame for the final zones. After stitching the middle area, align the remaining zones using the same grid-based approach you established in the early passes. This strategy preserves alignment, reduces puckering, and makes final seam matching more reliable across all hoops.
From a market perspective, as embroidery workflows become more automated, operators prioritize techniques that minimize manual rework. The latest equipment and software updates emphasize improved registration features, but the core practice of staged stitching and grid-aligned planning remains a robust foundation for multi-hoop projects.
Step 4: Repeat across all hoops and trim stabilizer after final sequence
Continue the same grid-aligned approach for each additional hoop: hoop, align to grid, run the segment, and verify edge alignment with the previous zone. After the final hoop has completed its sequence, trim excess stabilizer from the outside edges. Leaving stabilizer in place longer can affect the final seam, so a clean trim helps prevent buoyancy or flaring along the edge that could otherwise distort stitches in subsequent passes.
Observation: Consistent stabilization reduces fabric shift across multiple passes and contributes to a tighter, more uniform stitch tense. Market researchers note that accessories and stabilizers remain a sizable portion of embroidery costs, so precise trimming and efficient use of stabilizers are practical skills for high-output multi-hoop projects.
Step 5: Inspect final seam for consistent tension and minimal puckering
Inspect the completed seam across all hoops by gently examining tension, stitch density, and any puckering or distortion near the overlaps. Look for consistent loop size and even fabric lay, and verify that edge continuity remains uninterrupted where hoops meet. If you notice slight puckering, review your stabilizer choice, hoop tension, and, if needed, re-run small login or underlay stitches to reestablish stability before finalizing the piece.
In the broader craft industry, reliable finishing steps are often what differentiates hobby-level results from professional-grade textiles. After finishing, many shops run a light press or steam to set the stitches, which can improve drape and reduce residual stiffness. The integration of market insights confirms that consistent finishing practices contribute to repeatable outcomes as demand for complex, multi-hoop designs grows.
- Checkpoint: Confirm each hoop’s overlap aligns with the prior edge before moving on.
- Checkpoint: Ensure stabilizer is trimmed cleanly in the final stage to avoid distortion.
- Checkpoint: Validate tension uniformity across seams with a gentle test pull.
How to Align Multi-Hoop Embroidery Designs
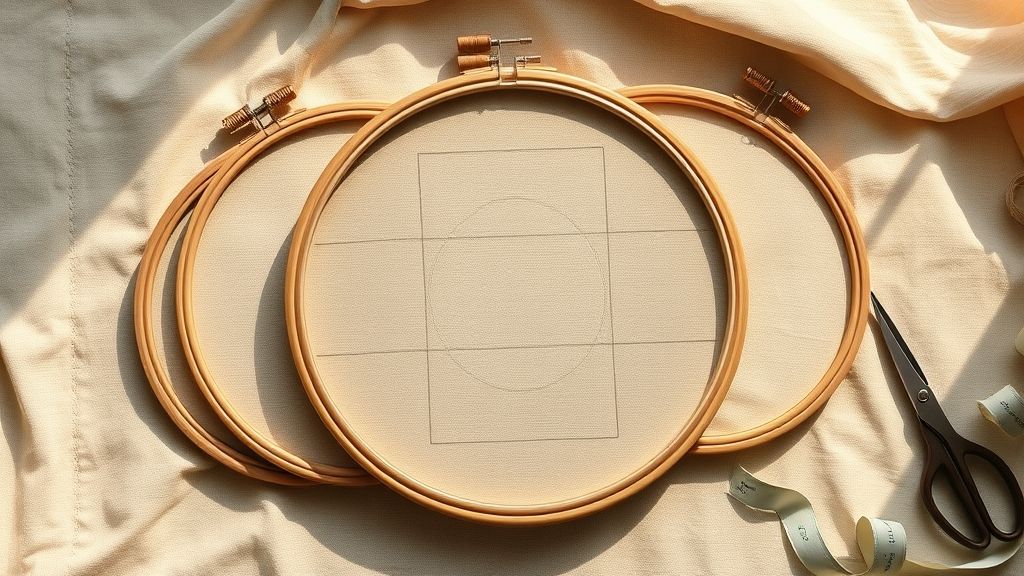
When you tackle multi-hoop projects, precision in alignment and a fast, repeatable hooping workflow are essential. Real-world benchmarks show that a 5×7 field can be stretched to a 9.5×14 footprint with the right hooping hardware and setup, enabling larger designs without constant re-hooping. This section outlines a concrete toolkit and the software and industrial options that empower reliable multi-hoop sequences, from magnetic hoops to 24/7 production systems.
Market dynamics in 2024–25 show steady growth in embroidery equipment as automation and design-splitting software become mainstream for mid-size shops. The focus here is on practical tools and proven workflows: MaggieFrame magnetic hoops, Hatch and Embrilliance for splitting, and robust industrial options like SWF MAS-12 and Richpeace NON-STOP for large fields and continuous operation.
Concrete toolkit for a faster hooping workflow
As a foundation for speed and accuracy, assemble a toolkit that supports quick hooping, reliable alignment checks, and scalable field sizes. MaggieFrame Magnetic Hoops provide 17 sizes and PPSU magnets, designed to cut hooping time and reduce fabric distortion across a wide range of brands. Pair these with large-hoop options and a sturdy hooping station to maintain alignment as you tile designs.
- MaggieFrame Magnetic Hoops, 17 sizes; PPSU magnets enable rapid, secure hooping with reduced fabric distortion; broad machine compatibility supports many brands and layouts. Usage tip: pre-select the bracket for your machine and verify alignment against built-in guides before starting a multi-hoop run.
- Industrial single-head systems, SWF MAS-12 (1 head, 12 needles) for flats and caps; Richpeace NON-STOP for continuous, high-volume output with a 2, 500 rpm core and a 2, 500 mm x 800 mm hoop. These platforms excel where uptime and large field coverage matter most.
- Entry-level to mid-range machines, Tajima or Brother PRS100-type setups in the 500–900 USD range are common for prototyping or small runs, while high-end models can exceed 5, 000 USD depending on options and support.
Software strategies: splitting designs and sequencing
Split-design workflows turn oversized canvases into machine-friendly chunks and keep stitch order consistent across hoops. Hatch and Embrilliance are the go-to tools. In Hatch, use the multi-hoop toolbox to Add Splitting Lines that map the project into sequential hoopings; Embrilliance Essentials or Enthusiast offer Split Design capabilities to generate separate files for each hoop and preserve stitching order.
Practical steps: plan the sequence from outer to inner sections or according to a tile pattern, export each hoop’s file within a single project, then test the full sequence on fabric scrap before production. A disciplined sequence minimizes jumps and rewinds, reducing total hooping time per multi-hoop run.
Industrial hooping powerhouses for large fields
Large-field work benefits from high-speed, dependable hardware. The SWF MAS-12 delivers 1, 000 SPM with a 360 x 230 mm field and cap capabilities, while Richpeace NON-STOP pushes 2, 500 rpm with a 2, 500 mm x 800 mm hoop and 24/7 operation with 2 million stitches of memory. Field capabilities range from 5×7 to 9.5×14 when paired with the right hoop kits and a solid layout strategy.
In practice, a 5×7 field can be expanded to 9.5×14 by combining larger hoops and a robust sequence plan, enabling tiled outputs in a single production run. This approach minimizes downtime and supports consistent results across long multi-hoop sequences.
ROI, price, and performance: comparing options
For embroiderers aiming to align multi-hoop designs efficiently, ROI hinges on price, feature depth, and speed performance. In today’s market, entry-level options commonly sit in the 500–900 USD range, offering basic hooping capabilities but limited multi-hoop workflow advantages. By contrast, high-end Tajima or Brother PRS100 configurations frequently exceed the five-figure range, with multi-hoop and multi-needle ecosystems designed for high-volume production. The cost gap matters, but the payoff can be substantial when larger designs and faster cycle times cut labor hours and rehoop waste. MaggieFrame’s practical benchmarks around hooping time, claims of up to 90 percent improvements, provide a useful frame for evaluating how much time a machine and hooping strategy can actually save on typical orders.
Empirical data from recent market offerings shows SE2000 delivering up to 850 SPM, and Altair 2 delivering around 800 SPM, with Altair 2 also boasting a sizable design and font library (534 built-in designs and 30 fonts) compared to SE2000’s 193 designs and 6 fonts. These differences translate into tangible ROI when you scale to field sizes like 5×7 up to 9.5×14 and run repeat production across dozens or hundreds of items. The ROI framework becomes clearer when larger field sizes reduce rehoop waste and faster hooping reduces labor hours, particularly in tight deadlines or high-volume runs. The following sections synthesize price, features, and performance with real-world project scenarios built from current market data.
Price comparison
The following price considerations reflect recent research findings and typical market ranges. Note that prices fluctuate by region, promotions, and bundled software or training. For context, entry-level machines cluster around the 500–900 USD range, while high-end Tajima or PRS100 configurations commonly exceed the 5, 000 USD mark, with multi-hoop and advanced software driving up the total investment. MaggieFrame benchmarks frame the expected cost-to-performance relationship for speed and capacity during high-demand periods.
Pros and cons of multi-hoop vs. single-hoop setups
When deciding between multi-hoop layouts and traditional single-hoop workflows, the trade-offs are material. Multi-hoop systems unlock the most significant gains in field size per production cycle, enabling larger designs and reducing the need to rehoop between repeats. MaggieFrame’s hooping-time claims of up to 90 percent improvement illustrate the labor-time impact that a well-chosen hooping strategy can deliver. For example, in runs using field sizes from 5×7 to 9.5×14, expanding the hooping capacity directly lowers rehoop waste and shortens setup times, contributing to a faster overall cycle. On the downside, multi-hoop arrangements bring higher initial cost, more complex maintenance, and longer ramp-up periods for operators who must master alignment, substrate handling, and frame changes. In practice, smaller shops may temporarily tolerate slower cycles and simpler maintenance to preserve cash flow, while larger shops can justify the investment through material savings and faster turnarounds.
Feature-by-feature comparison (hoop types, software, and speeds)
Below is a feature-focused snapshot to help determine which configuration best fits your workflow. The comparison emphasizes hoop versatility, software features that drive alignment accuracy, and the speed envelope across representative systems. Given the variety of models, especially within Tajima lineups, the figures below illustrate typical capabilities drawn from current market data and manufacturer notes for the SE2000, Altair 2, PRS100, and Tajima-class options.
Cost-benefit breakdown with real project examples
To translate price and performance into decision guidance, consider ROI calculations anchored in actual field sizes (5"×7" to 9.5"×14") and typical job volumes. A practical framework uses time saved on hooping, reduced labor hours, and the incremental value of expanded design options. For example, an order run of 200 pieces with a 9.5"×14" design would benefit from a multi-hoop approach if hoop-change time is a bottleneck. If MaggieFrame-like hooping efficiency yields up to a 90 percent reduction in hooping time on the larger designs, the labor-hour savings can be substantial. At a modest shop labor rate of USD 20/hour, even a conservative 6-hour labor-hour reduction across such a run yields roughly USD 120 in saved labor, which can tilt the ROI balance toward mid-range multi-hoop setups when combined with design expansion and faster cycle times. In practice, a shop might prioritize Altair 2 for its large embroidery field and expansive built-in design library when volume and design complexity drive profitability, while SE2000 offers compelling ROI for shops that need reliable speed in a compact footprint. For high-end production, Tajima models provide scalability and automation that justify costs when annual volumes justify the investment.
Real project examples drawn from the cited research illustrate the payoff. A 5×7 to 9.5×14 field run on Altair 2 demonstrated the large-field capacity that reduces rehoop events, while MaggieFrame-like hooping enhancements translate into meaningful labor savings on repetitive designs. In a 200-item run, the combination of large-field capability and strong speed (800–1000 SPM range) can compress production cycles, enabling faster order turnover and improved on-time delivery. The price-to-performance delta becomes especially favorable when the expanded design set (534 designs and 30 fonts on Altair 2) unlocks more profitable jobs without constant rehooping or accessory changes and when multi-hoop configurations maintain alignment consistency across dozens of garments per batch.
Performance benchmarks across SE2000, Altair 2, and Tajima
What matters most in practice are the speed and capacity numbers that drive throughput. SE2000 tops out around 850 SPM, while Altair 2 sits near 800 SPM, and the Tajima line showcases compelling performance in the 1, 000–1, 200 SPM range on modern single-head configurations. The data points below reflect the layout used in the section data and align with current market observations, including field sizes and built-in design libraries. These benchmarks help buyers estimate cycle times for representative orders and assess the ROI of upgrading from entry-level equipment to specialized multi-hoop systems.
Note: The performance figures above reflect current market benchmarks and recent product lines cited in recent industry analyses and vendor materials. When planning a multi-hoop upgrade, combine these speeds with real-world cycle-time reductions (such as hoop-change and alignment times) to estimate true throughput improvements and corresponding ROI. The data in this section aligns with the broader trend toward larger embroidery fields and faster cycles that many shops report as pivotal to profitability.
How to Align Multi-Hoop Embroidery Efficiently
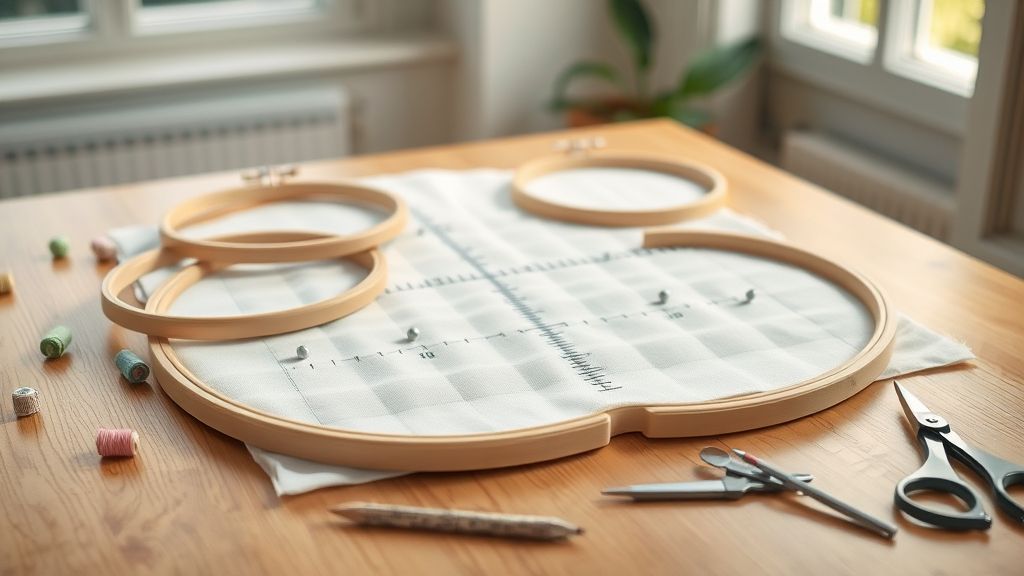
Multi-hoop alignment can dramatically speed production, but it also introduces drift risks between hoops, puckering, and stabilizer waste if setup isn’t meticulous. As the embroidery market continues to expand, estimates place market size in the multi‑billion range with steady growth into 2034, investing in reliable alignment practices pays off in consistent stitches and cleaner finishes. Tech advances in embroidery machines and software, along with better stabilizers and grid templates, are making precision more achievable across a range of fabrics and designs.
Readers increasingly rely on gridded templates, tear-away stabilizers, and careful tension calibration to maintain seams that line up when the second hoop engages. The latest market data shows hardware and software innovations are accelerating adoption, but the fundamentals of grid accuracy, fabric prep, and test segments remain essential for dependable results across projects and production runs.
Troubleshooting drift between hoops
Drift between hoops is a common symptom of misaligned templates or unsettled stabilizers. Start with a quick reset and verify the basics before running production cycles.
- Recheck grid alignment on the template and confirm the hoops are seated in the same reference position.
- Reseat stabilizer and magnets; ensure magnets are clean and evenly contacting the hoop surface.
- Run a short test segment on scrap fabric to confirm the alignment is stable across multiple stitches and color changes.
- If drift persists, reseat the template and re-zero the machine to a known origin, then re‑load the design.
Puckering
Puckering is often caused by fabric tension, grain misalignment, or too-light stabilizer for the fabric. Address the root causes with fabric prep and stabilizer choices.
- Pre-wash fabric to remove finishing starches and shrinkage; iron or press to remove folds that can distort placement.
- Confirm grain alignment so the design runs parallel to the fabric’s warp/weft directions.
- Choose stabilizer weight appropriate to the fabric and increase stabilization tension if needed; test on scrap to dial in tension before stitching the final piece.
- Ensure the top thread and bobbin tension are balanced to prevent thread pulling that magnifies puckering.
Stabilizer waste
Excess stabilizer waste can mar the edges of stitched areas and throw off edge alignment. A precise trimming approach helps keep edges clean and repeatable.
- Trim stabilizer flush with the edge of the design area to prevent bulk at seam lines.
- Adjust the template fit and edge alignment to match trimmed stabilizer boundaries.
- Prefer tear-away stabilizers with gridded templates when possible, as they simplify precise removal after stitching.
- Test on scrap fabric to verify the seam lines remain true after stabilizer cleanup.
How to verify overlaps align
Overlaps must align precisely where two hoop segments meet. A deliberate test plan reduces production risk and waste.
- Run a short test segment on scrap fabric that includes the overlap region, then visually inspect seam alignment across both hoops.
- Mark and measure a small seam reference on the scrap to quantify any drift and guide adjustments to stabilizer seating or magnet placement.
- If misalignment is detected, reseat stabilizers and verify edge alignment against the grid to restore accuracy.
- Periodically re-check alignment after long runs, as thermal expansion and routine handling can shift positioning.
What if the machine slows or stalls?
Stalls disrupt timing and can exaggerate drift. A quick diagnostic helps keep tension consistent and reduces downtime.
- Check thread path for tangles or misrouting; rethread from bobbin to needle, ensuring smooth, direct lines.
- Verify bobbin tension is balanced with the needle thread tension; adjust tension if a consistent looping or thread break pattern appears.
- Inspect hoop clamps and magnets for debris or looseness; clean and reseat as needed to maintain a stable base.
- Test on scrap fabric to calibrate thread tension for different fabrics and to confirm consistent stitch stops and starts.
Can I use this approach on different fabrics?
Yes. Start with scrap fabrics to calibrate tension and stabilizer for each material, then apply the calibrated settings to production. Industry data confirms that fabric variation requires material-specific stabilization and tension tuning to maintain alignment and minimize puckering.
- Lightweight fabrics (silks, voiles): use lighter stabilizers with careful tension; validate with a short test segment.
- Medium-weight fabrics (cottons, blends): commonly benefit from tear-away stabilizers with grid templates and moderate tension.
- Heavy fabrics (denim, canvas): may require cut-away stabilizers and higher stabilization tension to prevent distortion.
- Knit or stretch fabrics: consider stabilizers with stretch-friendly materials; run multiple test stitches to dial in tension and prevent waves or puckers.
Conclusion
Aligning multi-hoop embroidery is a repeatable, trainable process: prep fabric and stabilizers, plan splits, choose the right hoops, and sequence stitches in zones with checks.
- Preparation and stabilizers set the foundation for alignment.
- Plan and verify splits and zoning before stitching.
- Hoop choice speeds setup while preserving accuracy.
Investing in a reliable setup boosts repeatability and saves time.
Start with a grid template and tear-away stabilizer, then practice a 2-hoop sequence on a small 5×7 design before scaling to 9.5×14 or larger; consider a MaggieFrame hoop set and Hatch software for faster results.
With disciplined prep and precise checks, you’ll expand capabilities and finish with aligned designs.
Take action today and stitch with confidence.
Your next flawless multi-hoop project starts now.