Towel Embroidery: Stop Puckering, Get Crisp Designs
This post contains affiliate links. As an Amazon Associate, Latest Embroidery earns from qualifying
purchases, at no extra cost to you. Learn more.
Tired of your beautiful towel embroidery designs turning into puckered messes? You’re not alone. The unique texture of terry cloth, with its absorbent loops, presents a challenge that often leads to frustrating puckering and lost detail in your stitches. Achieving smooth, professional results on towels requires more than just a good embroidery stabilizer; it demands a keen understanding of stabilization techniques, stitch density, and precise design placement.
This article will guide you through the essential strategies to overcome these hurdles. We’ll delve into why puckering happens and provide actionable solutions, including the critical role of proper stabilization and density. Get ready to learn how to achieve crisp, clean designs on towels, transforming them into beautiful, gift-worthy creations. Read on to discover the secrets to perfect towel embroidery!
Why Does Towel Embroidery Puckering Happen?
Short on time? If you only take one thing from this guide: Machine oil & cleaning kit — most “faulty machine” problems are lint and a dry hook race.
Puckering in towel embroidery, and its related issue of stitch sinking, primarily stems from the inherent characteristics of terry cloth. The fabric’s dense, absorbent loops are designed for comfort and absorbency, but these same loops can easily trap embroidery threads. This trapping action, combined with the force of the needle and thread passing through, can cause stitches to sink into the fabric rather than lying on top. This leads to the fabric bunching up, creating an undesirable puckered effect that detracts from the crispness of the design.
Understanding these root causes is crucial for effective troubleshooting. The interplay between fabric density, stitch density, and stabilizer application directly influences the stability of the terry cloth during the embroidery process. Addressing these factors systematically is key to achieving smooth, professional-looking embroidered towels.
The Nature of Terry Cloth Loops
Terry cloth’s defining feature is its high pile, composed of numerous loops of yarn. These loops create a plush, absorbent surface, but they also present a challenge for embroidery. The loops can readily catch and embed embroidery threads, causing stitches to sink rather than sitting neatly on the surface. This sinking effect is a primary contributor to puckering, as the fabric is pulled unevenly with each stitch.
Stitch Density and Machine Tension
The density of your embroidery design and the tension set on your sewing machine play a significant role in fabric stability. Overly dense designs, where stitches are placed too closely together, exert excessive pulling force on the terry cloth. Coupled with incorrect machine tension, either too tight or too loose, this can cause the fabric to distort and bunch up, resulting in puckering. Finding the right balance is essential; the stitches need to be secure without constricting the fabric.
The Role of Stabilizers
The choice and application of stabilizer are critical for providing adequate support to the fabric. A stabilizer acts as a foundation, preventing the fabric from stretching or distorting under the needle’s action. For terry cloth, using the wrong type of stabilizer (e.g., a tear-away that’s too flimsy) or an insufficient amount can fail to provide the necessary backing. This lack of support is a common culprit behind puckering and stitch sinking, as the fabric is not held taut enough during the stitching process.
Design Characteristics and Their Impact
Certain design characteristics can exacerbate puckering issues on terry cloth. Designs with extremely high stitch counts or intricate, fine details can be particularly problematic. The sheer number of stitches in a dense design increases the overall tension on the fabric. Furthermore, very fine details may struggle to maintain their definition against the textured loops of terry cloth, potentially getting lost or creating localized tension points that lead to puckering.
Stabilization Strategies: Your Foundation for Smooth Embroidery
Achieving crisp, professional embroidery on terry cloth requires a deliberate approach to stabilization. The plush texture of towels can easily lead to puckering and lost stitch definition if not properly supported. This section dives into the essential techniques and materials that form the bedrock of successful towel embroidery, ensuring your designs stand out with clarity and neatness.
The key to preventing puckering lies in selecting and applying the correct stabilizers. A combination of backing and topping is crucial for managing the loft of terry cloth. By providing a stable foundation and a smooth stitch surface, you can overcome the inherent challenges of embroidering on such absorbent fabrics.
Choosing the Right Stabilizers
For terry cloth, a dual-stabilizer approach is highly recommended: a medium-weight tear-away or cut-away stabilizer underneath and a water-soluble topping on top. Tear-away stabilizers are excellent for general use, easily removed after stitching. Floriani’s Medium Firm TearAway is a popular choice for its balance of stability and ease of removal. Cut-away stabilizers offer more permanent support, which is ideal for dense or intricate designs that require robust backing.
Water-soluble toppings, such as Solvy or similar generic options, are indispensable. They create a smooth, even surface for your stitches to form on, preventing them from sinking into the towel’s loops. This ensures that the stitch definition remains sharp and clear, and prevents the fabric loops from poking through the design.
Applying Stabilizers for Hooping
Proper hooping is critical for smooth embroidery. When hooping, ensure the towel and stabilizer are taut, similar to a drum, but avoid over-stretching. Stretching can distort the fabric and lead to uneven stitching. For very thick or bulky towels that are difficult to hoop conventionally, the ‘floating’ technique is a game-changer. This method involves hooping only the stabilizer and then adhering the towel to it using a temporary adhesive spray or a sticky-back tear-away stabilizer.
Alternatively, adhesive tear-away stabilizers like Floriani Perfect Stick® or Wet N Stick® offer a convenient solution for ‘floating.’ These stabilizers provide the necessary adhesion to keep the towel in place without the need for hooping it directly, simplifying the process for challenging fabrics.
Advanced Techniques: The Floating Method
The ‘floating’ technique is particularly beneficial for items with significant loft, such as plush bath towels or bathrobes. By hooping only the stabilizer (either a traditional tear-away or cut-away, or an adhesive variety), you create a stable hoop frame. The towel is then attached to this hooped stabilizer using a temporary spray adhesive or by using a sticky-back tear-away stabilizer, which adheres the fabric directly to the hooped backing.
This method allows for precise placement and tension control, as the towel isn’t being pulled or distorted by the hoop itself. This ensures that the embroidery machine can stitch smoothly over the fabric, minimizing the risk of puckering and thread breakage. The water-soluble topping is then applied on top of the secured towel before stitching begins, providing that crucial smooth surface for stitches.
Optimizing Design & Machine Settings for Terry Cloth
Achieving crisp, professional embroidery on towels requires a nuanced approach to design density, stitch settings, and machine configuration. Terry cloth’s absorbent and lofty nature presents unique challenges, primarily the tendency for puckering and designs getting lost in the fabric’s texture. By carefully adjusting key parameters, embroiderers can overcome these hurdles and produce stunning results.
The foundation of preventing puckering lies in managing stitch density and selecting appropriate machine settings. This involves understanding how stitches interact with the terry loops and using tools to stabilize the design area effectively. The right combination of needle, tension, and underlay will ensure your embroidery sits proudly on the fabric surface, rather than sinking into it.
Adjusting Stitch Density and Underlay
To achieve solid coverage without puckering on terry cloth, aim for a spacing of approximately 0.4–0.45 mm between stitch rows in dense fill areas. Overly dense stitching can lead to thread breaks and fabric distortion. When digitizing specifically for terry cloth, it’s often beneficial to increase density by 10-20% and adjust pull compensation values accordingly. Utilizing a ‘laydown stitch’ or similar underlay technique is crucial. This creates a flat base layer that helps to flatten the terry loops and hold down the pile, allowing your design elements to be clearly defined and stand out.
Selecting the Right Needle and Tension
The choice of needle significantly impacts embroidery quality on thick fabrics like towels. A size 75/11 or 80/12 sharp sewing or embroidery needle is recommended, as its sharpness allows it to penetrate the fabric and stabilizer cleanly without causing excessive damage or snagging. For machine tension, begin by setting your top tension between 3.0 and 4.0. Observe your stitch quality: if the bobbin thread is visible on the top of the fabric, reduce the top tension slightly. Conversely, if stitches appear loose or floppy, a minor increase in top tension may be necessary. Consistent tension is key to a balanced stitch and preventing puckering.
Design Choice for Terry Cloth
Not all designs translate well to terry cloth embroidery. Opt for designs that feature solid fills and bold satin stitches. These elements have enough substance to be clearly visible against the textured background of the towel. Intricate, fine, or delicate stitch work can easily become obscured by the towel’s pile, diminishing the overall visual impact of the embroidery. Prioritizing designs with strong lines and robust fill areas will yield the most professional and appealing results.
Towel Embroidery: Stop Puckering, Get Crisp Designs
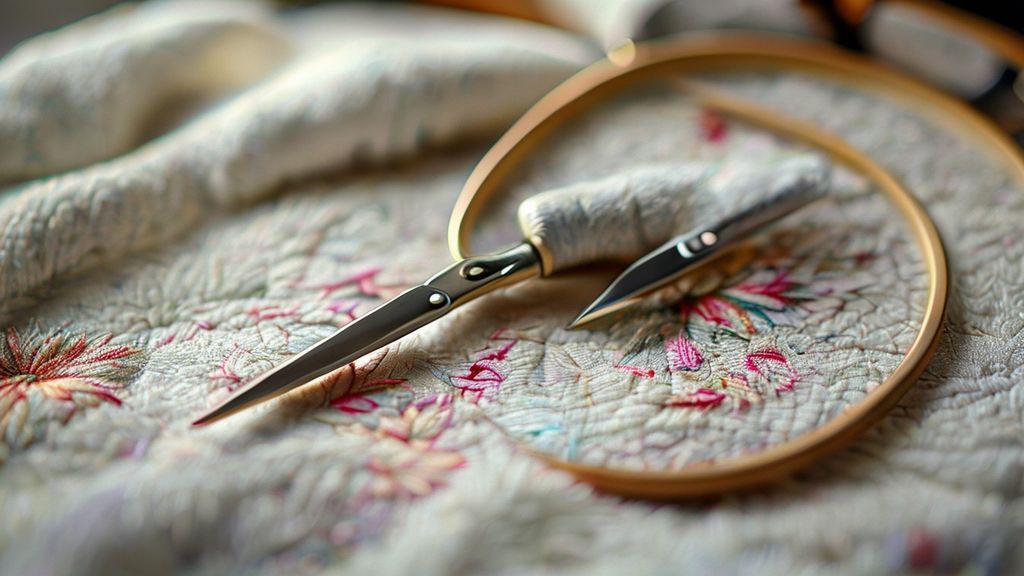
Achieving professional-looking embroidered towels hinges on precise design placement. Accurate positioning not only enhances the aesthetic appeal but also contributes to the overall quality of your finished product, preventing awkward or off-center designs that detract from the towel’s beauty and usability. This section guides you through the essential steps to ensure your embroidery is perfectly placed every time.
The embroidery craft industry continues to see growth, with personalized home textiles like towels being a significant segment. This highlights the importance of mastering techniques like precise placement to stand out and create high-quality, desirable items for personal use or sale. Understanding standard placement guidelines ensures your designs are not only visually appealing but also practical and aesthetically pleasing.
Finding the Towel’s Center
Locating the exact center of your towel is the foundational step for accurate design placement. To do this, neatly fold the towel lengthwise. Once folded, use a fabric chalk or a washable marker to mark the center line along the fold. This visual guide will be crucial for aligning your design.
Standard Placement Guidelines
Placement varies slightly depending on the towel size. For bath towels, a common and pleasing placement is centered approximately 4 inches above the lower border. For hand towels, consider a design width of 2.5 to 4 inches, typically placed 2 to 3 inches above the bottom border. Washcloths, being smaller, require more delicate placement, often centered with ample space around the design.
Positioning Relative to Borders and Seams
When your towel features a decorative border, it’s essential to position your design thoughtfully in relation to it. A good rule of thumb is to place the design about 0.5 inches above the top edge of the border. This creates a visual separation and prevents the embroidery from looking crowded or interfering with the border’s design.
Utilizing Templates for Precision
To further ensure accuracy, consider using a printed template of your embroidery design. Many embroidery software programs allow you to print a life-size template. Place this template on the towel to visualize the exact position and scale of your design before you even hoop the fabric. This step is invaluable for confirming how the design will look and considering how the towel will eventually be folded or displayed.
I will first search for current embroidery machine market trends and recent developments in embroidery technology.
Then, I will look for current pricing information and key features of the Brother PE770, Janome MB-7, Janome MB-4S, and Bernina E 16.
Following that, I will search for expert opinions or insights from embroidery professionals regarding machine recommendations for challenging fabrics like towels.
Finally, I will use all gathered information to generate the content for the “Expert Machine Recommendations & Pricing” section, incorporating a comparison table and cost-benefit analysis within the specified word count and formatting guidelines.
Expert Machine Recommendations & Pricing
Achieving crisp embroidery designs on challenging fabrics like terry cloth requires the right equipment. Multi-needle embroidery machines are highly recommended for their efficiency and ability to handle complex projects without puckering. These machines allow for multiple thread colors to be loaded simultaneously, significantly reducing project time and increasing productivity.
The embroidery machine market is experiencing steady growth, driven by the demand for customization and technological advancements. In 2024, the global embroidery machine market was valued at USD 2.14 billion, with projections indicating continued expansion. Multi-needle machines, in particular, dominate the market, accounting for a significant portion of revenue due to their efficiency in handling bulk orders and mass customization needs.
Multi-Needle Machine Comparisons
For those serious about professional results, multi-needle machines are essential. The Janome MB-7 stands out with its 7-needle system, a generous 9.4″ x 7.9″ embroidery area, and speeds up to 800 stitches per minute (SPM). It supports industry-standard formats like .jef+.jef, and .dst, and typically retails around $5, 999.00. Another robust option is the Janome MB-4S, a 4-needle machine, often found priced around $4, 999.00.
At the higher end for professional production is the Bernina E16 Pro, boasting 16 thread colors and a remarkable speed of 1, 400 SPM, with an extra-large embroidery field. While pricing can vary, it’s an investment upwards of $16, 495.00.
Budget-Friendly Option for Hobbyists
For home users or hobbyists, the Brother PE770 offers a more accessible entry point into embroidery. This machine features a 5″ x 7″ embroidery field and includes 136 built-in designs. It is often available for around $799.00, though it can be found for less, especially on the used market. While it lacks the multi-needle capabilities for high-volume production, it’s an excellent choice for personal projects and learning the craft.
Cost-Benefit Analysis
The choice between a multi-needle machine and a single-needle machine like the Brother PE770 hinges on your embroidery volume and business goals. For hobbyists or those new to embroidery, the PE770 provides a cost-effective way to start. However, for small businesses or individuals who frequently embroider on challenging fabrics or require high output, the investment in a multi-needle machine like the Janome MB-7 or MB-4S offers a significant return through increased efficiency and reduced labor time. The market trend towards customization and efficient production further supports the value of multi-needle systems for commercial applications.
Towel Embroidery: Stop Puckering, Get Crisp Designs
To ensure the longevity and pristine appearance of your embroidered towels, meticulous care during washing and drying is paramount. Proper maintenance not only preserves the intricate stitches but also maintains the towel’s absorbency and softness. By adhering to a few key practices, you can significantly extend the life of your beautifully embroidered creations.
The embroidery craft industry continues to grow, with home embroidery being a significant segment. Many enthusiasts focus on creating personalized home goods like towels, making care instructions vital for customer satisfaction and product durability. Following these guidelines will help keep your embroidered towels looking their best, wash after wash.
Washing Recommendations
It is recommended to wash embroidered towels inside out. Use a gentle cycle with cold water and a mild detergent. This minimizes friction and agitation, protecting the delicate embroidery threads. Avoid using harsh chemicals such as bleach or fabric softeners, as these can degrade the threads and reduce the towel’s natural absorbency.
Drying Techniques
When it comes to drying, opt for a low-heat setting on your dryer or, ideally, air dry the towels. High heat can cause shrinkage and damage to the embroidery. It is also advisable to remove towels from the dryer promptly once the cycle is complete to prevent deep-set wrinkles from forming in the fabric and the embroidery.
Spot Cleaning and Storage
For minor stains, spot cleaning is a more effective method than a full wash, as it targets the stain directly without subjecting the entire towel to washing stress. For general storage, keep your embroidered towels in a cool, dry place. Avoid stacking heavy items on top of them, as this can flatten the stitches and distort the design over time.
Pre-Wash Considerations
Some embroidery professionals suggest waiting at least 24 hours after the embroidery process before the first wash. This allows the stitches to fully set into the fabric, providing an extra layer of security against potential issues during the initial laundering.
Conclusion
You’re now equipped to conquer towel embroidery and achieve those crisp, professional designs you’ve been dreaming of! By mastering stabilization, machine settings, design selection, and proper care, puckering-free results are absolutely attainable. Don’t let past frustrations hold you back any longer; it’s time to embrace confidence in your stitching.
Ready to see your skills shine? Share your successful towel embroidery projects or any tips you’ve discovered in the comments below! Let’s build a community of stitchers inspiring each other to create beautiful, puckering-free masterpieces.