Every machine, thread, and accessory we cover is researched in depth, not reprinted from a spec sheet. Here is what goes into a Latest Embroidery review:
Specs, cross-checked. We verify manufacturer specifications against multiple retailers and official manuals, so the numbers you read are accurate and current.
What owners actually report. We read through verified buyer reviews, warranty complaints, and community threads to surface the real-world issues, threading, hooping, bobbin changes, noise, and jams, that owners run into after the first few weeks.
Value, not hype. We weigh each pick against its closest alternatives and tell you who a product is, and isn’t, for.
Kept current. Prices and models move fast, so every review carries a last-updated date.
Independence. We earn affiliate commissions if you buy through our links, but that never decides our recommendation. Read our disclosure.
Compiled by the Latest Embroidery editorial team · Last updated July 2026
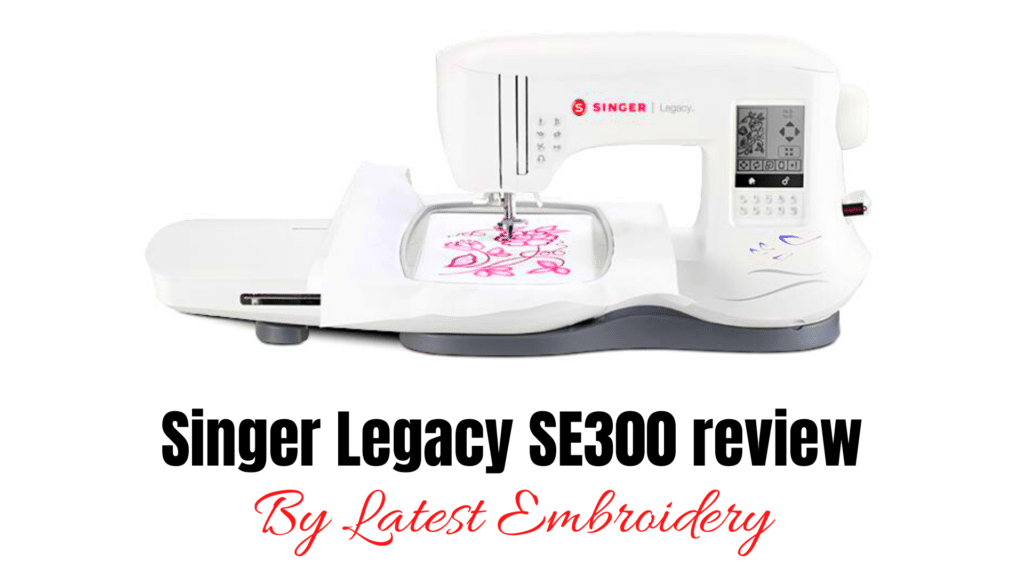
Cut through the guesswork with real-world numbers on hoop-time, speeds, and design ecosystems. If you’re eyeing the Singer Legacy S4000, you want benchmarks you can test in your studio, not vibes. This guide focuses on actionable hoop-change times, stitch throughput, and usable work area, all framed by the realities hobbyists face when balancing layout, fabrics, and design files.
To ground the comparison, the S4000 is evaluated against familiar rivals for scope and ecosystem: the PE800, Altair 2, Bernina E 16 Plus, and Melco Amaya Bravo. Expect notes on work area and file-compatibility across common formats (PES, DST, EXP). For deeper context, explore these resources: SINGER Legacy SE300 product page, Legacy SE300 & SE400 support, SINGER embroidery machine ultimate guide, Ultimate Guide to Singer Embroidery Sewing Machines.
For gear options, here’s a quick buying guide for embroidery machines you can trust:
Step-by-step evaluation path from hobbyist to shop: start with setup and hooping on a standard hoop, then run a simple motif in three sizes, compare throughput and reliability across the four reference machines, and test file formats you actually use. This practical path helps you decide what the S4000 delivers in real work and where it fits your project scale.
Keep reading to see the S4000’s numbers in action and how to optimize your setup from hobbyist to shop floor.
The following step-by-step evaluation is designed to help you determine the right machine setup for your space, with a focus on the Singer Legacy S4000 or any comparable system. You’ll walk through space, speed, built-in resources, workflow features, ROI, and a practical 2‑week test plan that mirrors real-world shop demands. The goal is a repeatable process you can reuse as you scale production or compare models in your lineup.
Using benchmark data from current machines in the market, and recognizing how features like hoop options, built‑in libraries, and workflow automation influence productivity, will help you make a confident, decision-ready assessment. Real-world studios often balance footprint, speed, and file compatibility, so this guide keeps those factors front and center.
Step 1, Define your production footprint and target hoop sizes
Start by sketching your space and listing the typical project sizes you’ll run. Target hoop sizes commonly encountered in shops include 5×7, 9.5×14, and 16×14 inches. Map these to candidate machines’ work areas to ensure you won’t outgrow your space before ROI.
Measure your embroidery table depth, clearance for handles/hoops, and any vertical space needed for rims or frames.
Confirm power availability and dust/airflow considerations that affect long‑ run embroidery blocks.
Cross‑check hoop compatibility with the machines you’re evaluating (e.g., 5×7, 9.5×14, 16×14 or larger, depending on model).
Create a quick “fit score” for each candidate: can you physically fit the largest hoop you’ll use, plus provide space for loading, trimming, and finishing tasks?
Step 2, Benchmark speeds you need (target 850–1, 500 spm)
Set a target production speed band that matches your product mix and labor costs. A healthy range to aim for is 850–1, 500 stitches per minute (SPM). To validate, run a controlled test swatch at low, medium, and high speeds and log the average SPM you achieve on each candidate.
Compare with known industry references: some high‑volume platforms reach around 1, 400–1, 500 SPM (for example, Bernina E 16 Plus at about 1, 400 SPM in stitching mode) and single‑operation multi‑needle systems can approach 1, 500 SPM in optimized workflows. Use these benchmarks to judge whether the S4000’s speed targets align with your output goals and to sanity‑check other models you’re considering.
MACHINE & SPEC
SINGER Legacy S4000 • Target range: 850–1, 500 SPM • Configurable speed steps • Assess actual throughput in controlled tests
Step 3, Check built‑in designs and fonts vs. external libraries; DST/PES/HUS compatibility
Evaluate the balance between built‑in resources and the ability to expand libraries. In the market, you’ll see a spectrum, from compact built‑in catalogs to robust ecosystems that support DST, PES, and HUS formats and work with external software for fonts and designs.
For context, compare typical baselines in the field: a model with around 138 built‑in designs and 11 fonts (earlier Brother‑style options), a model with 534 built‑in designs (Altair 2), and models with large libraries such as 1, 400 stitches per minute capability (Bernina) or 1, 500 built‑in designs (Melco Amaya Bravo). Note that stitch formats and compatibility, DST, PES, HUS, and others, affect how you move designs between software and the machine. Consider also the design ecosystems you rely on (Artspira, Embrilliance/Hatch/Stitch Era, Ink/Stitch/OpenArt) and whether the S4000 can natively import/export across these ecosystems or via a workflow bridge.
Use this quick checklist when testing the S4000 or any contender:
Can you access a broad library of designs natively and via USB/online libraries?
Are common formats (DST/PES/HUS) fully supported for both import and export?
Does the machine integrate with your preferred design software (Embrilliance, Hatch, Stitch Era, Ink/Stitch, OpenArt) or require adapters?
Are there built‑in fonts sufficient for monograms and signage, or will you rely on external fonts?
MACHINE
HOOP SIZE
BUILT‑IN DESIGNS
SPEED (SPM)
DESIGN FORMATS
WORKFLOW
Bernina E 16 Plus
(15.7×13.8 in)
1, 400 SPM
DST/PES/HUS
Manual + specialized software
Melco Amaya Bravo
(16×14 in)
1, 500 built‑in designs
DST/PES/HUS
Integrated workflow
Baby Lock Altair 2
(9.5×14 in)
534 designs
(speed not specified)
DST/PES/HUS
Tools, equipment, and setup you need for reliable results
For the Singer Legacy S4000 landscape, a practical embroidery kit starts with a capable multi-needle option, reliable hoops, and a workflow that minimizes setup time. This section lays out four widely used machines at different price and capability tiers, plus a clear decision framework so you can match your production goals to the right setup. You’ll find concrete price cues, workspace specs, and design ecosystems to help you plan purchases and software choices without guesswork.
Beyond the hardware, hooping efficiency is a real multiplier. MaggieFrame reports hoop-time reductions of about 90%, cutting typical hooping sessions from roughly three minutes to about 30 seconds per garment. Pair that with a solid design stack (DST/PES/HUS formats) and compatible design ecosystems like Artspira, Embrilliance/Hatch/Stitch Era, and Ink/Stitch/OpenArt to keep production moving smoothly from file to finished piece.
Practical kit options and price snapshots
Below is a concise, budget-conscious starter pack and a higher-capacity option set. Prices reflect current market notes from primary retailers and industry guides, with a focus on real-world purchase considerations rather than promotional hype. If you’re aiming for camera-assisted positioning, note that built-in cameras are not standard on these four models; see the PR1055X for InnovEye-style positioning features.
Small-to-mid production runs; flexible digitizing options
Tip: If camera-assisted placement is critical, consider the Brother PR1055X as a complementary option, since none of the four listed machines include InnovEye-style positioning built-in.
Feature-by-feature comparison
To visualize how each option stacks up, here’s a concise feature matrix focused on workspace, built-in designs, speed, and automation basics. Note: built-in cameras are not standard on these four models; a camera-equipped platform like the PR1055X is available separately for positioning accuracy.
MACHINE
WORKSPACE (EMB TFIELD)
BUILT-IN DESIGNS
SPEED (SPM)
AUTOMATION
CAMERA
Brother PE800
5″ x 7″
138
N/A
✗
✗
Baby Lock Altair 2
9.5″ x 14″
534
N/A
✗
✗
Bernina E 16 Plus
15.7″ x 13.8″
Unknown
1, 400
✗
✗
Melco Amaya Bravo
16″ x 14″
1, 500
1, 500
✗
✗
Notes: Built-in camera features are highlighted for the PR1055X family (Brother) and are not native to the four machines above. If camera-assisted placement is essential, consider pairing one of these machines with a dedicated camera-backed option or upgrade path like PR1055X.
Pros andCons analysis
✓ Pros
PE800: Accessible entry price; tiny footprint; easy to learn for beginners.
Altair 2: Large 9.5×14″ hoop suits apparel; robust built-in library; positioning app aids accuracy.
E 16 Plus: 16-needle versatility; fast multi-color embroidery; potential for high-output work.
Melco Bravo: Large field, high-speed capability, expansive DesignShop ecosystem for production runs.
✗ Cons
PE800: Limited scale for large runs; small hoop restricts larger designs; lacks automation features common on higher-end units.
Altair 2: Higher upfront cost for entry, CAD-based price points can be a hurdle; learning curve for advanced workflows.
E 16 Plus: Higher initial investment; space needs; maintenance and service considerations for multi-needle platforms.
Melco Bravo: Higher total cost with software packages; setup and service complexity can slow initial ROI.
Hoop-time efficiency and MaggieFrame reference
hooping speed is a critical bottleneck in apparel decoration. MaggieFrame’s hoop-time reduction metric, approximately 90% faster hooping, from about 3 minutes to 30 seconds per garment, translates into meaningful throughput gains when you’re processing batches. In practical terms, if you’re producing 40–60 garments in a single run, those seconds saved per piece accumulate into real hours saved per week, letting operators shift focus to design edits, color changes, and quality checks rather than repetitive hooping tasks. For studios weighing upgrades, the hooping upgrade often pays back faster than a purely speed-focused machine upgrade, especially when combined with larger work areas and robust design ecosystems.
Cost-benefit breakdown and project examples
Understanding the math behind an upgrade helps translate spec sheets into workflow ROI. Consider a small shop running 80–120 garments per week with routine 9.5×14″ or larger designs. If hooping time drops from 3 minutes to 30 seconds per garment (a 90% improvement), that’s a savings of about 60 seconds per piece. In a 100-piece batch, that’s roughly 1.7 hours saved just on hooping. At a blended labor rate of $20/hour, that’s about $34 per batch in labor savings, and that’s before factoring faster design changes, fewer rehoops, and reduced set-up times. Add a mid-range Melco Bravo or Bernina E16 Plus, and you gain not just speed but expanded field sizes and a broader design library that reduces the need for frequent digitizing or design edits mid-run.
ROI Snapshot
Hoop-time savings ≈ 9.0x faster than manual hooping in high-volume runs
Projected annual savings vary with batch size and wage rates, but the cumulative impact of reduced hooping time plus larger embroidery fields can push a buy decision toward a production-focused machine like Melco Bravo or Bernina E16 Plus.
Project Examples
Batch of 100 polo shirts: hoop-time savings could translate to 1.5–2 hours of labor time saved weekly.
Jacket back designs (16×14″ field): larger field with Melco Bravo can reduce color-change interruptions and speed up production.
Performance and workspace capacities
When choosing between these four, consider both field size and sustained throughput. The PE800 is compact and ideal for small runs and a home studio workflow, with a 5×7″ frame. The Altair 2 moves up to a 9.5×14″ field for apparel and smaller home businesses, with 534 built-in designs and a positioning app to guide alignment. Bernina’s E16 Plus expands to a 15.7×13.8″ field with 16 needles and speeds up to about 1, 400 stitches per minute, blending production capability with a manageable footprint. Melco Amaya Bravo pushes to a 16×14″ field and up to 1, 500 stitches per minute, backed by DesignShop Pro and a broad ecosystem for commercial work. In short, if you’re prioritizing field size and speed for mid-scale production, Melco Bravo and Bernina E16 Plus outperform entry-level models on throughput per hour, while PE800 and Altair 2 excel in space-constrained studios and lower upfront risk.
Operational notes: MaggieFrame hoop-time reductions serve as a practical benchmark for any upgrade. In real-world settings, the efficiency gains compound across batches, reducing the cumulative idle time and freeing operators for color changes or design tweaks. For owners evaluating a move from a single-needle to a multi-needle workflow, the combination of larger embroidery fields plus hoop-time savings can shorten the ROI horizon considerably.
Section wrap-up: decision criteria in practice
When selecting among these options, weigh four axes: (1) field size vs. garment type you most often decorate, (2) built-in design libraries and software compatibility, (3) speed and automation features that reduce rework, and (4) total cost of ownership including hoops, frames, and service. If your workflow hinges on large, complex designs across bulk runs, a Melco Amaya Bravo or Bernina E16 Plus will typically deliver the best long-term value. For hobbyists or small studios focused on rapid-turn projects, the PE800 or Altair 2 provides a compelling mix of price-to-performance with dependable reliability. And if you want on-device positioning with camera previews, consider pairing any of these with a dedicated camera system or exploring Brother’s PR1055X family as a complementary upgrade path.
Design and digitizing workflow to maximize output
Design-to-production in modern embroidery studios hinges on a cohesive workflow that moves designs from concept to stitch with minimal friction. In 2025, the embroidery market is robust, with global forecasts placing growth around the high single digits and the sector expanding toward the multi‑billion‑dollar range. Industry analyses project a global embroidery market approaching $3.7 billion by the mid‑2020s, supported by DIY craft trends, personalization demand, and continuing advances in software ecosystems. A well‑organized workflow that leverages design ecosystems, flexible digitizing tools, and disciplined asset management can shave minutes off each job and reduce troubleshooting in production. The emphasis this year is on oversized typography, sustainable and metallic threads, glow‑in‑the‑dark accents, and ITH (in‑the‑hoop) projects as core techniques that push output without sacrificing quality.
To maximize output, your design pipeline should embrace multiple ecosystems in a deliberate way: Artspira (Brother), Embrilliance/Hatch/Stitch Era, and open‑source paths like Ink/Stitch/OpenArt. Each brings different strengths, Artspira for on‑the‑go ideation and quick asset import, Embrilliance/Hatch/Stitch Era for structured digitizing and font management, and Ink/Stitch/OpenArt for customization and cost efficiency. Harnessing these tools in concert shortens setup, standardizes file handling, and keeps production scalable as you take on more ITH projects and experimental textures that 2025 trends reward.
Design ecosystems at a glance
Choosing a primary design ecosystem is about balancing speed, control, and extensibility. The following snapshot highlights how each option fits into a practical production line, with real‑world updates to keep you current.
MACHINE/TOOL/SOFTWARE
Price
Key Features
Best For
Artspira (Brother)
Free
Design editor with file import; cloud sync; 300+ fonts added in 2025 update; sublimation support
Mobile-to‑desktop drafting within Brother ecosystem
Embrilliance/Hatch/Stitch Era
From about $315 (per‑license range)
Native Mac/Windows; Stitch editing; merge; color changes; font management; StitchArtist for from‑scratch design
Professional workflows with strong font control and patch‑making
Ink/Stitch (Open‑Source)
Free
SVG‑based auto‑digitizing via Inkscape; cross‑platform; strong font and color handling
Open‑source enthusiasts and educators seeking customization
OpenArt
Varies (open‑source/community‑driven; some free access)
AI‑assisted prompts and asset generation; integration potential with open pipelines
AI‑driven inspiration and rapid concepting for experimental textures
Digitizing techniques: converting fonts to monograms, textures, and ITH-ready files
Turn fonts into refined monograms by combining a clean letterform with a scalable vector outline in your design app, then digitize manually for the letter connections and in‑hoop compatibility. In Artspira, you can import font hierarchies and convert them to editable outlines, while Ink/Stitch lets you wrap font outlines in stitches and assign satin or fill fills to create texture. A practical approach is to create a single‑line monogram with dense satin fills for the outer letterforms, adding subtle textures using fill patterns or texture stitches to give depth, especially effective for durable denim or canvas fabrics that are common in 2025 ITH projects.
Texture surfaces rise from deliberate stitch choices: use Tatami fills for large areas, add underlay (line or edge run) to stabilize stitching, and balance density to preserve fabric integrity. Ink/Stitch’s font tool updates in 3.2.0, and Embrilliance’ typography tools, support multi‑color font sets and font mapping that help you build cohesive monograms at scale. OpenArt can supply AI‑generated motifs to layer into ITH designs, giving you the textures buyers expect in bold, contemporary pieces.
Format handling and testing: DST, PES, HUS compatibility; conversion workflow
With production machines that speak DST, PES, and HUS, your workflow must include reliable conversion and verification steps. Start by exporting your digitized file in the primary format from the design ecosystem you used, then convert to the other formats using a trusted tool or the machine’s native utilities. Brother and Husqvarna platforms routinely support DST, PES, and HUS combinations, but always run a physical test on fabric swatches before bulk production. A practical rule: export DST for testing edge alignment and density, then verify color stops and pull compensation in PES/HUS to ensure stitch integrity on the target fabric.
Before production, do a mock run on a representative swatch with the actual thread types you’ll use, confirming that glow‑in‑the‑dark accents, metallics, and oversized typography render cleanly. Document any necessary adjustments to density or underlay so later orders can reuse the same asset with minimal rework.
Asset management: organize designs by client, project type, and machine profile
A disciplined asset system saves cycles when you bake in multiple clients and machines. Create a centralized naming convention that encodes client, project type (logo, monogram, ITH kit), hoop size, and machine profile. Tag designs by fabric type (woven, knit, specialty), colorway, and thread family (polyester, rayon, metallics). Maintain separate folders for fonts, swatches, and approved colorways, and store metadata such as sample results, density, underlay choices, and test notes. A simple, scalable taxonomy keeps setup times predictable and makes it easy to hand off projects to teammates.
Quality control: test stitches on fabric swatches and adjust for fabrics
Quality control should be a built‑in step, not an afterthought. For each new fabric, run a swatch with test stitches that cover stitching density, underlay, kickback risk, and pull‑out. Compare densitiy across fabrics such as light cottons, heavy twills, and stretch knits. Adjust underlay to improve coverage on delicate fabrics and increase density for heavier textiles. If using metallic or glow threads, test for thread cut‑ends, color change stability, and needle heat sensitivity. Maintain a record of recommended densities and underlay recipes by fabric family to speed future jobs.
Open‑source toolchains and customization: Ink/Stitch, OpenArt, and flexible workflows
Open‑source toolchains offer unmatched customization. Ink/Stitch provides a cross‑platform digitizing solution that integrates with Inkscape, enabling you to tailor stitch paths and export to DST, PES, or HUS as needed. OpenArt contributes AI‑generated prompts and assets that you can adapt into your embroidery concepts, a valuable asset for oversized typography and bold textures that dominate 2025 trends. By combining Ink/Stitch’s flexibility with the creative assets from OpenArt, you can build bespoke digitizing setups that fit unique client demands while keeping production costs contained.
Production realities and 2025 design trends
Current market dynamics underscore the need for scalable workflows. The market is growing as personalization remains in high demand and craft markets expand. In practice, leveraging oversized typography, glow‑in‑the‑dark accents, metallics, and sustainable threads in ITH projects creates value but also requires careful asset management and thorough testing. A disciplined, ecosystem‑aware workflow, supported by Artspira, Embrilliance/Hatch/Stitch Era, Ink/Stitch/OpenArt, will help you consistently hit quality targets while expanding your creative toolkit for 2025 and beyond.
Performance, ROI, and practical comparisons you can trust
For embroiderers weighing the Singer Legacy S4000 against bigger multi-needle setups, performance, cost of ownership, and measurable ROI matter most. This section pulls together benchmarked speeds, field sizes, and ecosystem compatibility to help you decide whether the S4000, or a competitor, fits your production goals. The numbers below reflect industry-wide ranges and model-specific specs to ground your decision in real-world outcomes rather than hype.
The embroidery market is in a growth phase. In 2023, industry revenue was about $2.98 billion, with forecasts scaling toward roughly $5.7 billion by 2030 as demand for personalized wearables, home décor, and small-business launch kits rises. Speed, work area, and automation features increasingly determine how quickly a shop can fulfill orders and reach profitability. Expect ROI timelines to compress as you align your hardware with your typical project mix, from small tokens and cap designs to large-format garments.
Price snapshot and benchmark models
Below is a snapshot of common entry-to-midrange and commercial options, with prices drawn from current publicly listed data. The Singer S4000 is used here as a benchmark for ROI modeling since published street prices vary by region and retailer. Where available, prices reflect typical US-market quotes to illustrate relative value. Note that prices can shift with bundles, software licenses, and training packages.
Machine/Tool/Software
Price
Key Features
Best For
Singer Legacy S4000 (Benchmark)
N/A
Benchmark model for ROI comparisons; supports standard embroidery formats; common ecosystem compatibility; used to gauge upgrades.
ROI modeling, initial project scoping, and vendor comparison baselines.
Brother PE800
$899.99
5″ x 7″ hoop; 138 designs; 11 fonts; DST/PES/HUS formats; USB connectivity.
Entry-level hobbyist to small-tamily projects; compact footprint.
Baby Lock Altair 2
$9, 499
9.5″ x 14″ embroidery area; 534 designs; robust automation and sewing/embroidery combo.
Mid- to high-end hobbyist or small business with a need for larger hoop.
Bernina E16 Plus
$15, 999
15.7″ x 13.8″ field; up to 1, 400 spm; multi-needle capability; premium build and support ecosystem.
Premium large-format production with strong service network.
Bernina E16
$6, 599
15.7″ x 13.8″ field; up to 1, 400 spm; reliable multi-needle workflows; strong software support.
Large-format production with a tighter budget than Plus variant.
Melco Amaya Bravo (Single Head 16 Needle)
$5, 697
16″ x 14″ field; up to 1, 500 spm; DST/PES/HUS formats; design software ecosystems compatible.
Commercial-grade field with strong throughput in a single-head setup.
Melco Amaya Bravo 16 Needle Package A
$9, 450
16″ x 14″ field; 1, 500 spm; DesignShop Pro and Digitizing included for workflow acceleration.
Best for shops needing DesignShop Pro workflow and faster digitizing integration.
Note: Table prices reflect current public listings and typical configurations; actual quotes may vary with bundles, software licenses, service plans, and geographic region. The S4000 row intentionally uses a benchmark approach to ROI rather than a fixed street price because published prices vary widely by market.
Performance benchmarks
Across the models above, speed and footprint matter most for throughput. The data show speeds ranging from 850 to 1, 500 stitches per minute (spm), and work areas spanning 9.5″ x 14″ (Altair 2) up to 16″ x 14″ (Amaya Bravo). The Bernina E16 family sits in the 15.7″ x 13.8″ range with robust multi-needle capability, while entry models like the PE800 give a compact, cost-efficient start. In real-world production, larger fields reduce paneling steps, while higher spm cuts embroidery time per design, beneficial when you process dozens to hundreds of items weekly.
Operationally, a typical design can run into the 20, 000–40, 000 stitch range. At 1, 000 spm, a 25, 000-stitch motif takes about 25 minutes; at 1, 500 spm, roughly 16–17 minutes. If your monthly output is 100 designs, the speed delta could save 8–9 hours of machine time, translating into roughly one additional full-time equivalent garment batch per month, depending on complexity. Hoops and designated work areas also impact throughput, larger formats reduce re-hooping but require more space and investment.
Pros and cons analysis
✓Pros
S4000 benchmark: useful ROI modeling with a standard reference for speed and field-size expectations.
Low-entry models (PE800): compact, beginner-friendly, and cost-efficient for small items and personalized gifts.
Large-field options (Amaya Bravo, Bernina E16 Plus): enable high-volume, back-of-house production with fewer hoopings.
S4000: ROI benchmarking only; limited real-world turnkey features without a specific price anchor.
PE800: small hoop and limited multi-needle capability constrain larger prints or bulk runs.
Altair 2: high price point relative to hobbyist lines; ongoing service and parts support required.
Bernina E16 Plus: premium price and footprint demand substantial space; learning curve for multi-needle workflows.
Melco Amaya Bravo: higher upfront cost; service and software licensing can add to TCO; requires room and electrical setup.
Cost-benefit breakdown and practical project examples
To translate price and speed into actionable ROI, use simple project scenarios. Start with a baseline labor rate (for example, $25–$40/hour depending on market) and a typical project mix: wall art panels, apparel embroidery, and small home décor items. The speed advantage of upper-tier machines is most evident in large-format designs and high-volume garment work. A 25, 000-stitch design, approached at 1, 000 spm, takes about 25 minutes; at 1, 500 spm, it drops to roughly 16–17 minutes. In a shop producing 60 such panels monthly, this speed delta can reclaim 6–9 hours of machine time per month, translating into notable labor savings and quicker quote-to-delivery cycles.
Example ROI calculations (illustrative only):
ITH wall art batch (10 designs per run, 25, 000 stitches each): moving from 1, 000 spm to 1, 500 spm saves ~9 hours per month for a single machine; at $30/hour, that’s ~$270/month in labor value, which can offset a portion of a higher upfront purchase over time.
Garment embroidery line (hundreds of shirts per week): a 20% throughput gain on a 1, 500 spm platform can reduce a 40-hour workweek to roughly 32 hours for the same output, saving ~8 hours weekly. At $28/hour, that’s about $224/week in labor savings; annualized, roughly $11, 648 in direct labor value before depreciation and maintenance.
Software ecosystems and digitizing capabilities (e.g., DesignShop Pro, Hatch/Stitch Era) often reduce design-to-production cycles by 15–30%, enabling faster turnaround on custom orders and higher-margin projects.
ROI timelines depend on usage intensity, maintenance costs, and software licensing. A small-to-mid-size shop upgrading from an entry unit toward Amaya Bravo or Bernina E16 Plus may see payback within 1–3 years if the additional throughput translates directly into expanded order capacity and higher-margin workflows.
Market context, adoption, and gaps
These performance characteristics sit inside a growing market ecosystem. The embroidery market is expanding as digital design tools, cloud-based libraries, and multi-needle platforms become more accessible to small shops and home businesses. With 2023 revenue around $2.98B and projections toward $5.7B by 2030, the ROI potential for upgrades grows as demand for custom apparel, home décor, and personalized gifts continues to rise. Speed, field size, and automation features remain the most impactful levers for scaling production and shortening delivery timelines.
Notes on data gaps: ROI data is sparse and verification of supplier claims can be limited. Use a structured test plan when evaluating claims, set up a pilot run with a defined design library, measure actual spm achieved, test hoop versatility with several hoop sizes, and benchmark design-load times across typical workflows. This approach helps separate marketing promises from repeatable performance in your shop.
Section wrap-up: how to decide
If your goal is to maximize throughput on large-format designs and bulk garment work, machines like Melco Amaya Bravo and Bernina E16 Plus deliver the most compelling field size and speed advantages. If you’re budget-constrained or primarily focused on small items and customer samples, the Brother PE800 or Baby Lock Altair 2 provide strong value with solid design libraries and dependable ecosystems. Use the S4000 as a ROI reference point to quantify how upgrades translate into real production gains, then validate through a structured in-house test plan before committing to a purchase.
Frequently asked questions (practical answers for buyers)
When you’re evaluating an embroidery setup, practical decisions beat guesswork. This section offers actionable guidance you can apply right away, from ROI expectations to choosing the right design ecosystem and standard file formats. Real-world industry data shows steady market growth and efficiency gains from newer machines and workflows, which informs smart buying decisions without getting lost in hype.
From ROI timelines to hoop choices and software ecosystems, use these practical answers to shape a purchase and setup plan that fits your throughputs and budget. You’ll also find a concise test plan to validate performance in the first two weeks after installation.
What is the typical ROI time frame for upgrading to a higher-speed machine with ITH capabilities?
Industry discussions repeatedly show ROI for higher-speed, in-the-hoop (ITH) capable systems can fall in the 12–24 month range, depending on volume, labor savings, and startup costs. Real-world references note notable time savings from faster production and automated features, with some shops citing aggressive throughput improvements that shorten payback when monthly output crosses certain thresholds. Use a simple ROI formula: (monthly incremental gross profit from higher throughput minus incremental costs) divided by monthly incremental profit. If you reclaim even a portion of labor time and material handling, the break-even timeline can drop meaningfully.
Plan a practical baseline: estimate current monthly embroidery hours and average job value, then forecast hours after upgrade given your expected speed gains and ITH benefits. If you can recover 15–25 hours per month through reduced setup and faster stitching, you’ll tilt the ROI calculation in your favor over a year or two.
Which hoop size should I prioritize first if most of my projects are apparel? How does MaggieFrame compare in real-world time savings?
For apparel-heavy work, prioritize hoops that cover the most common design areas, often 4″×4″ to 5″×7″ or similar. A single flexible hoop that works across many garments can yield quick wins. MaggieFrame has been highlighted in industry discussions for substantial time savings, with claims of up to 90% hooping time reduction and durable, long-lasting performance in busy shops. In real-world terms, this translates to faster changeovers, more consistent placement, and fewer setup errors, which compounds across a day’s production.
If you’re weighing MaggieFrame against traditional hoops, expect the most tangible gains on high-volume runs where repeated hooping and rehooping are common. Pair it with a workflow that emphasizes alignment efficiency and batch testing to maximize the time saved as you scale.
What design ecosystem should a hobbyist start with vs. a shop needing commercial throughput?
Hobbyists often benefit from user-friendly, budget-conscious ecosystems that balance design capability and learning curve. Open-source options like Ink/Stitch, and hobbyist-friendly platforms paired with Embrilliance or Artspira, offer approachable entry points and affordable upgrades as skills grow. For shops requiring commercial throughput, a broader ecosystem with robust digitizing and workflow tools, such as Embrilliance/Hatch/Stitch Era for advanced digitizing, alongside OpenArt or Open-source tools for experimentation, can support high-volume demands and custom library management. The choice often hinges on how quickly you need to convert designs to stitch files, manage colorways, and integrate with equipment like built-in cameras or automatic thread cutting.
In short: start with a design ecosystem that matches your current throughput and learning curve, then plan scalable upgrades to support higher volumes and more complex designs as your business grows.
How important are built-in cameras and automatic thread cutting for a small business?
Built-in cameras assist with design placement, alignment, and reducing misprints, features that directly impact accuracy and waste. Automatic thread cutting speeds up production by reducing manual intervention at the machine, improving consistency and throughput. For a small business that handles many garments per day, these features compound value by lowering operator fatigue and increasing the number of finished pieces per shift. Real-world discussions from commercial users note measurable productivity benefits when these features are present, especially on larger runs or cap designs where precise placement matters most.
What formats should I standardize on (DST/PES/HUS) to maximize compatibility with future digitizing tools?
DST and PES are the most universally supported formats across many brands and software solutions, making them a solid foundation for future compatibility. HUS is widely used on Husqvarna/Viking platforms and remains relevant for cross-compatibility with certain machines. Standardizing on DST and PES as primary formats, with HUS as a secondary option for specific machines, helps ensure your digitizing tools and embroideries remain interoperable as you upgrade software or hardware. Keeping a well-organized library of these formats minimizes rework when switching design software or hardware.
What test plan should I run in the first two weeks after installation to validate performance?
Use a focused two-week test plan to validate placement accuracy, color handling, stitch quality, and throughput. Start with design placement tests using a few representative apparel items (t-shirts, polos, caps if applicable) to verify alignment and distortion across fabrics. Run a mix of small and larger designs to check feed stability, thread breaks, and color changes. Document hooping times, setup changes, and any nuisance issues (skew, fabric pull, or needle heat) and adjust tension or stabilizer choices accordingly. Include a sanity check comparing DST/PES/HUS formats on your existing digitizing tools to confirm smooth file transfers and stitch conversions. Finally, record run times and piece counts to establish a baseline for ROI calculations and ongoing productivity improvements.
✓Pros
– Faster throughputs reduce lead times and open capacity for more orders.
Improved consistency with automated features.
Better placement accuracy with optional built-in cameras.
✗Cons
– Higher upfront cost; ensure your throughput justifies the investment.
Better to validate with a two-week test plan before committing.
Missed alignment on specialty fabrics can require stabilizer tweaks.
Conclusion
Choosing an embroidery setup means matching capability to real work. This Singer Legacy S4000 guide combines data-backed benchmarks, ITH workflow, and a practical ecosystem to tailor an upgrade to your space and volumes.
Benchmarks provide objective speeds, hoop-time, and fabric handling for quick comparisons.
ITH workflow streamlines setup and production.
Concrete project examples demonstrate real gains in throughput and quality.
To act, download and use the provided evaluation checklist, run a two-week trial with at least three project types, and compare results to the benchmarks.
For upgrades, map ROI to your shop’s throughput and growth targets.
Worried about space, budget, or training? The plan shows where you’ll see impact first and what’s realistic during ramp-up.
Have you ever struggled to make your applique embroidery look clean, precise, and durable? You’re not alone. Many crafters find it tricky to tell applique, patches, and in-the-hoop embroidery apart, and each technique has nuances that can make or break a project. The good news: once you understand the distinctions and master a couple of…
Our Research Method How We Research Every machine, thread, and accessory we cover is researched in depth, not reprinted from a spec sheet. Here is what goes into a Latest Embroidery review: Specs, cross-checked. We verify manufacturer specifications against multiple retailers and official manuals, so the numbers you read are accurate and current. What owners…
Are your embroidery projects losing shape or puckering? Discover how correct fabric grain alignment can transform your results. Misaligned fabric often leads to distorted stitches, uneven designs, and frustration, especially when you’re aiming for that professional look. Luckily, mastering fabric grain alignment is simpler than you might think, and it can dramatically boost your embroidery…
Have you ever found yourself frustrated after accidentally ripping a seam or snagging delicate embroidery threads? You’re not alone. Many crafters and hobbyists face these mishaps, but luckily, a simple tool like a seam ripper can come to the rescue. Imagine salvaging a nearly perfect embroidered design without damaging the fabric, that’s the power of…
Struggling to find the perfect batting for your machine embroidery projects? You’re not alone. Choosing the right batting can be a game-changer, affecting everything from the look and feel of your finished piece to how well your stitches hold up over time. With so many options out there, polyester, cotton, wool, blends, it’s easy to…