How to Calculate Machine Embroidery Cost Per Design Efficiently
This post contains affiliate links. As an Amazon Associate, Latest Embroidery earns from qualifying
purchases, at no extra cost to you. Learn more.
Ever wondered how to price your embroidery designs accurately and boost your profit margins? If you’re like many craft enthusiasts and small business owners, the challenge lies in figuring out just how much each design truly costs to produce, covering everything from materials to machine time. Without a reliable way to calculate this, prices can become a guessing game, leaving you undercutting your work or pricing yourself out of the market.
That’s where a clear, easy-to-use cost calculator can transform your pricing strategy. It helps you understand the real expenses behind every stitch, so you can set fair, profitable prices without second-guessing. In this article, you’ll discover step-by-step methods to streamline this process, saving you time and stress while improving your profit margins. Mastering this skill means turning your passion into a sustainable business, making sure every design pays you what you deserve. Ready to take the guesswork out of pricing and grow your embroidery hustle? Let’s dive in.
Key Insights from Embroidery Pricing Data
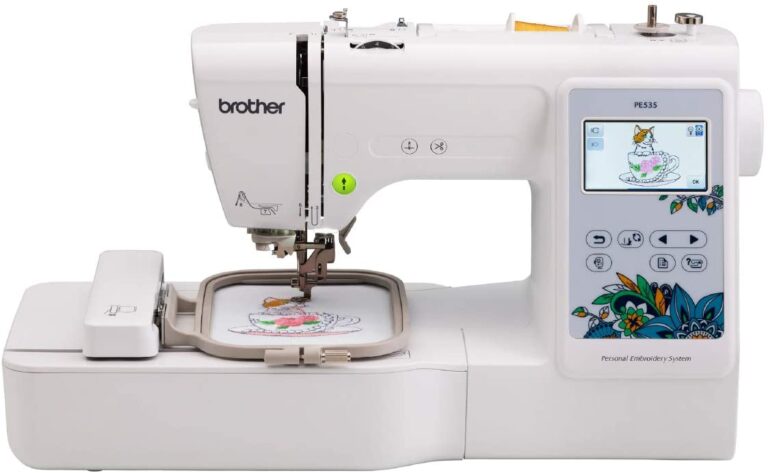
Short on time? If you only take one thing from this guide: Brother SE700 — the machine we point most beginners to — touchscreen, wireless transfer, and it sews as well as embroiders.

Staying ahead in the embroidery industry requires understanding how recent trends influence costs and profitability. Rapid technological advancements, shifting consumer preferences, and new materials are reshaping pricing strategies. Harnessing up-to-date data allows embroidery professionals to optimize their cost calculations and improve margins.
Current industry insights reveal that AI-designed patterns, sustainable materials, and niche applications now play pivotal roles in cost structures. For example, approximately 80% of embroidery businesses leverage AI design software like Stitch Delight, significantly affecting design efficiency and pricing. Additionally, the growth in eco-friendly textiles and specialized techniques impacts material and labor costs, requiring precise calculation methods.
Impact of AI-Designed Patterns on Costs
The adoption of AI in embroidery design has revolutionized cost efficiency and creativity. By automating pattern creation, AI tools reduce labor time, but also introduce new expenses like subscription fees and software updates. This trend has led to more competitive pricing models, while also enabling customization at scale, driving higher profitability for niche markets.
Sustainable Materials and Eco-Friendly Threads
Using recycled textiles and eco-conscious threads is now adopted in nearly 60% of projects. While environmentally sustainable options may increase material costs by around 15-20%, they also appeal to an expanding demographic of eco-conscious consumers. Balancing these expenses with premium pricing can enhance overall profitability, especially for premium or storytelling embroidery projects.
Niche Applications and Innovative Techniques
Growth in niche embroidery, including personalized storytelling and in-the-hoop (ITH) projects, has surged by 45%. These specialized applications often command higher prices; for instance, ITH techniques, which are now used by 30% of businesses, can add approximately 10-15% to production costs due to added complexity. Additionally, textured patterns and metallic threads have increased market share by 25%, further elevating material expenses and requiring careful cost management.
Step-by-Step: Calculating Material and Thread Costs for Designs

Accurately estimating material costs is essential for setting competitive prices and ensuring profitability in machine embroidery projects. By creating a detailed cost sheet and using practical methods to determine per-unit expenses, embroiderers can streamline their pricing strategies and maintain consistent quality. This section guides you through the process of calculating costs for thread, fabric, stabilizers, and embellishments with easy-to-implement techniques.
Creating a Material Cost Sheet
Start by listing all necessary supplies for your designs, including different thread types, fabrics, stabilizers, and embellishments. For each item, note the supplier prices and estimate the consumption per project. For example, eco-friendly threads like the one set at $12 per 4 oz spool, with approximately 1000 stitches per spool, provide a basis for cost calculation. Similarly, fabric costs at around $5 per item, stabilizers at $0.50 each, and embellishments at $2.50 help assemble a comprehensive sheet.
Calculating Per-Unit Material Costs
Divide the total cost of each material by its estimated usage. For instance, if a design with about 5000 stitches consumes roughly $0.60 worth of eco-thread, this calculation considers the stitch count and spool efficiency. Adjust for waste, typically around 10-15%, and factor in overhead costs like handling or storage. Using software or templates can help track material usage per design, ensuring precise and consistent cost assessments.
For example, a monogrammed pillow using eco-thread might have the following cost breakdown:
This systematic approach allows you to calculate precise material costs for each design, helping you price your work accurately while factoring in premium materials. Regularly updating your cost sheet as supplier prices change or new materials are introduced will further refine your pricing strategy.
How to Value Your Time and Overhead in Design Pricing

Accurate pricing for machine embroidery designs hinges on accounting for your actual costs, including machine hours, labor, and overheads. By assigning precise values to each component, you can develop a comprehensive cost structure that ensures profitability while remaining competitive. This process involves establishing an hourly wage, tracking time spent on each stage, and incorporating overhead expenses seamlessly into your final quote.
Establishing an Hourly Wage Rate
Begin by determining a fair hourly wage that reflects your skill level and local market standards. For example, setting a rate of $20/hour provides a baseline for calculating labor costs. This rate should incorporate not only your salary but also costs related to your skills, training, and business overheads. Once established, this rate translates directly into per-design labor costs based on the actual time spent.
Tracking Time and Overheads
Break down the total time required for each design: setup, stitchout, and finishing. For instance, average setup time might be 30 minutes, with stitchout varying from 45 minutes to 2 hours depending on complexity. Overhead costs such as electricity ($1.50/hour) and machine wear and tear ($2/hour) should also be calculated based on actual usage. For example, if a design takes 2 hours total with overhead of $5 per hour, your base cost before profit is $45.
Using this data, craft a formula that automatically includes these costs into your final pricing:
Total Design Cost = (Hourly Rate x Time Spent) + Overheads + Material Cost + Profit Margin
For example, a design taking 2 hours with $5 overhead results in a base cost of $45 before adding your profit margin. Adjust the variables depending on real data for each project to maintain accuracy and profitability.
Creating a Complete Cost-per-Design Calculator Tool

Designing an effective digital calculator for machine embroidery costs involves integrating key expense factors in a way that allows for quick adjustments and accurate pricing. Whether you opt for Excel, Google Sheets, or a dedicated app, a well-structured spreadsheet can streamline your workflow and improve profitability. This section guides you through building a customizable tool that considers materials, time, overhead, and profit margin, ensuring you’re always aware of your true costs per design.
Setting Up Your Spreadsheet Layout
Start by creating sections for each cost component: materials, time, overhead, and profit margin. For materials, include input cells for spool prices and stitch counts; for labor, capture hourly wages and estimated stitching time. Overhead should encompass equipment depreciation, utilities, and workspace costs. Finally, add adjustable profit margin cells to see how different markups affect your suggested retail price.
Use formulas to automate calculations: for example, multiply stitch count by spool price to get material costs, divide total work time by 60 for hours, then multiply by hourly wages for labor costs. Sum all expense cells for total cost, then add your profit margin percentage for a recommended sale price. Incorporate cells where you can test different scenarios, like switching to alternative materials or design complexities, to compare impacts on overall profitability.
Test and Adjust Your Calculator
Input sample data aligned with real-world projects. For instance, a design using a spool costing $5 with 10, 000 stitches at a stitch rate of 0.01 per stitch results in a material cost of $0.10. Assign a practical hourly wage, say $15, and estimate the stitching time based on design complexity. Run multiple scenarios with varying stitch counts and material costs to evaluate how your pricing adapts.
Include a feature to modify profit margins, say from 20% to 40%, and observe the resulting retail prices. This flexibility helps you set competitive yet profitable prices across different design types and customer segments.
Lastly, add a comparison function that allows side-by-side evaluation of different material choices or design complexities. This way, you can quickly see which options optimize profit margins and keep your costs transparent, aiding smarter pricing decisions in a competitive craft industry.
Conducting Competitive Analysis & Quotation Generation

Accurate market research is fundamental in setting competitive yet profitable prices for machine embroidery designs. By analyzing local shops, craft fairs, and online marketplaces, you can gather valuable data to inform your pricing strategy and ensure your quotes reflect current industry standards. Consistent research helps avoid underpricing or overpricing, both of which can impact your business sustainability.
Creating clear, professional quotations is equally essential. A structured quote that breakdowns materials, labor, overhead, and desired profit margin not only builds trust with clients but also facilitates transparent communication. Utilizing templates simplifies the process, enabling quick adjustments based on project scope, complexity, and customer type. Implementing a quick-price comparison tool ensures your quotes remain competitive within the evolving embroidery market, which is seeing steady growth, with recent industry reports indicating a CAGR of 7% over the past five years.
Researching Market Prices and Setting Competitive Quotes
Start by collecting data from competitors’ websites, local embroidery shops, and craft fairs. Note the pricing structure for similar designs, this might include per-design costs, minimum charges, or package deals. Online marketplaces, such as Etsy or specialized embroidery platforms, often publish price ranges that can serve as benchmarks. Recent trends suggest that average costs per design range from $20 to $50, depending on complexity and size. This data helps in setting a price that balances competitiveness with profitability.
Creating a Structured Quotation Template
Develop a template that includes sections for client info, project details, and a detailed cost breakdown. For example:
In addition, develop a quick comparison tool, such as a simple spreadsheet or calculator, to assess how your prices align with current market averages. This allows for rapid adjustments ensuring your quotes stay attractive and viable. Remember to customize your quotes based on client segments, project difficulty, and turnaround expectations for maximum efficiency and profitability.
Practical Tips for Accurate Pricing and Boosting Profitability

Managing the costs of machine embroidery designs can significantly influence your business’s success. Precise cost calculation ensures you avoid underpricing, which can erode margins, and helps scale your services profitably. Implementing consistent strategies for cost management sets the foundation for sustainable growth and client satisfaction.
Integrating real-world practices, such as updating material prices and optimizing your workflow, can boost your profitability. Regularly tracking expenses and refining your pricing approach enables continuous improvement, and ultimately, bigger margins and happier customers.
Keep Detailed Records of All Costs for Each Project
Start by meticulously documenting every expense related to each embroidery design, including thread, stabilizers, machine wear and tear, and labor hours. This detailed record-keeping provides a clear picture of your actual costs, preventing surprises and underpricing. Using tools like spreadsheets or specialized software streamlines this process.
Regularly Update Material Prices and Labor Rates
Market fluctuations impact material costs, recently, updating spool prices from $12 to $14 improved profit margins from 20% to 30%. Staying current with these changes ensures accurate cost calculations. Similarly, adjust labor rates periodically to reflect skill level, experience, and industry standards, maintaining profitability.
Batch Similar Projects to Optimize Time and Resources
Batching projects that share similar designs or materials reduces setup time, studies show that this can cut setup time by around 15%. It maximizes machine efficiency and minimizes material waste, directly contributing to increased margins. Planning ahead to group projects is a smart way to scale profitably.
Offer Tiered Pricing Based on Complexity and Customization
Creating different price tiers allows you to capture value based on design intricacy and personalization requests. This approach prevents undervaluing complex designs and caters to a broader client base, balancing affordability with profitability.
Use Client Feedback to Refine Your Pricing Strategy
Listening to customer responses can reveal insights into perceived value and price sensitivity. Adjust your pricing models accordingly to better align with market expectations, ensuring you remain competitive while protecting your margins.
Continuously Analyze Profit Margins and Adjust Pricing Accordingly
Regular profit margin analysis helps identify when costs rise or profits dip. For example, as material costs increase, adjusting your design prices ensures sustained margins. Stay vigilant and flexible, your pricing should evolve with industry trends and operational costs.
Conclusion
Mastering the art of calculating machine embroidery costs per design is a game-changer for anyone looking to enhance their profitability. By understanding and accurately tracking material expenses, valuing your time, and utilizing practical tools like spreadsheets for real-time pricing decisions, you gain the confidence to set competitive yet profitable price points. Combining thorough research, detailed tracking, and competitive analysis ensures your designs are priced sustainably, helping your business grow steadily.
Take action today, start building your custom embroidery cost calculator now and watch your margins grow. Implementing these steps immediately will empower you to take control of your pricing strategy, eliminate guesswork, and make data-driven decisions that boost your profitability. Don’t wait for the perfect moment; your success depends on the action you take today.
Remember, the more precise your cost calculations, the more confidently you can scale your embroidery business. Get started now and transform your pricing process into a powerful tool for growth and sustainability.
Stay motivated, stay strategic, and let your creative embroidery work pay off in every stitch.