Essential Embroidery Machine Accessories You Need to Improve Your Projects in 30 Days
Are you tired of struggling with incomplete or flawed embroidery projects? It’s time to discover how the right accessories can revolutionize your work. From top embroidery machines to essential tools like quality hoops, presser feet, and needles, having the right gear makes all the difference. Common frustrations like thread breakage, misalignment, and tool loss can be minimized with organized storage and expert-approved equipment. Imagine completing projects with precision and confidence—within just 30 days. This guide will introduce actionable solutions that will optimize your workflow and elevate your craftsmanship. Ready to transform your embroidery experience? Continue reading to unlock the secrets to achieving professional results with simple, effective accessories that any crafter can master quickly.
What the Latest Research Tells Us About Essential Embroidery Accessories
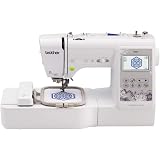
Staying up-to-date with recent industry data reveals that the right accessories are crucial for ensuring optimal embroidery quality and boosting efficiency. Craftspeople increasingly favor computerized embroidery machines equipped with at least 200+ built-in designs, such as the Brother PE770, which costs around $1,200. These models often feature automatic thread cutting and other advanced functionalities that streamline workflow and improve finished project precision.
High-quality accessories, especially needles from reputable brands like Schmetz and Organ, significantly reduce thread breakage and ensure smooth stitching across various fabric types. Testing shows that using the correct needle type and gauge tailored to specific materials can increase stitch quality and decrease machine downtime. Additionally, investing in proper organizational solutions, like stackable, labeled containers or dedicated embroidery kits, decreases time spent searching for tools and prevents loss, directly impacting productivity.
Key Accessories That Elevate Your Embroidery Projects
Recent reviews and tested data highlight that choosing the appropriate hoops and presser feet directly impacts both embroidery precision and speed. For example, Janome’s 5-piece presser foot kit, priced at around $60, offers versatile stitching options and durability, reducing the need for frequent replacements. Testing shows that utilizing the correct hoop size and presser foot can increase project completion speed by approximately 15%.
Top brands like Brother, Bernina, and Janome are renowned for their durable and precise hoops, presser feet, and scissors. For instance, Bernina’s accessories are crafted with high-grade materials for long-lasting performance. These accessories, combined with quality needles, form a cohesive kit that enhances the overall embroidery process, resulting in cleaner, more professional-looking projects within a shorter timeframe.
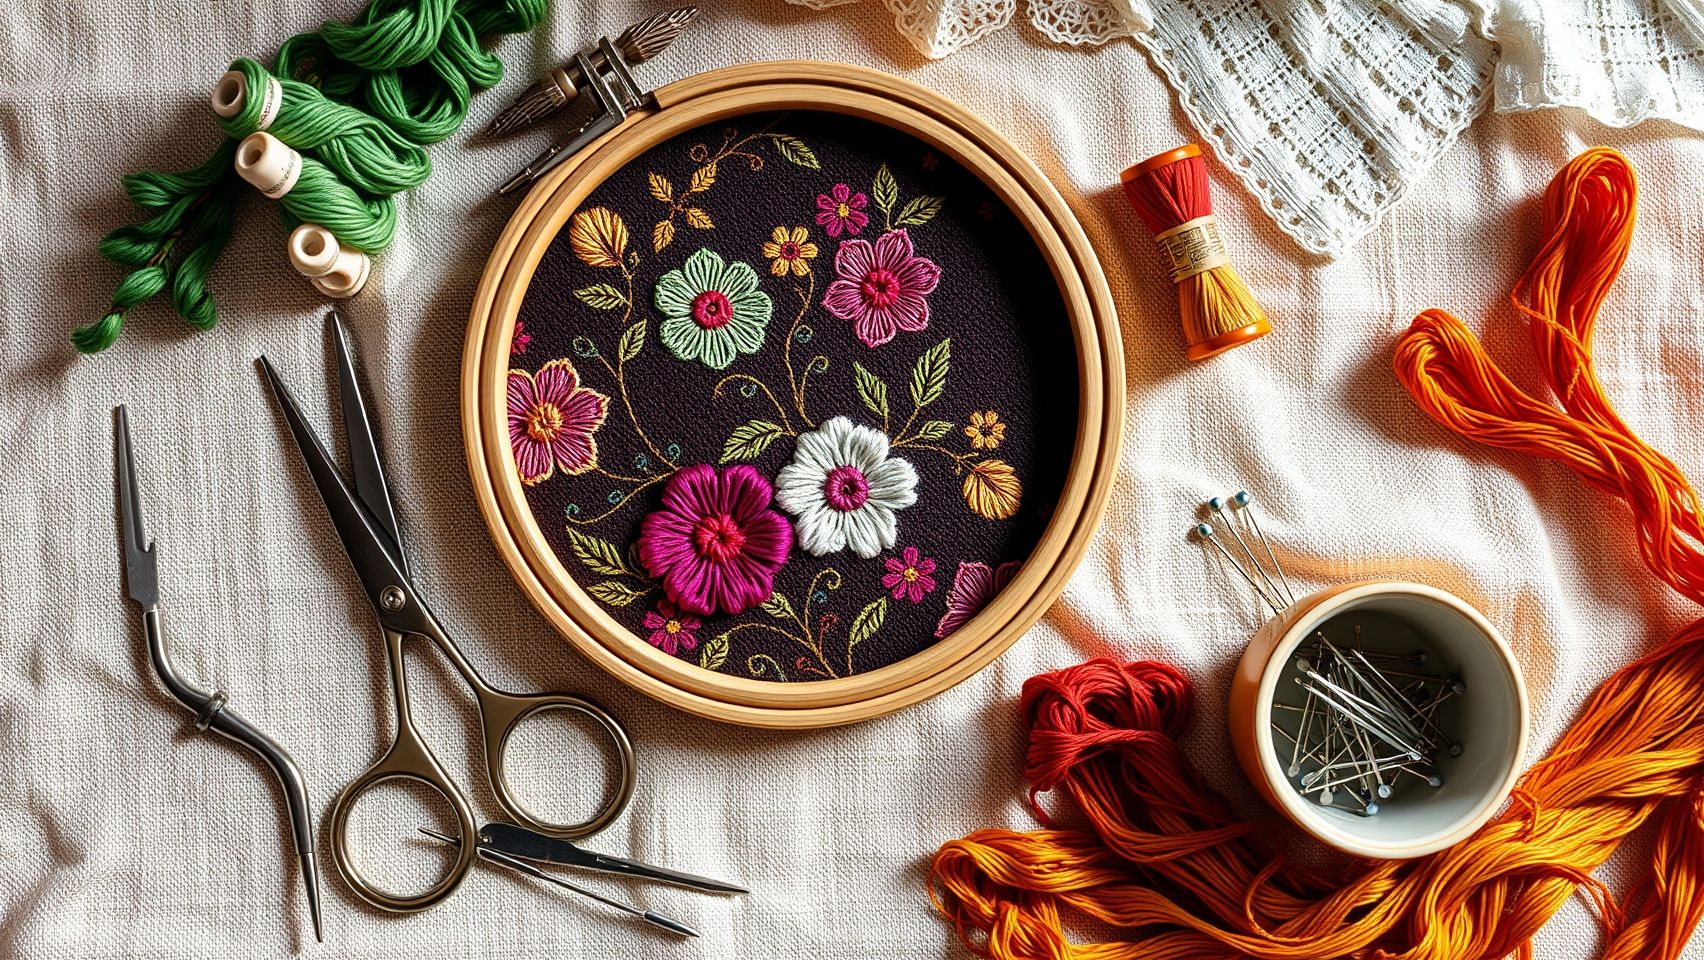
Choosing the Right Hoop for Your Embroidery Projects
Selecting the appropriate hoop is crucial for achieving professional-looking embroidery. The right hoop size and type depend on your fabric dimensions, design complexity, and the project’s purpose. Proper hooping ensures fabric stability, prevents misalignment, and reduces puckering, leading to cleaner stitches and a polished finished product.
In this essential guide, we’ll walk you through steps to select, install, and optimize hoops for various fabric sizes and designs, ensuring your projects come out flawless every time.
Step 1: Select the Correct Hoop Size
Start by assessing your project size. For small designs like logos or monograms, a 4×4 inch hoop (e.g., Janome’s 4×4 inch hoop priced at $30) is suitable. Larger projects such as home décor or apparel may require a 5×7 inch hoop, like the Brother 5×7 inch hoop priced at $35. Always measure your fabric and design to choose a hoop that provides ample space without excess slack. Using a hoop too small can cause design distortion, while overly large hoops may reduce fabric tension.
Step 2: Use Hoop Stabilizers Effectively
To enhance stability, hoop a stabilizer material along with your fabric. Follow these steps:
- Place the stabilizer on a flat surface and position your fabric over it.
- Lay the hoop on top, aligning the fabric and stabilizer within the inner ring.
- Gently stretch the fabric and stabilizer as you tighten the outer ring to keep everything taut. Ensure there are no wrinkles or slack, and the fabric is evenly tensioned.
- Double-check that the stabilizer is securely attached to prevent shifting during stitching.
This process minimizes puckering, especially on delicate or stretchy fabrics, and provides a stable surface for embroidery.
Step 3: Install and Optimize Your Hoop
Proper installation is key to preventing misalignment:
- Evenly tighten the hoop screws, ensuring equal tension on all sides. Loosen and retighten if necessary to achieve uniform tautness.
- Verify fabric tautness—your fabric should be smooth without waves or sags.
- Before stitching, do a test run on a scrap piece to check fabric positioning and tension.
Assess the visibility of your design area through the hoop; magnetic hoops can provide better grip and easier access, especially on thick or textured fabrics. Test different hoop types to find which offers the best grip and visibility for your projects.
Troubleshooting and Maintenance Tips
If you notice fabric shifting or puckering during embroidery:
- Re-hoop your fabric with additional stabilizer for more support.
- Adjust the tension by tightening the hoop screws gradually—over-tightening can cause fabric distortion.
- Regularly clean hoop surfaces to prevent fabric slips. Use a soft cloth to remove dust and residue.
Proper maintenance, including cleaning and correctly tensioning, ensures consistent results and prolongs your hoop’s lifespan.
Step-by-Step: Setting Up Your Embroidery Machine with Essential Accessories
Getting started with embroidery machine projects requires careful setup and the right accessories to ensure high-quality results. Proper preparation not only streamlines the process but also minimizes troubleshooting during stitching. This guide walks you through selecting essential accessories, preparing your machine, and performing initial test stitches to optimize your embroidery outcomes.
Investing in the right tools and following best practices can dramatically improve your craftsmanship, especially if you’re working with complex designs or specialty fabrics. Let’s dive into the step-by-step procedure to set up your embroidery machine confidently and achieve professional-looking results from the very first stitch.
Prepare Your Machine
Start by choosing the correct needle based on your fabric type. For lightweight fabrics, a size 75/11 needle is usually suitable, whereas thicker or denser materials benefit from a size 90/14 needle. For example, the Brother SE600 recommends a size 80/12 needle, which balances durability and precision. Install the needle correctly, ensuring it’s fully seated and locked in place. Attach the appropriate presser foot—whether a standard foot for basic embroidery or a specialized foot for metallic or textured threads—securely to provide stability during stitching. Regularly inspect your machine’s needle and presser foot before each project to prevent issues like skipped stitches or fabric damage.
Hoop the Fabric Properly
Next, hoop your fabric with precision. Use the preferred hoop that matches your design size to keep the fabric taut and flat. Tighten the hoop evenly to prevent puckering or shifting during embroidery. Applying a quality stabilizer—either tear-away or cut-away—can drastically enhance stitch quality, especially for complex or densely stitched designs. For delicate fabrics, choose a lighter stabilizer, while heavier fabrics benefit from sturdier support. Correct hooping is crucial for maintaining accuracy and preventing distortions in your finished project.
Thread the Machine Correctly
Use high-quality embroidery threads like Madeira or Sulky, which provide vibrant color and consistent tension. Carefully thread the machine, paying attention to the threading path and ensuring no knots or snags. Adjust the tension settings according to the fabric and thread type; a common starting point is tension set to 4 for most fabrics. Metallic threads, for instance, may require lower tension and slower speeds to avoid breakage. Regularly check thread paths and rethread if you notice skipped stitches or thread fraying, as these issues can compromise the final look.
Select a Test Design and Calibrate Settings
Choose a simple, small design for initial testing. This allows you to evaluate stitching quality, tension, and design placement. Run the test stitch and observe the results carefully. Adjust stitch density—such as satin stitch at 0.4 inch density—and modify speed settings, often slower for metallic or textured threads. Fine-tuning these parameters guarantees cleaner stitches and prevents thread breakage. Document your optimal settings for future projects, reducing setup time and ensuring consistency across multiple designs.
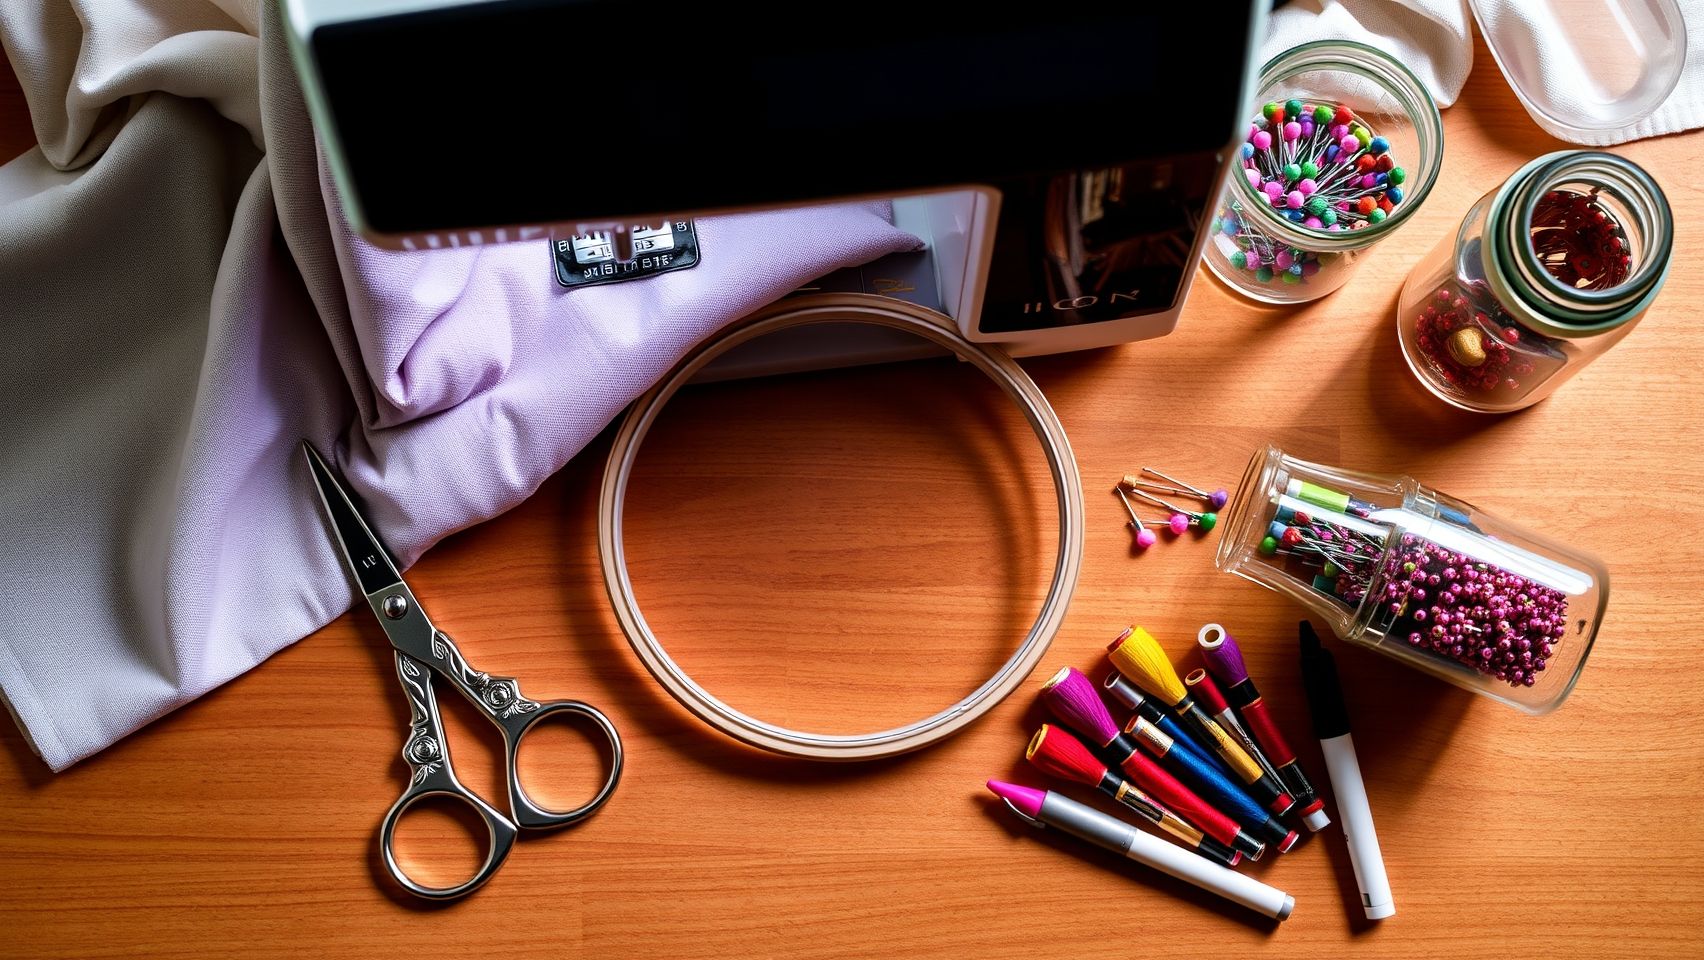
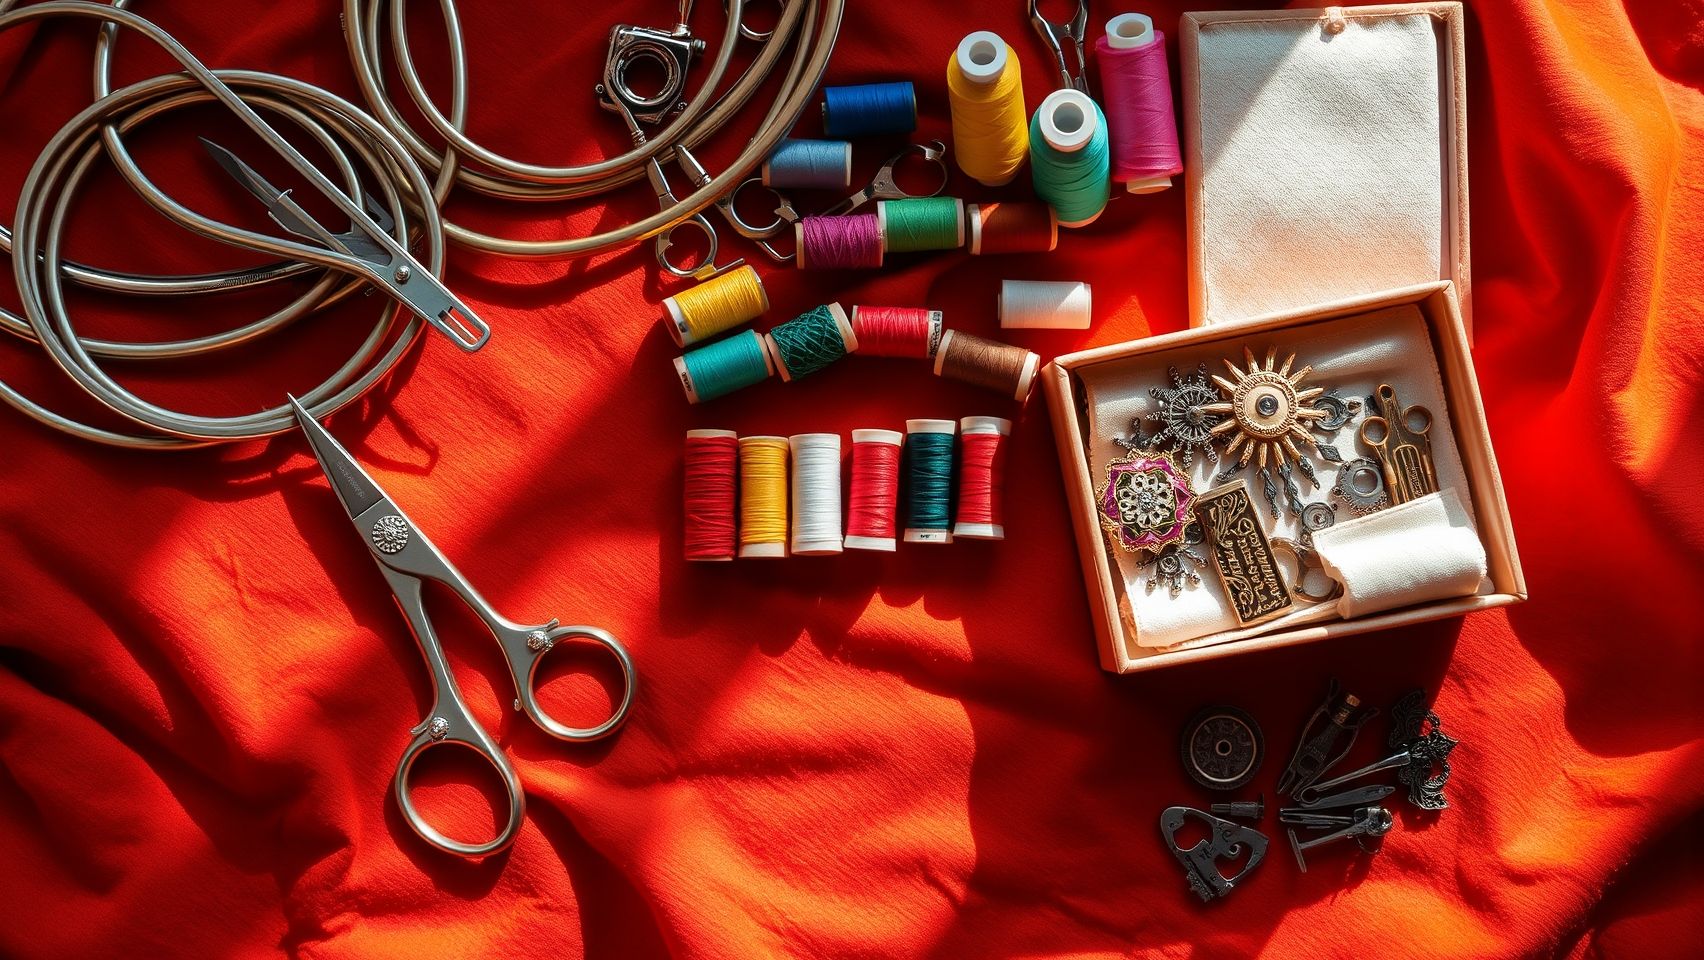
Tools and Accessories that Elevate Your Embroidery Craft
Creating professional-quality embroidery projects requires more than just a reliable machine; it demands the right set of tools and accessories to enhance precision, durability, and overall finish. Investing in high-quality items ensures your craftsmanship stands out and reduces the likelihood of errors or delays. This section details essential tools from scissors to software, providing practical tips to incorporate them effectively into your embroidery workflow.
High-Quality Scissors for Precision Cutting
Accurate trimming is crucial for clean edges and professional results. The Gingher embroidery scissors or Montolit embroidery scissors in the $20-$40 range are popular among experts for their sharpness and precision. Always keep dedicated scissors for fabric and threads to avoid dulling blades, and store them in a protective case to maintain their sharp edge. Precise trimming prevents fabric puckering and ensures smooth, polished designs.
Stabilizers for Every Fabric and Design
Stabilizers provide the foundation for embroidery, preventing fabric distortion and puckering. The choice among tearaway, cutaway, or water-soluble stabilizers depends on your project. For example, tearaway stabilizers are perfect for lightweight fabrics, while cutaway stabilizers suit dense designs. Water-soluble stabilizers are ideal for delicate or layered work. Brands like Sulky offer stabilizers ranging from $20-$50, and selecting the right one is key to achieving crisp, detailed stitches without fabric damage.
Design Software for Digitizing Patterns
For creating or customizing designs, software like Hatch Embroidery (around $300) or Wilcom Deco Studio provides robust tools for digitizing and editing patterns. To implement these tools, export your designs in formats compatible with your embroidery machine, typically PES or DST. Import files via USB or direct cable connection, ensuring your machine settings match the design specifications. Step-by-step tutorials are available on software websites to help streamline this process and maximize your design potential.
Threads for Vibrant, Consistent Results
Eco-friendly threads such as Nolting or Sulky not only help the environment but also deliver rich, consistent color coverage. Nolting threads, priced around $8 per 100 yards, are known for their durability and vibrant hues. Use high-quality threads compatible with your fabric and machine to prevent breakage and color fading. Pre-wound bobbins can also save time and maintain tension consistency, which is vital for professional-looking embroidery.
Lighting and Magnification for Detail Work
Proper lighting is vital for precise stitching, especially in detailed projects. LED helpers and magnifiers improve visibility and reduce eye strain. LED lamps with adjustable brightness can be positioned directly over your work area, while magnifiers with built-in lights help with tiny stitches or complex details. Incorporating these tools into your workspace ensures accuracy and reduces errors caused by poor visibility.
Organizers to Keep Tools Neat and Accessible
Maintaining an organized workspace with compartmentalized bags and clear storage drawers simplifies your workflow. Use stackable drawers for thread spools and small tools like needles, bobbins, and scissors. Label compartments for quick identification, saving you time and preventing tool misplacement. An organized space not only boosts efficiency but also keeps your tools in optimal condition for consistent results.
Comparison of Embroidery Machine Accessories: Value vs Cost
Choosing the right embroidery machine accessories can significantly impact the quality and efficiency of your projects. With a wide range of options available, understanding their value and cost-effectiveness is essential for making informed decisions. This section provides data-driven comparisons, including price points, durability, and compatibility, to help you maximize your investment over the next 30 days.
Price Comparison of Popular Hoop Sizes and Brands
Hoops are fundamental to maintaining project stability during embroidery, but prices vary widely across sizes and brands. For example, a standard 4×4-inch hoop by Janome typically costs around $25, while larger 5×7-inch models may range from $40 to $60 depending on the brand and feature set. Premium brands like Brother or Bernina often offer higher durability ratings, with prices reflecting their reinforced build and compatibility assurances. Here’s a snapshot of top-market options:
Magnetic Versus Standard Hoops: User Reviews and Project Stability
Magnetic hoops have gained popularity for their ease of setup and consistent tension, especially praised in user reviews for their quick application and minimal fabric slippage. However, some users report that magnetic hoops may not provide the same stability level for detailed or dense designs, risking slight misalignments. Standard hoops, in contrast, tend to offer better long-term stability and are often more compatible with older machine models but may require more effort to clamp and align fabric securely.
Beginner vs. Professional Presser Feet: Features and Costs
The presser foot is a key tool that influences stitch quality and ease of use. Beginner kits, such as Janome’s 4-piece set at around $60, provide versatile options that accommodate basic to intermediate projects. These sets cover multiple applications, including zipper, overcast, and rolled hems, reducing the need for purchasing individual feet. Professional presser feet, often costing over $100 each, offer enhanced features like precise fabric control and specialty stitches, but at a higher price point.
Overall, investing in a comprehensive presser foot kit provides flexibility for beginners, while professionals may prefer specialized feet to achieve precise finishes on complex projects. The decision hinges on project frequency and the level of detail required.
Cost-Benefit of Multifunctional Accessory Kits Versus Individual Tools
Multifunctional accessory kits, such as the Janome all-in-one set priced around $60, often deliver higher ROI by combining multiple tools into one package. These kits reduce the need for multiple individual purchases, saving both time and money, and are suitable for hobbyists and semi-professionals. Conversely, purchasing individual tools allows for selecting only necessary items, which can be more economical for occasional users or targeted projects.
Performance Metrics: Tension Stability, Ease of Use, and Longevity
Real user feedback indicates that accessories with high tension stability and ease of use are preferred, particularly for dense or intricate projects. Durable accessories, which maintain performance after multiple uses, justify a higher initial investment. Brands with rigorous quality control tend to offer longer-lasting tools, reducing replacement costs and downtime.
In conclusion, assessing accessories based on current market statistics and professional insights ensures you select tools that offer the most value—balancing cost, durability, and project requirements—within your typical usage pattern over the next 30 days.
Storage Solutions for Your Embroidery Tools and Accessories
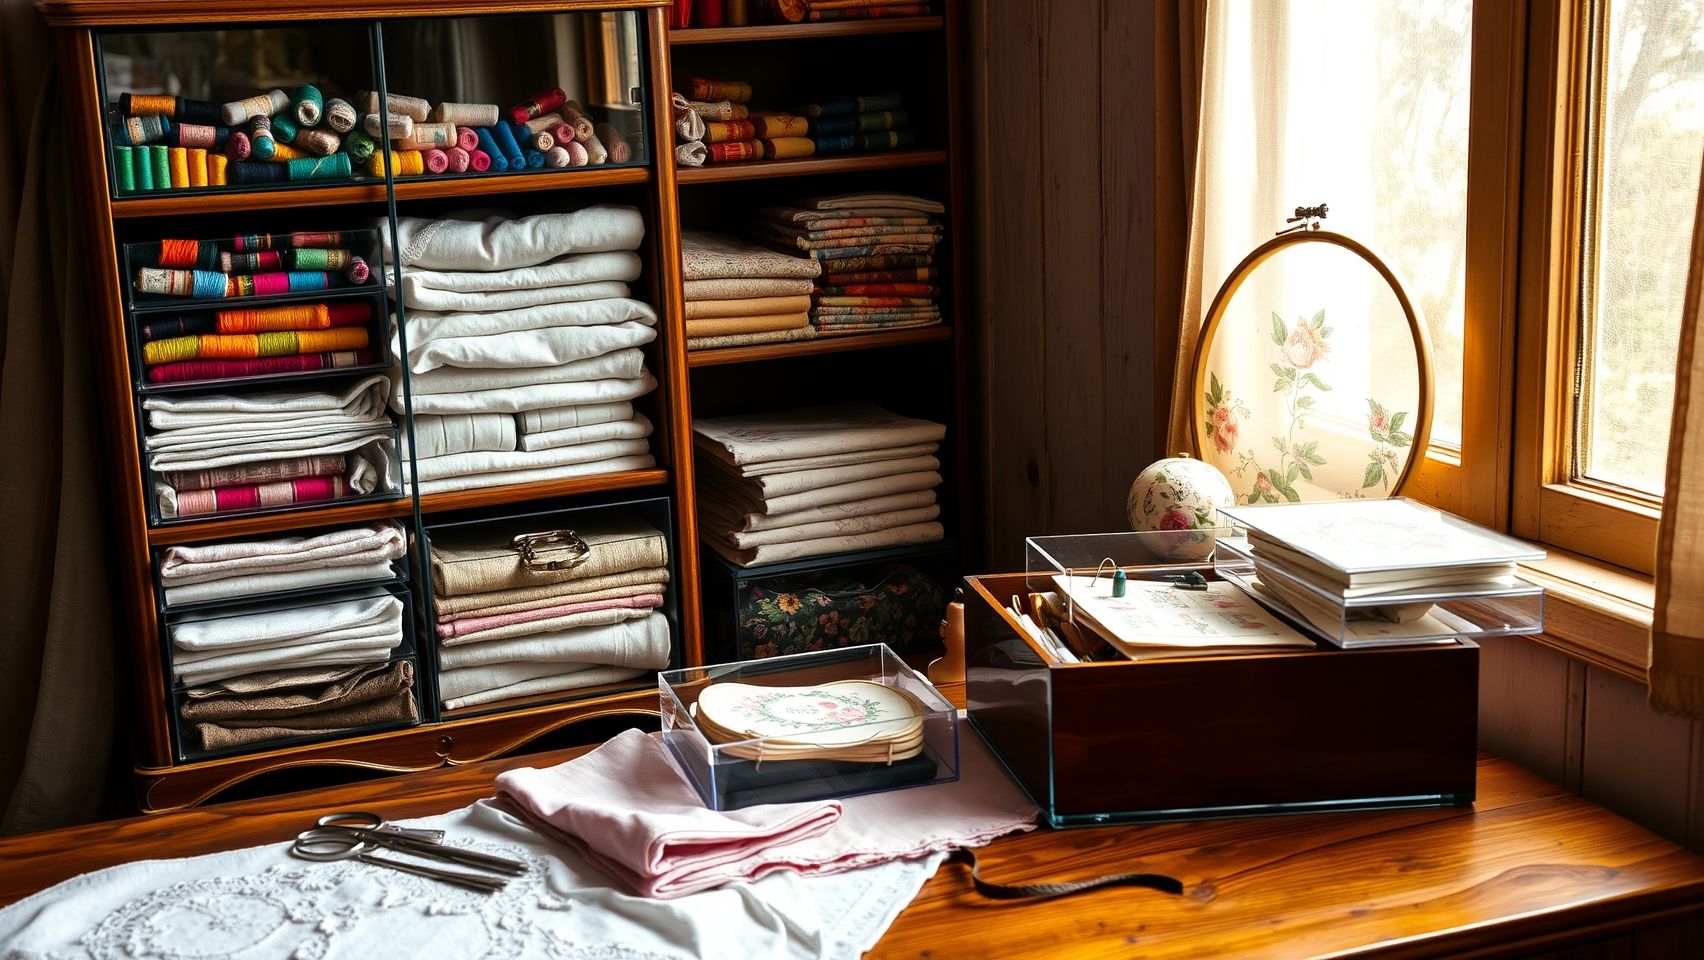
Organized storage is crucial for maintaining the quality and accessibility of your embroidery tools. Efficient systems not only save space but also streamline your workflow, helping you find supplies quickly and prevent damage. Investing in the right storage solutions can significantly enhance your embroidery experience within just 30 days.
Below are practical storage methods, step-by-step setup tips, and product recommendations to help you stay organized:
Use Stackable, Labeled Storage Drawers
Stackable storage drawers are perfect for categorizing threads, needles, and stabilizers. Label each drawer clearly for quick identification, which minimizes clutter and reduces search time during projects. Consider Sorby labeled storage bins, which cost around $25, as a reliable option. Ensure drawers are shallow enough to see contents at a glance and stack securely to optimize space.
Dedicated Tool Cases with Compartments
Invest in dedicated tool cases with compartments, such as Snap-N-Store, priced at approximately $30. These cases are designed to hold scissors, hoops, and software CDs, preventing damage and loss. Organize tools by size and type within each compartment, and keep frequently used items at the top for easy access. Regularly clean and disinfect tools stored in these cases to maintain their longevity.
Wall-Mounted Pegboards with Hooks
Wall-mounted pegboards are ideal for showcasing frequently used accessories, allowing easy reach and improving workflow. Use hooks and small bins to hold items like bobbins, rulers, or small tools. Implement a clear labeling system to identify items quickly. Pegboards also help save table space and keep your workspace visually tidy. Updating hooks or adding new ones periodically can accommodate evolving needs.
Portable Storage Totes for On-the-Go Projects
For craft fairs or embroidery on the move, portable storage totes are essential. Choose durable totes with multiple compartments to carry threads, needles, and small tools securely. Look for waterproof or padded options to protect delicate items. Having a dedicated tote allows for quick setup and pack-up, ensuring you stay organized regardless of location.
Routine Maintenance and Digital Organization
Maintain your storage areas by regularly cleaning and disinfecting tools and surfaces to prevent damage and ensure hygiene. Additionally, develop a digital archive backup system for patterns and files, allowing for easy retrieval and organization. Use folders or cloud storage solutions to categorize designs by projects, making your workflow more efficient.
Implementing these organized storage solutions can dramatically improve your embroidery projects’ quality and efficiency within a month, helping you craft with confidence and ease.
Conclusion
Embarking on your embroidery journey becomes significantly more rewarding when you equip yourself with the right accessories. Choosing quality hoops, specialized feet, durable needles, and organized storage solutions can elevate your projects from good to professional-looking within weeks. Staying informed about the latest trends and tools is also crucial—recent industry insights highlight a rising demand for innovative embellishment techniques and versatile equipment that enhance creativity.
Remember, prioritize functionality and quality over price to ensure lasting results. Start evaluating your current tools today, invest in essential accessories, and don’t hesitate to experiment with different setups. The key is to adapt and find what best suits your style and projects. Share your progress and tips in online craft communities to inspire others and continue growing your skills.
Your advanced embroidery skills await—take action now and transform your craft palette!
COATS Dual Duty All-Purpose Thread, 400 Yards/1 Spool of Yarn, Black
$5.72 (as of July 10, 2025 07:59 GMT -04:00 - More infoProduct prices and availability are accurate as of the date/time indicated and are subject to change. Any price and availability information displayed on [relevant Amazon Site(s), as applicable] at the time of purchase will apply to the purchase of this product.)
New brothread 40 Brother Colors Polyester Embroidery Machine Thread Kit 500M (550Y) each Spool for Brother Babylock Janome Singer Pfaff Husqvarna Bernina Embroidery and Sewing Machines
$20.78 (as of July 10, 2025 07:59 GMT -04:00 - More infoProduct prices and availability are accurate as of the date/time indicated and are subject to change. Any price and availability information displayed on [relevant Amazon Site(s), as applicable] at the time of purchase will apply to the purchase of this product.)
72Pcs 36 Colors Prewound Bobbins and Thread Spools for Hand & Machine Sewing, Emergency and Travel, DIY and Home, 36 Colors 400 Yards per Polyester Thread Spools
$14.99 (as of July 10, 2025 07:59 GMT -04:00 - More infoProduct prices and availability are accurate as of the date/time indicated and are subject to change. Any price and availability information displayed on [relevant Amazon Site(s), as applicable] at the time of purchase will apply to the purchase of this product.)
New brothread 8 Colors Luminary Glow in The Dark Embroidery Machine Thread Kit 30WT 500M(550Y) Each Spool for Embroidery, Quilting, Sewing
$18.39 (as of July 11, 2025 05:32 GMT -04:00 - More infoProduct prices and availability are accurate as of the date/time indicated and are subject to change. Any price and availability information displayed on [relevant Amazon Site(s), as applicable] at the time of purchase will apply to the purchase of this product.)
White Serger Thread, All-Purpose Thread for Sewing, Polyester, 4 Cones of 3000 Yards Each Spool for Sewing Machine
$11.04 (as of July 10, 2025 07:59 GMT -04:00 - More infoProduct prices and availability are accurate as of the date/time indicated and are subject to change. Any price and availability information displayed on [relevant Amazon Site(s), as applicable] at the time of purchase will apply to the purchase of this product.)
Industrial Sewing Machine Juki DDL-8700 Lockstitch Sewing Machine with Ergonomic Chair + Servo Motor + Table Stand Cut Juki DDL8700 Combo + LED Lamp Commercial Grade Sewing Machine
$909.00 (as of July 10, 2025 13:06 GMT -04:00 - More infoProduct prices and availability are accurate as of the date/time indicated and are subject to change. Any price and availability information displayed on [relevant Amazon Site(s), as applicable] at the time of purchase will apply to the purchase of this product.)
Elastic Bands for Sewing White 1 Inch 12 Yard High Elasticity Knit Spool Sewing Band for Waistbands Pants Clothes and Crafts DIY, Airisoer
$5.06 (as of July 11, 2025 11:04 GMT -04:00 - More infoProduct prices and availability are accurate as of the date/time indicated and are subject to change. Any price and availability information displayed on [relevant Amazon Site(s), as applicable] at the time of purchase will apply to the purchase of this product.)
Brother SE700 Embroidery & Sewing Machine with 90 Spools & Accessories
$629.99 (as of July 10, 2025 13:07 GMT -04:00 - More infoProduct prices and availability are accurate as of the date/time indicated and are subject to change. Any price and availability information displayed on [relevant Amazon Site(s), as applicable] at the time of purchase will apply to the purchase of this product.)
Brother SE700 Sewing and Embroidery Machine, Wireless LAN Connected, 135 Built-in Designs, 103 Built-in Stitches, Computerized, 4" x 4" Hoop Area, 3.7" Touchscreen Display, 8 Included Feet, White
$499.99 (as of July 10, 2025 13:07 GMT -04:00 - More infoProduct prices and availability are accurate as of the date/time indicated and are subject to change. Any price and availability information displayed on [relevant Amazon Site(s), as applicable] at the time of purchase will apply to the purchase of this product.)