Paper Embroidery: Stitching Art Beyond Fabric
Imagine transforming ordinary paper into extraordinary art, adorned with vibrant threads and intricate designs. Forget the traditional confines of fabric; paper embroidery is a captivating craft that blends the delicate nature of paper with the textural richness of embroidery. It’s a surprising and delightful way to add a unique, handcrafted touch to cards, journals, wall art, and more. Ready to explore this fascinating intersection of art forms? This blog post will guide you through the essential techniques and inspire you with project ideas, unlocking a new dimension in your creative journey.
Whether you’re a seasoned stitcher looking for a fresh challenge or a paper enthusiast eager to experiment, paper embroidery offers a rewarding experience. We’ll delve into selecting the right materials, mastering fundamental stitches suitable for paper, and exploring diverse project possibilities. Prepare to be amazed by the beauty and versatility of paper embroidery!
Choosing the Right Paper: Your Canvas Matters
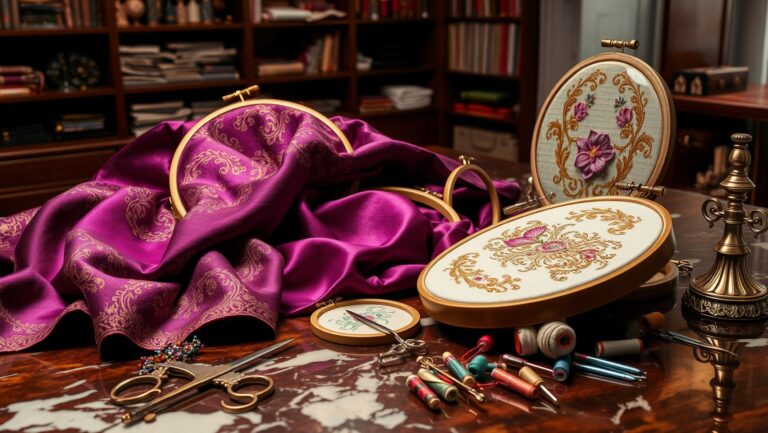
The foundation of any successful paper embroidery project is, of course, the paper itself. Selecting the right type is crucial for achieving clean stitches and preventing tearing. Cardstock is generally the preferred choice due to its thickness and durability. Look for cardstock with a smooth surface to allow the needle to glide easily through the fibers. Avoid textured or heavily coated papers, as they can be difficult to pierce and may cause the thread to snag. Weight is also a key consideration; a weight of 65lb or higher is recommended for optimal results. Heavier weight papers stand up better to the repeated piercing and pulling of the thread.
Beyond cardstock, watercolor paper can also be a good option, especially for projects where you want to combine embroidery with painting or drawing. However, be mindful of the paper’s absorbency and adjust your stitching accordingly. As Mary Corbet of Needle ‘n Thread emphasizes, “The key to successful embroidery lies in understanding your materials and adapting your techniques to suit their properties.” (Needle ‘n Thread). Experimenting with different paper types is encouraged, but always test a small area first to ensure it can withstand the stitching process without tearing or buckling.
Recycled paper can be used, but ensure it’s free of large fibers or impurities that might impede the needle. Ultimately, the ideal paper will depend on the specific project and desired aesthetic. Consider the color, texture, and weight of the paper in relation to the thread you plan to use for a harmonious and visually appealing outcome. Remember to avoid papers that are too thin or brittle, as they are likely to tear easily during the stitching process.
Essential Tools and Materials for Paper Embroidery
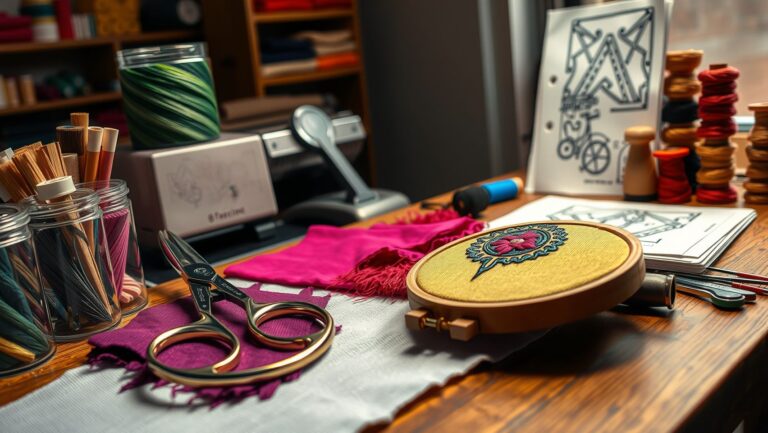
Beyond paper, a few essential tools are needed to embark on your paper embroidery adventure. A sharp needle is paramount, and specifically designed embroidery needles are often the best choice. These needles typically have a larger eye, making threading easier, and a sharp point that cleanly pierces the paper without causing excessive tearing. Needles marketed as “tapestry needles” or “crewel needles” are good choices. You’ll also need embroidery floss, which comes in a wide array of colors and materials. Cotton floss is a popular and versatile option, but you can also experiment with silk, metallic, or even wool threads for different effects.
A piercing tool, such as a needle tool or a pin, is essential for creating the holes through which you’ll stitch. Using a template with pre-marked holes will ensure consistent and even spacing. This helps prevent tearing and creates a neat, professional finish. Consider using a self-healing cutting mat beneath your paper while piercing to protect your work surface. Small scissors, specifically designed for embroidery, are helpful for trimming threads close to the paper surface. As Erica Wilson, a renowned embroidery artist, once said, “Good tools are the key to any successful craft.” (Erica Wilson). The right tools not only make the process easier but also contribute to a more polished and refined final product.
Finally, consider using a light box or a well-lit area to make it easier to see the pre-marked holes. This will reduce eye strain and improve accuracy. You may also find it helpful to use a pair of tweezers to grip and pull the thread through tight spaces. Remember to keep your tools clean and sharp to ensure optimal performance and prevent damage to your paper.
Mastering Basic Stitches for Paper Embroidery
While many embroidery stitches can be adapted for paper, some are particularly well-suited for this medium. The back stitch is a fundamental stitch that creates a solid line and is ideal for outlining shapes or adding details. The running stitch is another simple and versatile stitch that can be used for creating dashed lines or filling in areas. The blanket stitch is a decorative stitch that adds a textured edge and is perfect for framing your design. French knots, while slightly more challenging, add a beautiful dimensional element to paper embroidery.
When stitching on paper, it’s important to use a gentle and controlled approach. Avoid pulling the thread too tightly, as this can cause the paper to tear. Instead, work slowly and deliberately, ensuring that each stitch is secure but not overly stressed. The goal is to create a balanced tension that enhances the design without compromising the integrity of the paper. According to “The Embroidery Stitch Bible,” “The key to mastering any stitch is practice and patience.” (Christen Brown). Don’t be discouraged if your first attempts aren’t perfect; with practice, you’ll develop a feel for the proper tension and technique.
Experiment with different thread colors and thicknesses to create a variety of effects. Consider using contrasting colors to make your stitches stand out or blending colors to create a more subtle and harmonious look. You can also vary the spacing between stitches to create different textures and patterns. Remember to secure your thread ends on the back of the paper with a small knot or a piece of tape to prevent them from unraveling. By mastering these basic stitches and experimenting with different variations, you can unlock a world of creative possibilities in paper embroidery.
Creating Templates and Transferring Designs
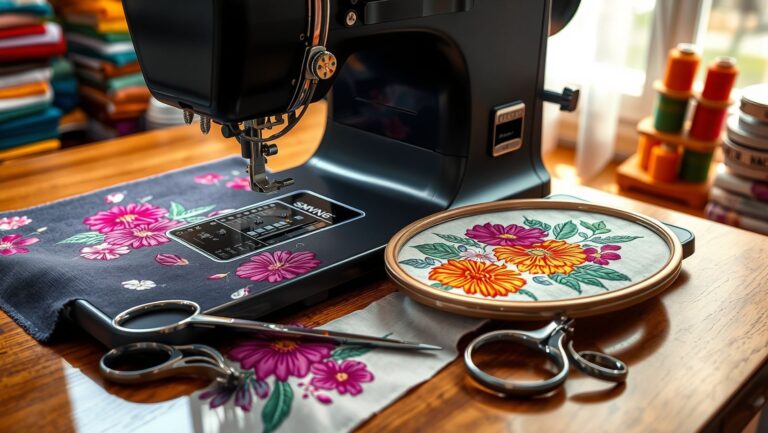
Templates are essential for creating precise and consistent paper embroidery designs. You can create your own templates using drawing software or find pre-designed templates online. Once you have your template, you’ll need to transfer it to the paper. There are several methods for doing this, including tracing, using transfer paper, or printing directly onto the paper (if your printer supports the weight and thickness of the paper). Tracing is a simple and effective method, especially for simple designs. Simply place the template over the paper and trace the outline using a pencil or a fine-tipped marker.
Transfer paper allows you to transfer more complex designs without having to trace them directly. Place the transfer paper between the template and the paper, then trace the design with a pencil or a stylus. The pressure will transfer the design onto the paper. When using transfer paper, be sure to use a light touch to avoid damaging the paper. If you have a printer that can handle cardstock, you can print the design directly onto the paper. This is the most accurate method, but it’s important to test a small area first to ensure that the ink doesn’t bleed or smudge. As author and crafting expert Cath Kidston notes, “Preparation is key to a successful project.” (Cath Kidston). Taking the time to create a well-defined template and transfer it accurately will save you time and frustration in the long run.
After transferring the design, use a piercing tool to create the holes along the lines of the template. Ensure that the holes are evenly spaced and aligned with the design. Using a template with pre-marked holes will simplify this process. Remember to use a light box or a well-lit area to make it easier to see the design and the holes. Once the holes are pierced, you’re ready to start stitching!
Project Ideas to Inspire Your Paper Embroidery
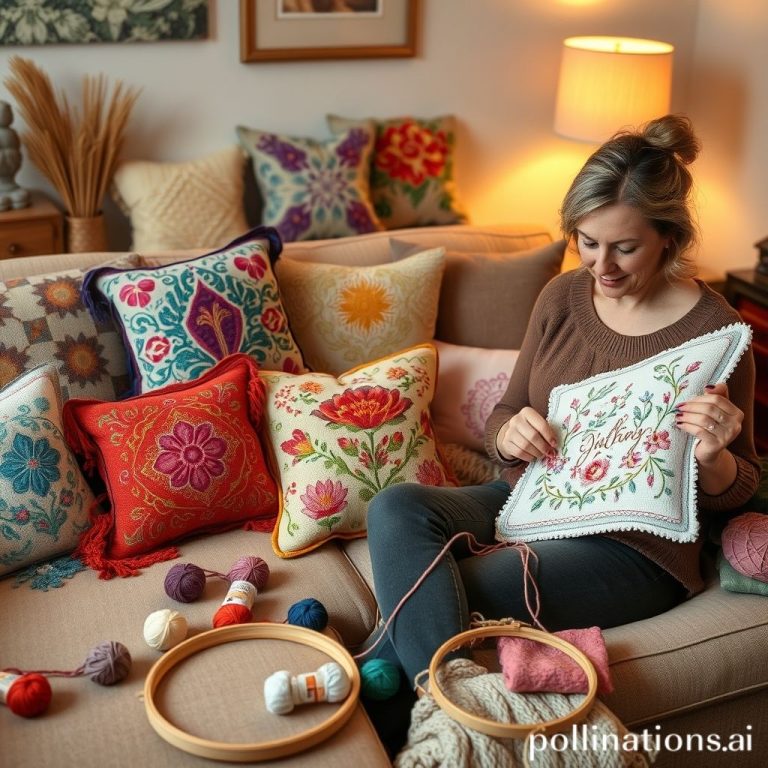
The possibilities for paper embroidery projects are endless! Greeting cards are a classic choice, allowing you to add a personal and handcrafted touch to your messages. Create birthday cards, thank you notes, or holiday greetings with intricate embroidered designs. Bookmarks are another practical and charming project, adding a touch of elegance to your reading experience. Embroider a floral design, a geometric pattern, or a personalized monogram onto a piece of cardstock and attach it to a ribbon or tassel. Gift tags are a simple and festive way to embellish presents. Use small pieces of cardstock to create unique and personalized tags adorned with embroidered motifs.
Framed art is a more ambitious but incredibly rewarding project. Create intricate embroidered designs on larger pieces of paper and frame them for display. You can create abstract patterns, floral arrangements, or even portraits. Journal covers offer a unique way to personalize your notebooks and journals. Embroider a design onto a piece of cardstock and attach it to the cover of your journal. As Martha Stewart, the queen of crafting, always advises, “The best projects are those that reflect your personal style and creativity.” (Martha Stewart). Let your imagination run wild and explore the endless possibilities of paper embroidery.
Consider creating paper-embroidered ornaments for your Christmas tree or other special occasions. You can use cookie cutters as templates to create festive shapes and embellish them with embroidered details. Shadow boxes provide a unique way to showcase your paper embroidery creations. Layer different pieces of embroidered paper within a shadow box to create a dimensional and visually stunning display. Don’t be afraid to experiment with different techniques and materials to create your own unique and personalized paper embroidery projects. The only limit is your imagination!
Troubleshooting Common Paper Embroidery Problems
Like any craft, paper embroidery can present its share of challenges. One common problem is tearing. This typically occurs when the paper is too thin, the thread is pulled too tightly, or the holes are too close together. To prevent tearing, use a heavier weight paper, avoid pulling the thread too tightly, and ensure that the holes are spaced adequately. If tearing does occur, you can try reinforcing the area with a small piece of tape on the back of the paper.
Another common issue is thread snagging. This can happen if the paper is too textured or the needle is not sharp enough. To prevent thread snagging, use a smooth paper and a sharp needle. You can also try waxing the thread to help it glide more easily through the paper. According to “Embroidery for Dummies,” “Patience is essential when dealing with delicate materials like paper.” (Suzanne McNeill). Don’t rush the process, and take your time to address any problems that arise.
If you find that your stitches are uneven or inconsistent, it may be due to inconsistent hole spacing or tension. To improve stitch consistency, use a template with pre-marked holes and pay attention to your tension. Try to maintain a consistent tension throughout the project to create a uniform and professional finish. Remember to practice regularly to refine your technique and develop a feel for the proper tension and spacing. With practice and patience, you’ll be able to overcome these common challenges and create beautiful paper embroidery projects.
Taking Paper Embroidery to the Next Level
Once you’ve mastered the basics of paper embroidery, you can start exploring more advanced techniques and creative possibilities. Consider incorporating different types of embellishments, such as beads, sequins, or buttons, to add texture and dimension to your designs. You can also experiment with different color palettes and thread combinations to create unique and visually striking effects. Layering different pieces of embroidered paper can create depth and complexity.
Another way to elevate your paper embroidery is to combine it with other art forms, such as painting, drawing, or collage. Create a watercolor background and then add embroidered details on top. Or, use paper embroidery to embellish a collage or a mixed media piece. As designer and author Debbie Shore suggests, “Don’t be afraid to experiment and push the boundaries of your craft.” (Debbie Shore). The more you explore and experiment, the more you’ll discover new and exciting ways to express your creativity through paper embroidery.
Consider exploring different cultural traditions of embroidery and incorporating their techniques and motifs into your paper embroidery projects. Research different embroidery styles from around the world and adapt them to your own unique aesthetic. By pushing the boundaries of the craft and exploring new possibilities, you can truly take your paper embroidery to the next level and create stunning and original works of art.
Conclusion: A Stitch in Paper Saves Fine Art
Paper embroidery is a captivating craft that offers a unique and rewarding creative outlet. By combining the delicate nature of paper with the textural richness of embroidery, you can transform ordinary materials into extraordinary art. Throughout this blog post, we’ve explored the essential techniques, tools, and project ideas to get you started on your paper embroidery journey. From selecting the right paper and mastering basic stitches to creating templates and troubleshooting common problems, you now have the knowledge and skills to embark on your own paper embroidery adventures.
Remember that the key to success in paper embroidery is practice, patience, and a willingness to experiment. Don’t be afraid to try new techniques, explore different materials, and push the boundaries of your creativity. The more you practice, the more comfortable you’ll become with the process, and the more confident you’ll be in your ability to create beautiful and unique paper embroidery projects. Whether you’re creating greeting cards, bookmarks, framed art, or journal covers, paper embroidery allows you to add a personal and handcrafted touch to your creations.
So, grab your needle, thread, and paper, and let your imagination run wild. Embrace the joy of stitching on paper and discover the endless possibilities that await you. Paper embroidery is not just a craft; it’s a form of self-expression, a way to connect with your creativity, and a means to create something beautiful and meaningful. As you continue your journey, remember to share your creations with others and inspire them to discover the magic of paper embroidery. Happy stitching!
10 Skeins Black Embroidery Floss, 8m Cotton Embroidery Floss - Cross Stitch Thread Set
$3.79 (as of June 22, 2025 13:06 GMT -04:00 - More infoProduct prices and availability are accurate as of the date/time indicated and are subject to change. Any price and availability information displayed on [relevant Amazon Site(s), as applicable] at the time of purchase will apply to the purchase of this product.)
Simthread Brother 40 Colors 40 Weight Polyester Embroidery Machine Thread Kit 550Y(500M) for Brother Babylock Janome Singer Husqvarna Bernina Embroidery and Sewing Machines
$27.99 (as of June 24, 2025 05:32 GMT -04:00 - More infoProduct prices and availability are accurate as of the date/time indicated and are subject to change. Any price and availability information displayed on [relevant Amazon Site(s), as applicable] at the time of purchase will apply to the purchase of this product.)
122 skeins Embroidery Floss - Embroidery Thread - Friendship Bracelet String for Cross Stitch, Hand Embroidery, String Art
$9.99 (as of June 23, 2025 07:58 GMT -04:00 - More infoProduct prices and availability are accurate as of the date/time indicated and are subject to change. Any price and availability information displayed on [relevant Amazon Site(s), as applicable] at the time of purchase will apply to the purchase of this product.)
Simthread 144pcs Embroidery Pre-Wound Bobbins Thread, Class 15 Type A Size SA156, Polyester White 60 wt, Bernina Pfaff Ambition BabyLock Brother Embroidery and Sewing Machines Plastic Side
$24.99 (as of June 24, 2025 05:32 GMT -04:00 - More infoProduct prices and availability are accurate as of the date/time indicated and are subject to change. Any price and availability information displayed on [relevant Amazon Site(s), as applicable] at the time of purchase will apply to the purchase of this product.)
Connecting Threads White 100% Cotton Thread for Sewing, Quilting, and Crafting - 50-Weight - 1200 Yard Large Spool (White)
$8.99 (as of June 23, 2025 07:58 GMT -04:00 - More infoProduct prices and availability are accurate as of the date/time indicated and are subject to change. Any price and availability information displayed on [relevant Amazon Site(s), as applicable] at the time of purchase will apply to the purchase of this product.)
JUNING Sewing Kit with Case Portable Sewing Supplies for Home Traveler, Adults, Beginner, Emergency, Contains Thread, Scissors, Needles,Measuring Tape
$5.49 (as of June 23, 2025 11:03 GMT -04:00 - More infoProduct prices and availability are accurate as of the date/time indicated and are subject to change. Any price and availability information displayed on [relevant Amazon Site(s), as applicable] at the time of purchase will apply to the purchase of this product.)
New brothread - Single Huge Spool 5000M Each Polyester Embroidery Machine Thread 40WT for Commercial and Domestic Machines - Black
$7.99 (as of June 23, 2025 11:03 GMT -04:00 - More infoProduct prices and availability are accurate as of the date/time indicated and are subject to change. Any price and availability information displayed on [relevant Amazon Site(s), as applicable] at the time of purchase will apply to the purchase of this product.)
Juki DDL-8700 Industrial Lockstitch Servo Motor, Table DDL8700 LED Lamp.Assembly Required. DIY
$898.88 (as of June 23, 2025 13:06 GMT -04:00 - More infoProduct prices and availability are accurate as of the date/time indicated and are subject to change. Any price and availability information displayed on [relevant Amazon Site(s), as applicable] at the time of purchase will apply to the purchase of this product.)
Juki DDL-8700-H Industrial Straight Stitch Sewing Machine, K.D table & Servo Motor DIY
$882.39 (as of June 23, 2025 13:06 GMT -04:00 - More infoProduct prices and availability are accurate as of the date/time indicated and are subject to change. Any price and availability information displayed on [relevant Amazon Site(s), as applicable] at the time of purchase will apply to the purchase of this product.)