Stitch Style: Embroidered Kitchen Towels Made Easy
Ever looked at a beautifully embroidered kitchen towel and thought, “I could never do that”? Think again! Adding a touch of handmade charm to your kitchen doesn’t require years of experience or fancy equipment. In fact, transforming plain, ordinary kitchen towels into personalized masterpieces is surprisingly simple and incredibly rewarding. Imagine the delight of displaying (or gifting!) towels adorned with your own unique designs, adding a pop of color and personality to a space that’s often overlooked. This isn’t just about practicality; it’s about infusing everyday objects with creativity and love.
In this tutorial, we’ll break down the embroidery process into manageable steps, even if you’re a complete beginner. We’ll start with choosing the right materials, from the best types of towels to essential embroidery floss and needles. Then, we’ll explore a few beginner-friendly embroidery stitches that will form the foundation of your designs. Next, we’ll guide you through transferring your chosen pattern onto the fabric and setting up your embroidery hoop. Finally, we’ll offer tips and tricks for creating a polished finished product, leaving you with towels you’ll be proud to display. Get ready to unleash your inner artist and transform your kitchen with these delightful embroidered creations!
Choosing the Perfect Towels and Embroidery Supplies
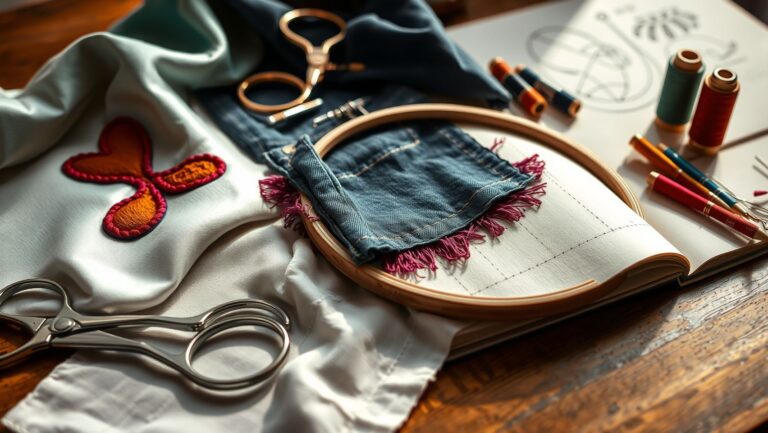
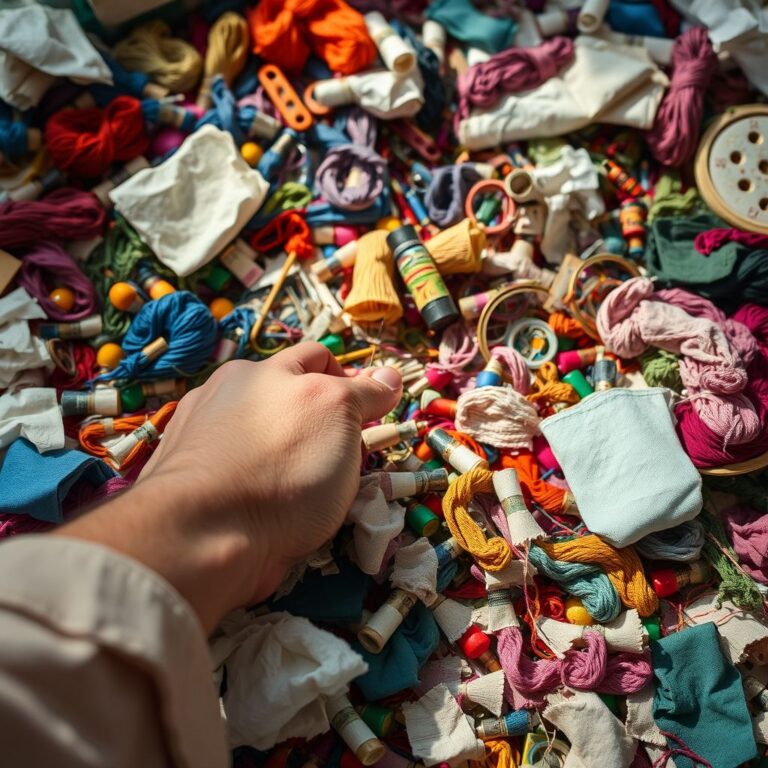
The foundation of any successful embroidery project lies in selecting the right materials. When it comes to kitchen towels, opt for natural fibers like cotton or linen. These materials are absorbent, durable, and provide a good surface for stitching. Avoid towels with overly textured surfaces, as they can make it difficult to create neat, even stitches. According to textile expert Deborah Young, “The tighter the weave, the easier it will be to embroider on. Look for a relatively smooth surface to avoid snagging.” Opt for a lighter color, such as white or cream, as this will make your embroidery stand out more prominently.
Next up: embroidery floss. Cotton embroidery floss is the most common and versatile choice, coming in a vast array of colors. DMC is a popular brand known for its quality and colorfastness. However, you can also experiment with other types of floss, such as silk or metallic threads, for added texture and visual interest. Just remember to consider the washability of the floss if the towels will be frequently used and washed. You’ll also need embroidery needles. Choose needles with a sharp point and a large eye, making it easier to thread the floss. A variety pack of needle sizes is a good investment, allowing you to experiment with different thread thicknesses. Finally, don’t forget essential tools like embroidery scissors, a water-soluble pen or pencil for transferring patterns, and an embroidery hoop.
An embroidery hoop is crucial for keeping your fabric taut and preventing puckering while you stitch. Wooden or plastic hoops are both suitable; choose a size that comfortably accommodates your design. Properly hooping your fabric is essential, as explained by embroidery artist Sarah Treuerman: “Tightening the fabric in the hoop is key. If the fabric is loose, your stitches will be uneven and the design may distort.” Ensure the fabric is centered in the hoop and tightened evenly before you begin stitching. Investing in quality materials and taking the time to prepare your supplies will significantly impact the final result of your embroidered kitchen towels.
Mastering Beginner-Friendly Embroidery Stitches
Embroidery might seem intimidating at first, but with a few basic stitches, you can create a wide range of designs. The running stitch is arguably the simplest stitch, perfect for outlining shapes and adding delicate details. To execute a running stitch, simply bring the needle up through the fabric, then down a short distance away, creating a series of evenly spaced dashes. This stitch is versatile and can be used for both straight and curved lines.
The back stitch is another essential stitch for creating clean, solid outlines. Bring the needle up through the fabric, then down a short distance away. Bring the needle up again slightly ahead of the first stitch, then bring it back down into the end of the previous stitch, creating a continuous line. This stitch is stronger and more defined than the running stitch, making it ideal for lettering or intricate details. As stated in “The Embroidery Handbook” by Alison Smith, “The back stitch creates a sturdy and well-defined line, making it a go-to for many embroidery projects.”
The satin stitch is used to fill in shapes with smooth, solid color. Bring the needle up through the fabric on one side of the shape, then down on the opposite side, creating a long, straight stitch. Continue stitching in this manner, placing the stitches closely together to completely fill the shape. For larger areas, consider using a padded satin stitch for added dimension. Finally, the French knot adds a touch of texture and whimsy to your designs. Wrap the floss around the needle several times, then insert the needle close to where it emerged from the fabric, holding the floss taut as you pull the needle through. These four stitches – running stitch, back stitch, satin stitch, and French knot – provide a solid foundation for creating beautiful and unique embroidered kitchen towels. Practice these stitches on a scrap piece of fabric before starting your project to build confidence and refine your technique.
Transferring Your Design with Ease
Once you’ve chosen your design, the next step is to transfer it onto your kitchen towel. There are several methods for transferring patterns, each with its own advantages. A popular and straightforward method involves using a water-soluble pen or pencil. Simply trace your design onto tracing paper, then position the tracing paper onto the towel and carefully transfer the design using the pen or pencil. Ensure you press lightly to avoid damaging the fabric. The beauty of this method is that any remaining marks will easily wash away with water after you’ve finished embroidering.
Another option is to use a heat-transfer pen. Trace your design onto tracing paper using the heat-transfer pen, then iron the design onto the towel. The heat will transfer the ink from the tracing paper onto the fabric. This method is best suited for light-colored fabrics, as the transferred ink may be visible on darker materials. Be sure to test the pen on a scrap piece of fabric first to ensure it doesn’t bleed or stain. A third technique involves using a stabilizer. You can purchase pre-printed stabilizer sheets with various designs, or you can print your own design onto a stabilizer sheet using your home printer. Simply adhere the stabilizer sheet to the towel and stitch directly through it. Once you’ve finished embroidering, you can carefully tear away the stabilizer, leaving your design beautifully stitched onto the towel. “Using a stabilizer is particularly helpful for delicate fabrics or intricate designs, as it provides extra support and prevents the fabric from puckering,” advises embroidery teacher Emily Carter.
No matter which method you choose, take your time and ensure the design is accurately transferred onto the towel. A well-transferred design will make the embroidery process much smoother and more enjoyable. Remember to choose a method that is appropriate for the type of fabric you are using and test it on a scrap piece of fabric first to ensure optimal results.
Setting Up Your Embroidery Hoop for Success
Properly setting up your embroidery hoop is crucial for achieving professional-looking results. An embroidery hoop keeps the fabric taut, preventing puckering and ensuring even stitches. Choose a hoop size that comfortably accommodates your design, leaving enough space around the edges for easy manipulation. When hooping your fabric, start by loosening the screw on the outer ring of the hoop.
Place the inner ring of the hoop on a flat surface and center your design over it. Then, carefully place the outer ring over the inner ring, sandwiching the fabric between the two rings. Gently tighten the screw on the outer ring, pulling the fabric taut as you go. The fabric should be drum-tight, with no visible wrinkles or slack. As explained in the book “Embroidery for Everyone” by Barbara Snook, “The key to a successful embroidery project is to maintain even tension throughout the stitching process. A properly hooped fabric is essential for achieving this.”
If the fabric is too loose, the stitches will be uneven and the design may distort. Conversely, if the fabric is too tight, it can be difficult to insert the needle and the fabric may stretch or tear. Finding the right balance is key. Once the fabric is hooped, gently tug on the edges to ensure the tension is even. If you notice any areas that are looser than others, loosen the screw and readjust the fabric until it is uniformly taut. Periodically check the tension of the fabric as you work, and re-tighten the screw if necessary. A well-hooped fabric will provide a stable and supportive surface for your embroidery, allowing you to focus on creating beautiful and precise stitches.
Stitching Your Design: Tips and Techniques
With your fabric hooped and your design transferred, it’s time to start stitching! Begin by threading your needle with the appropriate color of embroidery floss. Remember to separate the strands of floss to achieve the desired thickness. For finer details, use fewer strands; for bolder lines, use more. Secure the floss to the back of the fabric with a knot or by weaving it through existing stitches.
When stitching, maintain a consistent tension to create even and uniform stitches. Avoid pulling the floss too tight, as this can cause the fabric to pucker. Similarly, avoid leaving the floss too loose, as this can result in sloppy and uneven stitches. Focus on creating smooth, flowing lines and filling in shapes with consistent density. “Practice makes perfect,” says renowned embroiderer Trish Burr. “Don’t be afraid to experiment with different stitches and techniques to find what works best for you.” Pay attention to the direction of your stitches, especially when filling in shapes with satin stitch. Stitching in the same direction will create a smoother and more polished appearance. As you work, periodically check the back of your embroidery to ensure there are no loose ends or knots that could potentially unravel. Trim any excess floss on the back of the fabric to keep it neat and tidy.
If you make a mistake, don’t panic! Simply use a seam ripper or small scissors to carefully remove the stitches. Then, re-thread your needle and re-stitch the area. Remember to take breaks as needed to avoid eye strain and fatigue. Embroidery can be a relaxing and rewarding hobby, but it’s important to listen to your body and avoid overworking yourself. With patience and practice, you’ll be amazed at the beautiful designs you can create.
Finishing Touches: Washing and Displaying Your Embroidered Towels
Once you’ve completed your embroidery, it’s time to give your towels a final touch and prepare them for display. Start by carefully removing the fabric from the embroidery hoop. If you used a water-soluble pen or pencil to transfer your design, now is the time to wash away any remaining marks. Gently hand wash the towel in cool water with a mild detergent. Avoid using harsh chemicals or bleach, as these can damage the embroidery floss. According to textile care expert Jane Bradley, “Always test a small, inconspicuous area of the embroidery before washing the entire towel to ensure the colors are colorfast.”
After washing, gently squeeze out any excess water and lay the towel flat to dry. Avoid putting the towel in the dryer, as the heat can cause the embroidery to shrink or distort. Once the towel is completely dry, iron it on the reverse side using a low heat setting. This will help to smooth out any wrinkles and give your embroidery a polished appearance. If you used a stabilizer, carefully remove any remaining pieces from the back of the embroidery. You can use tweezers or a seam ripper to gently tease away the stabilizer without damaging the stitches. Consider adding a decorative trim or border to your embroidered towels for an extra touch of elegance. You can use ribbon, lace, or even a simple hem to create a custom finish.
Finally, display your embroidered kitchen towels with pride! Hang them on a towel bar, fold them neatly in a drawer, or gift them to a loved one. These handmade creations are sure to add a touch of charm and personality to any kitchen. Remember that proper care will ensure your embroidered towels remain beautiful for years to come. Wash them gently, avoid harsh chemicals, and iron them on the reverse side as needed. With a little love and attention, your embroidered kitchen towels will be treasured heirlooms for generations.
Beyond the Basics: Expanding Your Embroidery Skills
Now that you’ve mastered the basic techniques of embroidered kitchen towels, the possibilities are endless! Consider experimenting with different stitches, such as the chain stitch, the blanket stitch, or the French knot, to add texture and dimension to your designs. Explore different color combinations and thread types to create unique and eye-catching effects. “The beauty of embroidery lies in its versatility,” says embroidery artist Lisa Engelbrecht. “Don’t be afraid to break the rules and experiment with new techniques to develop your own unique style.”
You can also incorporate other embellishments into your embroidery projects, such as beads, sequins, or buttons. These additions can add a touch of sparkle and glamour to your towels. Try designing your own patterns or adapting existing patterns to suit your personal taste. Draw inspiration from nature, art, or even everyday objects to create truly unique designs. Join an embroidery club or online community to connect with other enthusiasts and share your creations. Learning from others and sharing your own experiences can be a great way to improve your skills and expand your knowledge.
There are countless resources available to help you continue learning and growing as an embroiderer. Books, magazines, and online tutorials offer a wealth of information on various embroidery techniques and styles. Consider taking a workshop or class to learn from an experienced instructor. With dedication and practice, you can transform your embroidered kitchen towels from simple projects into works of art. Embrace the joy of creating and let your imagination soar!
Embroidered Kitchen Towels: A Final Stitch of Style
Embarking on the journey of creating embroidered kitchen towels is more than just a craft project; it’s an opportunity to infuse your personality and artistic flair into a functional item. We’ve covered the essentials, from selecting the perfect towels and embroidery supplies to mastering beginner-friendly stitches and transferring your designs with ease. You’ve learned how to set up your embroidery hoop for success, stitch your design with confidence, and add those all-important finishing touches to ensure your towels are both beautiful and long-lasting. Remember, the key takeaways are patience, practice, and a willingness to experiment.
By mastering these basic techniques, you’re not just creating pretty towels; you’re building a foundation for a lifetime of creative expression. The possibilities are truly endless – from personalized gifts for loved ones to unique additions to your own home décor. Think of the joy of gifting a set of embroidered towels to a newlywed couple, each towel personalized with their initials or a special date. Or imagine the satisfaction of displaying a collection of embroidered towels in your own kitchen, each one reflecting your individual style and personality. As author and craft enthusiast Mary Randolf Carter writes, “The true value of handmade items lies not just in their beauty, but in the love and care that goes into creating them.”
So, grab your supplies, choose your design, and let your creativity flow! Don’t be afraid to make mistakes – they’re all part of the learning process. Embrace the imperfections and celebrate the unique character of your handmade creations. Embroidered kitchen towels are more than just absorbent cloths; they’re a testament to your creativity, your dedication, and your love for the art of embroidery. Happy stitching!

CABODYALS Rainbow Gradient Color Cross Stitch Floss Variegated Embroidery String 6 Strands Colorful Polyester Friendship Bracelet Needlepoint Yarn Thread for Sewing Bracelet Making Knitting Art Crafts
$6.99 (as of July 2, 2025 13:06 GMT -04:00 - More infoProduct prices and availability are accurate as of the date/time indicated and are subject to change. Any price and availability information displayed on [relevant Amazon Site(s), as applicable] at the time of purchase will apply to the purchase of this product.)
Gutermann Thread Set: Sew-All: 100m: Pack of 20, Assorted
$25.99 (as of July 2, 2025 13:06 GMT -04:00 - More infoProduct prices and availability are accurate as of the date/time indicated and are subject to change. Any price and availability information displayed on [relevant Amazon Site(s), as applicable] at the time of purchase will apply to the purchase of this product.)
Athena’s Elements Embroidery Floss | Rainbow Thread for Embroidery, Cross Stitch Thread, Crafting Arts Embroidery Strings Bulk(447 Colors)
$29.88 (as of July 2, 2025 13:06 GMT -04:00 - More infoProduct prices and availability are accurate as of the date/time indicated and are subject to change. Any price and availability information displayed on [relevant Amazon Site(s), as applicable] at the time of purchase will apply to the purchase of this product.)
Friendship Bracelet String 50 Skeins Fashionable Rainbow Color Embroidery Floss Cross Stitch Embroidery Thread Cotton Floss Bracelet Yarn, Craft Floss
$5.99 (as of July 2, 2025 07:59 GMT -04:00 - More infoProduct prices and availability are accurate as of the date/time indicated and are subject to change. Any price and availability information displayed on [relevant Amazon Site(s), as applicable] at the time of purchase will apply to the purchase of this product.)
New brothread - Single Huge Spool 5000M Each Polyester Embroidery Machine Thread 40WT for Commercial and Domestic Machines - Navy Blue (Janome Color)
$7.99 (as of July 3, 2025 05:32 GMT -04:00 - More infoProduct prices and availability are accurate as of the date/time indicated and are subject to change. Any price and availability information displayed on [relevant Amazon Site(s), as applicable] at the time of purchase will apply to the purchase of this product.)
Juki TL-15 9" Mid-Arm Quilting and Piecing Machine with Auto Thread Trimmer and Speed Control
$1,399.00 (as of July 1, 2025 13:06 GMT -04:00 - More infoProduct prices and availability are accurate as of the date/time indicated and are subject to change. Any price and availability information displayed on [relevant Amazon Site(s), as applicable] at the time of purchase will apply to the purchase of this product.)
Cricut® Value Iron-On, White (12 in x 5 ft)- HTV Heat Transfer Vinyl
$6.99 (as of July 2, 2025 11:04 GMT -04:00 - More infoProduct prices and availability are accurate as of the date/time indicated and are subject to change. Any price and availability information displayed on [relevant Amazon Site(s), as applicable] at the time of purchase will apply to the purchase of this product.)
Brother Skitch Single-Needle Embroidery Machine powered by the required Artspira mobile app, 4” x 4” Embroidery Area, Bluetooth Connected
$499.99 (as of July 1, 2025 13:06 GMT -04:00 - More infoProduct prices and availability are accurate as of the date/time indicated and are subject to change. Any price and availability information displayed on [relevant Amazon Site(s), as applicable] at the time of purchase will apply to the purchase of this product.)
OZXTYO Triangle Tailors Chalk,Sewing Fabric Chalk and Fabric Markers for Quilting,Sewing Supplies Accessories(10 Pieces)
$5.95 (as of July 2, 2025 11:04 GMT -04:00 - More infoProduct prices and availability are accurate as of the date/time indicated and are subject to change. Any price and availability information displayed on [relevant Amazon Site(s), as applicable] at the time of purchase will apply to the purchase of this product.)