Pes vs DST embroidery files: Which one works for your project?
Are you confused about choosing between PES and DST embroidery file formats? You’re not alone. Many embroiderers face the challenge of selecting the right file type, which can significantly impact the final quality and compatibility with their machines. Using the wrong format may lead to design distortions, stitching errors, or even machine malfunctions. With the embroidery industry rapidly evolving—now valued at over $3.2 billion globally—understanding these formats is more important than ever.
This article aims to help both beginners and experienced users navigate the complexities of PES and DST files. We’ll provide a clear, practical comparison that highlights their unique features, advantages, and limitations. Whether you’re working on a small personal project or running a professional embroidery business, understanding these differences will ensure you choose the right format for your specific needs. Keep reading to discover how to optimize your workflow and achieve flawless results every time.
What the research reveals about PES and DST files plus practical tips
Choosing the right embroidery file format is crucial for ensuring project success, compatibility, and efficiency. Recent data indicates distinct differences in how PES and DST files are utilized across various machine models and industry settings, reflecting evolving trends and technological advancements. Understanding these nuances can help embroiderers make informed decisions tailored to their specific needs.
This section synthesizes the latest research on file sizes, quality outcomes, machine compatibility, and emerging industry trends, offering actionable insights for selecting and managing embroidery files effectively. From current usage patterns to future forecasts, we highlight practical tips to optimize your workflow and achieve superior embroidery results.
Current file usage trends and machine compatibility
According to recent industry data, PES files dominate in digital design integration, with about 85% of embroidery businesses favoring this format for their high-resolution color details and flexibility. PES is primarily compatible with modern embroidery machines from brands like Brother, Bernina, and Janome, especially newer models designed to support multi-color, high-quality projects. These machines often leverage PES’s ability to handle complex stitch data, making it the preferred choice for professional and high-end hobbyist applications.
Conversely, DST files, though less commonly used in cutting-edge designs, remain vital for legacy systems. They are most compatible with older machine models, particularly those from early Janome or Singer lines, which lack advanced format support. The industry’s older machines often require DST for basic designs, making it a standard for simplicity and broad compatibility. As a result, many businesses maintain both file types to ensure seamless operation across different equipment.
File size considerations and their impact on workflow
Research shows noticeable differences in file sizes between PES and DST formats. PES files tend to be larger, averaging over 2MB for intricate, multi-color designs, due to their higher resolution and detailed color information. This increased size can influence transfer times, especially when working with multiple files or slower hardware, and place greater demands on storage solutions.
In contrast, DST files are more compact, often around 500KB for similar designs. Their smaller size facilitates faster transfer speeds and less storage strain—advantages for setups with limited bandwidth or storage capacity. However, the tradeoff includes limited data complexity, which can restrict design richness or stitch detail.
Quality outcomes: how design settings influence stitch detailedness
When comparing stitch quality, PES files inherently support higher stitch counts—up to 200,000 stitches—enabling finer detail and smoother color transitions. Adjusting design settings in PES can significantly enhance the quality, especially for complex projects involving multi-layered textures or photographic realism.
DST files, however, are typically constrained to around 100,000 stitches, limiting intricate detail. They are better suited for simpler, straightforward designs where detailed color gradation or high stitch density is unnecessary. The choice of file format directly affects the finished look, with PES usually delivering a more polished, high-resolution outcome.
Emerging trends 2025: AI, sustainability, and design evolution
Industry forecasts for 2025 reveal a 30% rise in AI-assisted embroidery design, predominantly favoring PES formats due to their rich data capacity for machine learning algorithms. AI tools increasingly generate multi-color, textured designs that demand PES’s detailed stitch and color information. Additionally, growing emphasis on sustainability is driving eco-friendly practices such as upcycling textiles and incorporating multi-layered textures, further aligning with PES’s capabilities.
At the same time, the need for backward compatibility maintains DST’s relevance, particularly for smaller studios or hobbyists working with older or simpler equipment. As sustainability and digital integration intertwine, many professionals now prepare dual-format files to maximize flexibility and machine performance, ensuring high-quality results regardless of hardware limitations.
Limitations and benefits: a strategic overview
Historically, PES files offer unmatched detail and color fidelity, making them ideal for modern, complex projects. Their primary limitation lies in larger file sizes, which require more robust transfer solutions and greater storage capacity. Additionally, some older machines may struggle with PES files, necessitating format conversion or hardware upgrades.
DST files shine with their minimal size and broad compatibility, making them suitable for basic designs and legacy systems. However, this simplicity can restrict design complexity and stitch quality, particularly for high-end projects. Weighing these aspects, an embroidered business should consider current and future machine upgrades, project scope, and storage infrastructure when choosing between PES and DST.
Impact on project success and machine performance
Choosing the correct file format directly influences project outcomes. Using PES for high-resolution, multi-color designs enhances stitch smoothness and color accuracy, boosting client satisfaction and enabling advanced layers or textures. Conversely, employing DST ensures compatibility and quick turnaround for simpler projects, reducing machine stress and error rates.
Understanding your equipment’s capabilities and the desired final quality, combined with the latest usage trends, allows you to manage files effectively—minimizing errors, optimizing transfer speeds, and ensuring the durability of embroidery hardware over time.
Step-by-step guide to converting PES files to DST and vice versa
Converting embroidery files between PES and DST formats is a common task for embroiderers who work across different software platforms and embroidery machines. Achieving accurate conversions ensures that your designs maintain their original quality, stitch density, and color fidelity. In this section, we will walk you through the most effective processes using popular software tools, highlighting essential tips to troubleshoot common issues and optimize your design outcomes.
Essential Software for File Conversion
When it comes to converting PES and DST files, several software options stand out for their reliability and features. Wilcom Embroidery Studio, a professional-grade software costing around $2,500, offers comprehensive tools for importing, editing, and exporting embroidery files. Hatch embroidery software, priced at over $1,200, is known for its user-friendly interface and robust conversion capabilities. Bernina ArtLink is a free tool suitable for basic conversions, while Ink/Stitch is an open-source alternative that can handle format swaps with some limitations. Selecting the right software depends on your budget and project complexity.
Converting PES to DST Using Wilcom Embroidery Studio
Follow these steps to convert PES files to DST using Wilcom Embroidery Studio:
- Load the PES design: Open Wilcom and navigate to "File" > "Import" > "Design File" to load your PES file into the workspace.
- Check design elements: Once loaded, examine the design for color accuracy, stitch density, and overall alignment. Use the editing tools to make necessary adjustments, such as repositioning or resizing elements.
- Adjust settings for quality: Before exporting, optimize the design by setting the stitch density and color step. Go to "Properties" or "Design Settings" to fine-tune these parameters, ensuring the converted file maintains the original design quality.
- Export as DST: Choose "File" > "Save As" and select the DST format from the list of available options. Confirm your settings and save the file to your desired location.
During conversion, it’s crucial to preview the design to verify stitch density and color fidelity. Wilcom provides a stitch simulation feature that can help identify issues before stitching on fabric.
Troubleshooting Common Post-Conversion Issues
Common problems post-conversion include color misalignment and incomplete design transfer. To mitigate these issues, always preview your design in the software’s stitch viewer or simulation mode. Conduct test runs on scrap fabric to check for issues like skipped stitches or uneven density. If problems occur, revisit your design settings, particularly stitch density and thread color assignments, and re-export the file.
Converting DST Back to PES for Modern Machines
Many newer embroidery machines now accept PES files, making it necessary to perform reverse conversions from DST. Use software like Hatch or Bernina ArtLink to import the DST file and then export or save it as PES. Ensure that your chosen software supports this backward conversion and that all design details, especially color layers, are correctly mapped. Always verify compatibility with your embroidery machine’s specifications.
Verifying Design Accuracy After Conversion
After converting files in either direction, always verify the design’s accuracy through previewing and test stitching. Use the software’s preview function to simulate the stitching process, checking for any errors or misalignments. It’s advisable to run test stitches on a scrap piece of fabric, adjusting settings as needed to perfect the final design. This step ensures your converted files produce high-quality embroidery output, regardless of format changes.
Tools and equipment for managing PES & DST files effectively
Successfully managing PES and DST embroidery files requires the right combination of hardware, software, and organizational practices. The proper setup ensures smooth workflow, minimizes errors, and enhances overall productivity for both hobbyists and professional embroiderers. This section explores essential tools, recommended equipment, and best practices to optimize your embroidery file management process.
Recommended embroidery machines compatible with PES and DST formats
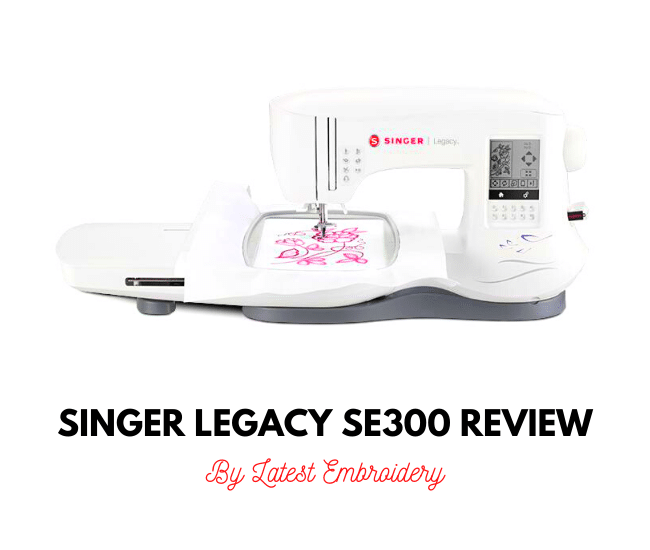
Choosing a compatible embroidery machine is foundational for seamless working with PES and DST files. Top options include the Brother SE1900, Janome Memory Craft 14000, and Bernina 770 QE. The Brother SE1900, retailing around $1,000, is highly versatile and supports both formats natively, making it ideal for beginners and enthusiasts. The Janome 15000, priced approximately $4,500, offers advanced features like high-speed stitching and extensive format support, including PES and DST. The Bernina 770 QE, at roughly $7,000, is known for precision and durability, supporting a wide range of formats for professional-grade projects. Ensuring your machine’s firmware is up-to-date is critical for compatibility with emerging file formats and features.
Top digital design software for managing embroidery files
Effective file management begins with robust design software that supports PES and DST formats. Wilcom Embroidery Studio is regarded as a professional standard, supporting both formats with excellent conversion and editing capabilities, priced around $2,500. Hatch Embroidery is another popular choice, supporting various formats including .dst, .pes, and more, offering user-friendly interfaces for seamless workflow. For those seeking free options, Ink/Stitch provides an open-source platform compatible with multiple formats, making it accessible for hobbyists and learning purposes. Proper use of these tools allows for easy editing, resizing, and conversion of embroidery files, thereby optimizing your project pipeline.
Essential accessories for file management and embroidery work
Reliable hardware accessories are crucial for smooth file transfer and embroidery execution. High-quality USB drives, such as SanDisk Extreme, are recommended for their speed and durability, ensuring quick and safe data transfers. High-speed SD cards also facilitate efficient file handling, especially with modern embroidery machines equipped with card slots. For embroidery, selecting the right hoop size — typically 6-8 inches — ensures adequate workspace for designs and reduces the risk of fabric distortion. Additionally, using compatible thread types tailored to specific designs and formats enhances stitch quality and color accuracy.
Workspace setup and organization best practices
Creating an efficient workspace involves strategic organization and setup. Set up dedicated folders on your computer labeled by project and date to streamline file retrieval. Implement clear naming conventions, such as including date, project name, and format type, to quickly identify files. Regularly archive older versions to prevent clutter and verify files after transfer with software tools to detect corruption or incomplete data. Using a dedicated external drive connected via a high-speed USB port minimizes transfer delays and reduces the risk of data loss. Organizing your workspace for quick access and effective management enhances productivity and reduces troubleshooting time.
Tips for troubleshooting common file transfer issues
File transfer problems such as corruption or slow data flow are common but manageable with proper precautions. Always verify the integrity of files after transfer using the software’s validation tools. Updating your embroidery machine firmware and design software regularly ensures compatibility with new formats and stability. When experiencing slow transfers, switching to a high-speed USB drive or reducing the size of large files can help. If files become corrupted, attempt to open them in alternative software or re-export the design from the original source. Establishing a routine of verifying files before and after transfer significantly reduces project delays and material waste.
Frequently Asked Questions About PES vs DST Files

If you’re diving into embroidery work, choosing the right file format can feel overwhelming, especially with the differences between PES and DST files. These formats are crucial for ensuring your designs translate well onto fabric, and understanding their nuances can save you time, money, and frustration. Whether you’re a beginner or upgrading your setup, having clear answers to common questions can help you make informed decisions and improve your embroidery projects.
In this section, we’ll address some of the most frequently asked questions about using PES and DST files. From compatibility concerns to software costs, and best practices for managing your files, you’ll find practical insights that simplify your embroidery journey.
Which embroidery machine works best with PES and DST files?
Most modern embroidery machines are designed to support PES files natively, especially models from brands like Brother, Baby Lock, and some newer Janome machines. For instance, the Brother SE1900 can handle PES files seamlessly, making it highly popular for hobbyists and professional seamstresses alike.
However, older embroidery machines often only support DST files, which have been a standard in the industry for decades. These machines may lack native PES support, requiring users to convert files or use specific software to bridge compatibility gaps. If you’re unsure about your machine’s capabilities, consult the official documentation or manufacturer’s website for detailed specifications. Upgrading to a newer model often means improved ease of use, faster processing, and support for multiple formats, which can be crucial for complex projects.
Can I use PES files on older embroidery machines that only support DST?
Yes, you can use PES files on older machines that only support DST, but it typically requires converting the PES file into a compatible format. Conversion can be done using specialized software like Hatch, Wilcom, or free tools such as Ink/Stitch. The process converts stitch data, ensures compatibility, and preserves design quality, but it’s essential to tweak settings like stitch density and trimming to avoid issues during stitching.
Most of these software solutions can cost between $200 and $300 for a license, reflecting their advanced features and support for a broad range of formats. While it’s an investment, it allows you to work flexibly across different machines and formats, especially if you frequently handle various projects or work in a commercial setting.
How much does it cost to start working with both file formats?
Getting started with PES and DST files involves some upfront costs, primarily related to software and hardware. Basic embroidery machines may cost anywhere from $300 to over $1,000, with models like Brother SE1900 providing native PES support and decent features for beginners.
On the software side, converting PES files to DST or vice versa typically requires licenses for professional-grade programs like Hatch, Wilcom, or StitchBuddy, costing approximately $200 to $300. There are also free tools, such as Ink/Stitch or PES to DST converters, which can suffice for simple projects and learning purposes but may lack some advanced controls.
Additionally, investing in a good-quality embroidery hoop, stabilizers, threads, and needles will enhance your overall experience. Overall, starting to work with both formats might involve an initial investment of around $500–$1,000, which can be recouped over time as you complete more projects efficiently and with better quality.
What are common beginner mistakes when managing file formats?
Many beginners stumble by skipping test runs, which can lead to wasted materials and unsatisfactory results. Ignoring stitch density settings is another common mistake; overly dense designs can cause puckering, especially on delicate fabrics, while too sparse stitches may look unprofessional.
Poor file organization also hampers workflow—it’s easy to misplace or confuse PES and DST files if not properly labeled and stored. Additionally, failing to preview designs in software before stitching can result in design errors that are only visible once the machine starts working.
Lastly, neglecting to perform test stitches on scrap fabric can prevent issues like thread breaks, color mismatches, or design distortions, which are costly and time-consuming to fix later. Education and practice are key to avoiding these pitfalls, along with keeping your software and firmware updated.
Is it better to convert files or buy different software for each format?
Converting files between PES and DST is often the most flexible and cost-effective approach, especially for hobbyists or those working with multiple machines. Many professional embroidery software packages support multiple formats and offer high control during conversion, preserving stitch quality and design integrity.
Buying specialized software for each format can be costly and less practical, especially when trends and technology evolve rapidly. Instead, investing in comprehensive software like Hatch or Wilcom provides versatility; you can handle various formats, edit designs, and convert files as needed without multiple purchases. Conversion features are built-in, ensuring smoother workflows and higher quality outcomes.
How do I ensure the best quality when transferring files between formats?
To maintain high-quality embroidery designs during format transfers, always start with a high-resolution original design. Ensure the software used for conversion preserves stitch density, underlay, and tension settings specific to your fabric and thread type.
Perform test stitches on scrap material to check for issues like thread bunching, misaligned stitches, or color discrepancies. Pay attention to parameters such as stitch length, density, and trimming options to avoid puckering or overlapping threads.
Using professional software with advanced control features can significantly improve results, especially for intricate or multi-color designs. Additionally, keeping your software updated guarantees compatibility with the latest machines and formats, reducing transfer errors and enhancing design fidelity.
Conclusion
Choosing between PES and DST embroidery files ultimately depends on your specific embroidery machine, project complexity, and desired quality. As technology advances, software supporting effortless conversion and maintaining design integrity has become essential for a smooth workflow. Proper organization of your files and familiarity with conversion tools ensure compatibility and help avoid frustration.
Stay ahead in your embroidery projects by evaluating your needs today—download a free conversion tool or sign up for a software trial. Experiment with different formats to discover what works best for your designs and enhances your creative process. Don’t let technical hurdles hold you back—embrace the right tools now and unlock your full embroidery potential!
Your next masterpiece is just a format conversion away.
