Stunning Stitches: Floral Embroidery with Satin and Chain
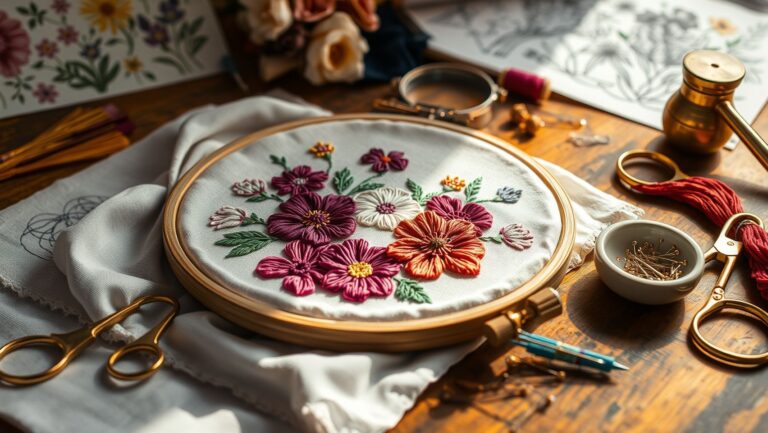
Embroidery offers a canvas for creativity, a way to breathe life into fabric with vibrant threads and intricate designs. While countless stitches exist, mastering a few key techniques unlocks a world of possibilities. Today, we’ll delve into the enchanting combination of satin and chain stitches, a duo perfect for crafting exquisite floral patterns. Imagine delicate petals rendered in the smooth sheen of satin stitch, their outlines emphasized by the bold texture of chain stitch – the effect is simply breathtaking. This isn’t just about learning stitches; it’s about understanding how they interact to create depth, dimension, and visual interest. By exploring their individual strengths and how they complement each other, you’ll gain the skills to elevate your floral embroidery from simple outlines to captivating works of art. This post will guide you through the nuances of each stitch, illustrate how to combine them effectively, and provide practical tips for achieving professional-looking results. We’ll cover everything from choosing the right materials to mastering essential techniques, empowering you to create stunning floral embroidery that will impress and inspire.
Satin Stitch: The Soul of Your Floral Petals
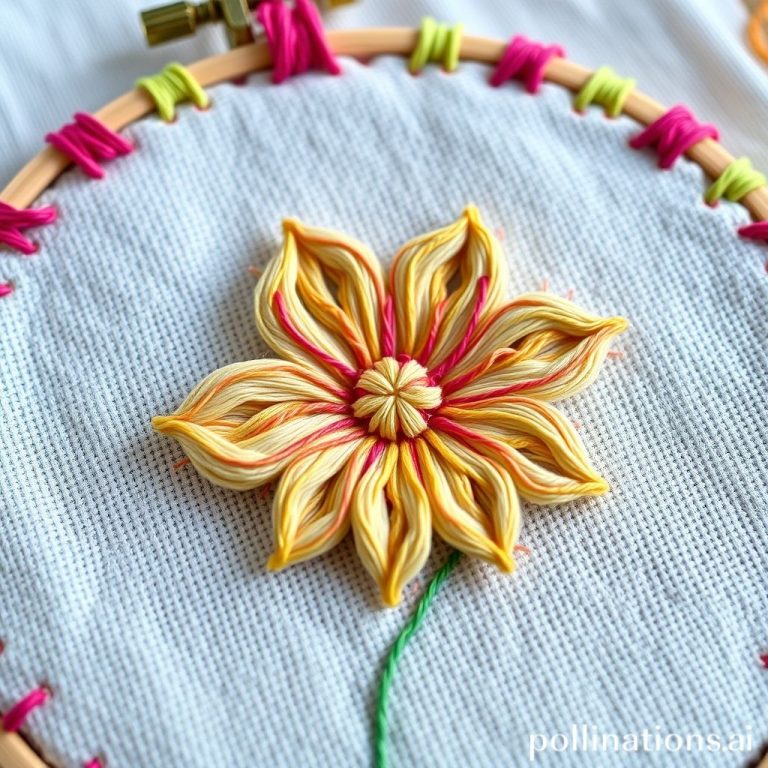
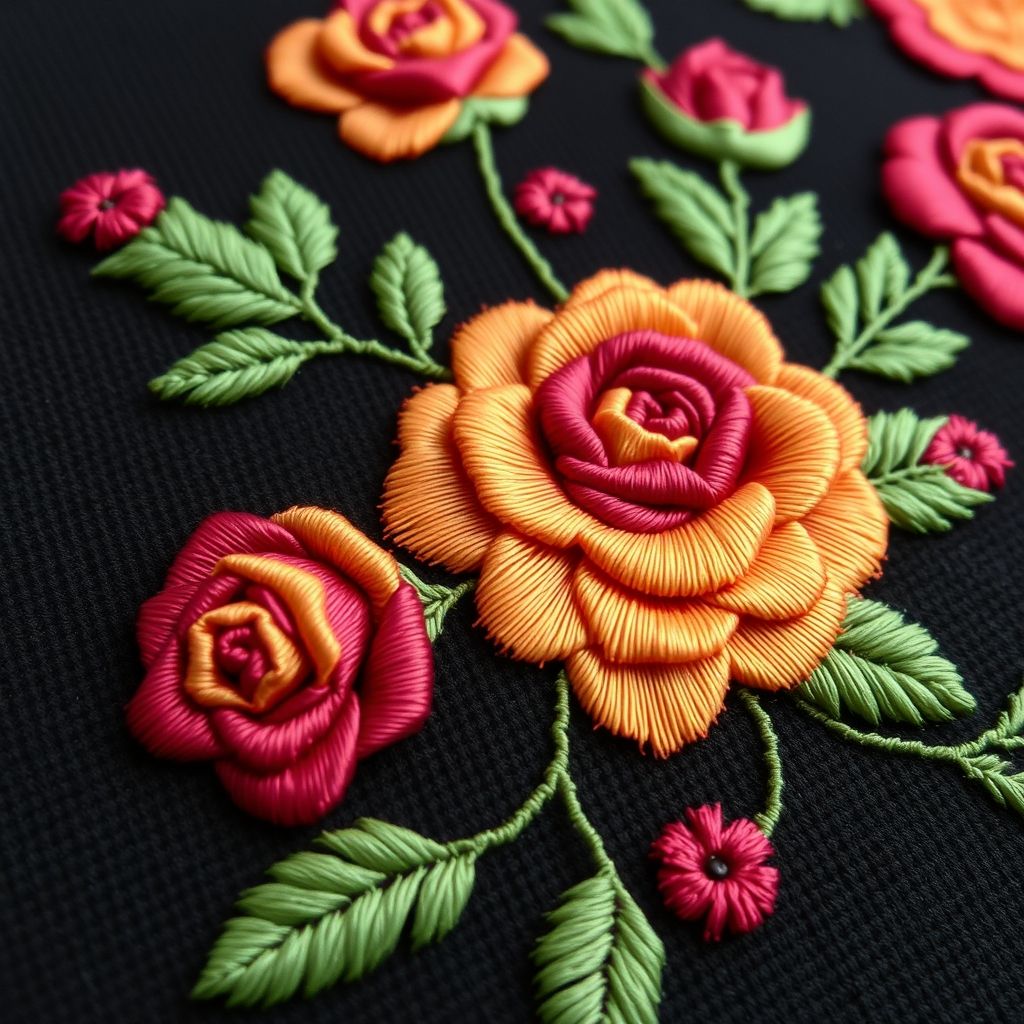
The satin stitch, renowned for its smooth, glossy appearance, is the ideal choice for filling in the petals and leaves of your floral designs. This stitch involves creating a series of closely spaced, parallel stitches that completely cover the fabric beneath. The key to a beautiful satin stitch lies in maintaining consistent tension and ensuring that the stitches are perfectly aligned. According to Mary Thomas in her “Dictionary of Embroidery Stitches,” “The satin stitch is one of the most frequently used filling stitches…Its beauty depends on the closeness and evenness of the stitches.” Uneven tension or spacing can result in a bumpy or distorted surface, detracting from the overall elegance of your design. Practice on scrap fabric to perfect your technique before committing to your final project. Consider using a hoop or frame to keep your fabric taut, preventing it from puckering during the stitching process. You can also vary the direction of your satin stitches to create subtle shading effects, adding depth and dimension to your petals. For instance, stitching the base of a petal in a slightly darker shade of thread can create the illusion of shadow and make the petal appear more realistic. Experiment with different thread types, such as silk or rayon, to achieve a lustrous sheen that will enhance the visual appeal of your floral embroidery.
Chain Stitch: Defining Lines and Adding Texture
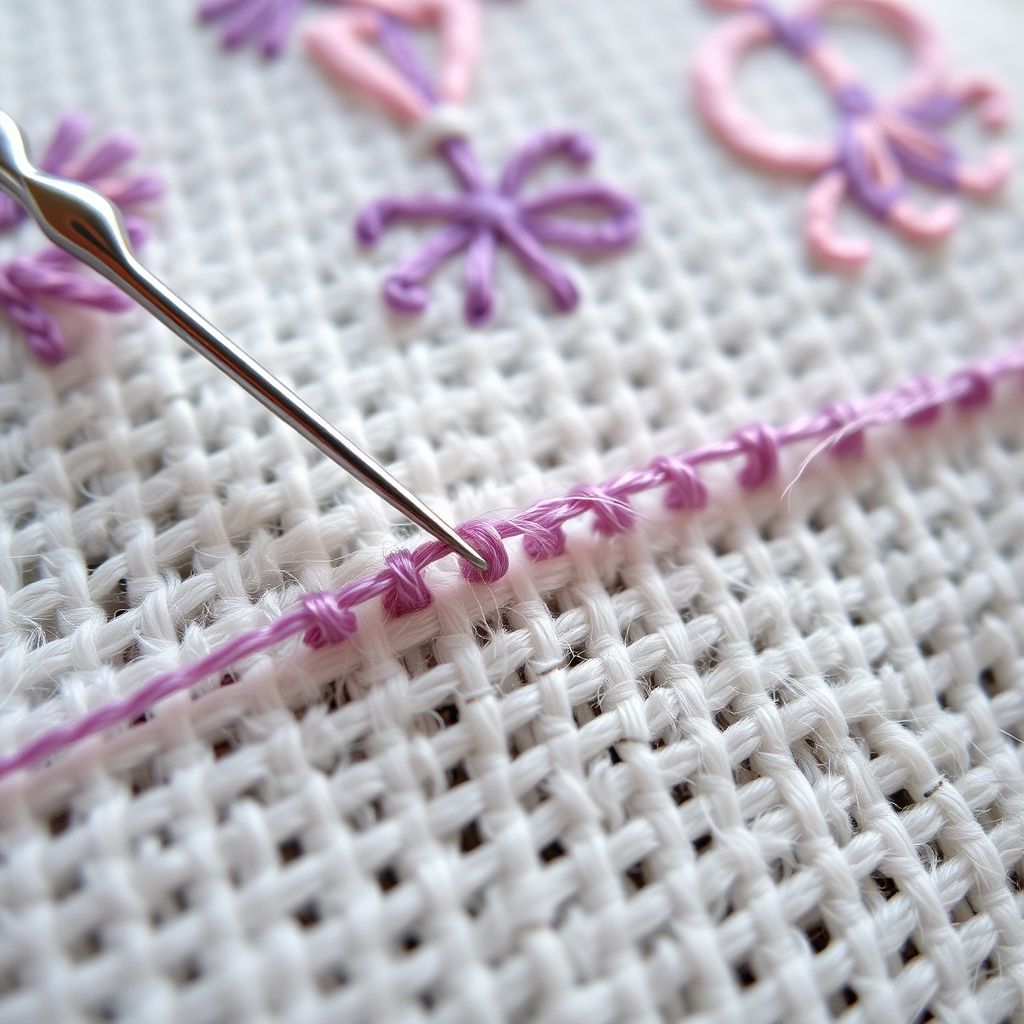
While the satin stitch provides the smooth foundation for your floral elements, the chain stitch steps in to define their outlines and add a touch of textural contrast. This looped stitch creates a chain-like effect on the fabric, making it perfect for outlining petals, stems, and leaves. The chain stitch is relatively simple to execute, but mastering its consistency is crucial for achieving a polished look. Each loop should be uniform in size and spacing, creating a continuous, flowing line. Erica Wilson, in her book “Erica Wilson’s Embroidery Book,” emphasizes the importance of consistent tension in chain stitch: “The secret of a good chain stitch is even tension. Too tight and the chain will pucker; too loose and it will be sloppy.” Practice maintaining even tension to ensure that your chain stitch lines are smooth and well-defined. Beyond outlining, the chain stitch can also be used to add decorative details to your floral designs. Consider filling in small areas with chain stitch to create textured patterns or using it to create delicate tendrils and vines that intertwine with your flowers. Experiment with different thread weights to vary the thickness of your chain stitch lines, adding visual interest and depth to your embroidery. You can even use variegated thread to create a subtle gradient effect within your chain stitch outlines, further enhancing the artistic appeal of your work.
Choosing the Right Threads and Fabrics for Success
The success of any embroidery project hinges on selecting the appropriate threads and fabrics. When working with satin and chain stitches, consider the texture and sheen of your chosen materials. For satin stitch, smooth, lustrous threads like silk or rayon are ideal for creating a polished, elegant look. These threads reflect light beautifully, enhancing the visual impact of your filled-in petals and leaves. For chain stitch, you have more flexibility. Cotton floss, perle cotton, or even slightly thicker threads can work well, depending on the desired effect. Experiment with different thread weights to achieve varying degrees of texture and definition in your outlines. As for fabrics, choose a tightly woven material that can support the dense stitching of satin stitch without puckering or distorting. Linen, cotton twill, and even some types of silk are excellent choices. Avoid fabrics that are too loose or stretchy, as they may not hold the stitches securely. “The choice of fabric is as important as the choice of thread,” notes Trish Burr in “Contemporary Color Schemes for Crewel Embroidery.” “A good quality fabric will provide a stable base for your stitching and prevent distortion.” Before starting your project, consider washing and ironing your fabric to pre-shrink it and remove any wrinkles that might interfere with your stitching. Stabilizers, such as fusible interfacing, can also be used to add extra support to your fabric, particularly when working with delicate or lightweight materials.
Transferring Your Floral Design: Accuracy is Key
Before you can begin stitching, you’ll need to transfer your floral design onto your fabric. Accuracy is paramount at this stage, as any errors in the transfer will be magnified in the finished embroidery. Several methods can be used to transfer your design, each with its own advantages and disadvantages. One popular method involves using a water-soluble transfer pen to trace the design onto the fabric. These pens create clear, crisp lines that are easy to follow, and the ink washes away cleanly with water after the embroidery is complete. Another option is to use a light box or window to trace the design onto your fabric. Simply place the fabric over the design and trace the lines with a pencil or fabric marker. This method works well for light-colored fabrics, but it may not be suitable for darker materials. For more intricate designs, consider using an iron-on transfer. These transfers are printed with a special ink that adheres to the fabric when heated with an iron. However, it’s important to test the transfer on a scrap of fabric first to ensure that it doesn’t damage or stain the material. Regardless of the method you choose, take your time and ensure that the transfer is accurate and complete. Use a ruler or straight edge to ensure that your lines are straight and even, and double-check the placement of each element of the design. “A well-transferred design is the foundation of a successful embroidery,” advises Helen M. Stevens in “Embroidered Flowers.” “Take the time to get it right, and you’ll be well on your way to creating a beautiful piece of embroidery.”
Combining Satin and Chain: Practical Techniques
Now that you’ve mastered the individual stitches and transferred your design, it’s time to combine satin and chain stitches to create stunning floral patterns. Start by filling in the petals and leaves of your flowers with satin stitch, paying close attention to tension and alignment. Once you’ve completed the satin stitch filling, use chain stitch to outline the edges of the petals and leaves, creating a crisp, defined border. The chain stitch outline will not only add visual interest but also help to contain the satin stitch and prevent it from unraveling. When outlining with chain stitch, try to follow the natural curves and contours of the petals and leaves, creating a flowing, organic line. Don’t be afraid to experiment with different variations of chain stitch to add texture and dimension to your outlines. For example, you can use a slightly thicker thread to create a bolder outline or a variegated thread to add a subtle gradient effect. You can also use chain stitch to add decorative details to your floral designs, such as veins on leaves or details within the petals. For instance, a line of detached chain stitch can mimic the delicate veins found on leaves. Remember to maintain consistent tension throughout your stitching, and don’t be afraid to practice on scrap fabric until you’re comfortable with the techniques. “The key to successful embroidery is practice, practice, practice,” emphasizes Laura Strutt in “The Ultimate Encyclopedia of Embroidery.” “The more you stitch, the more confident and skilled you’ll become.”
Adding Depth and Dimension Through Color Choices
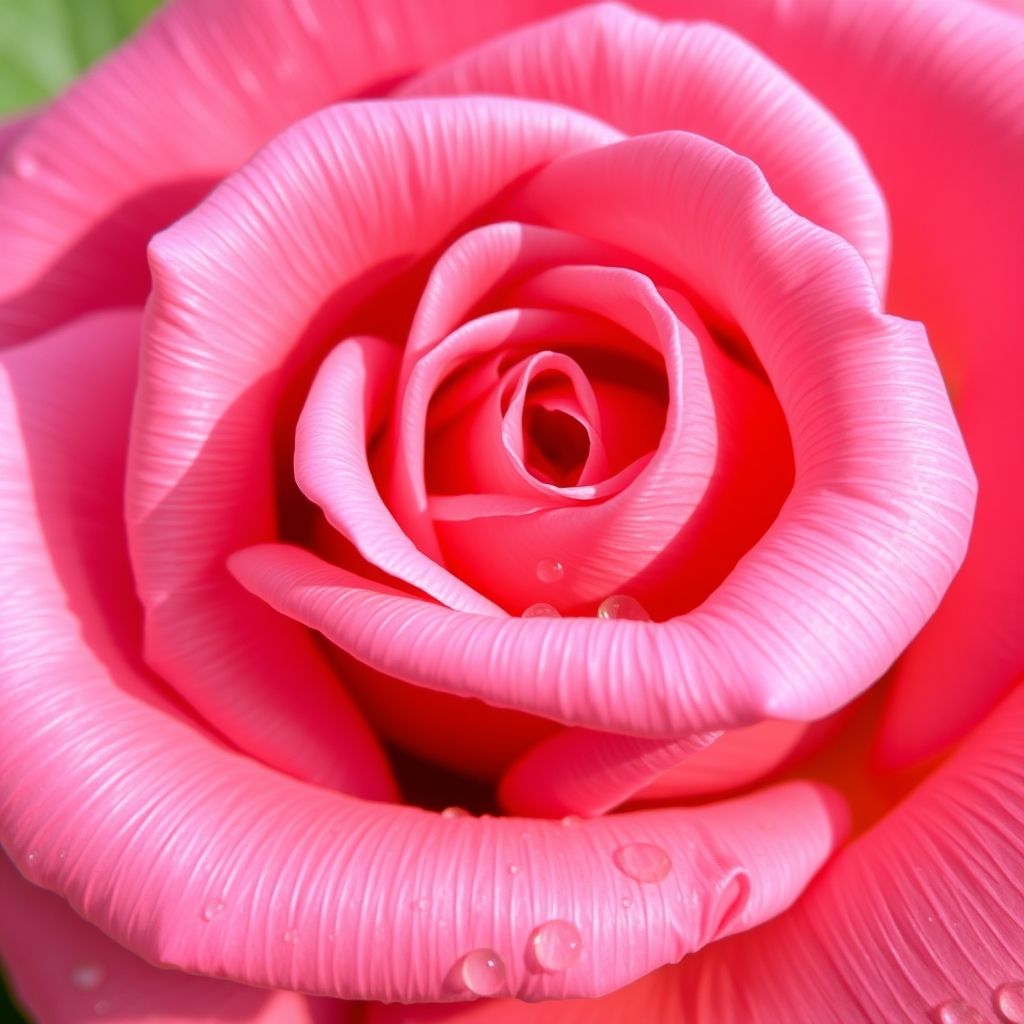
Color plays a crucial role in creating depth and dimension in your floral embroidery. By carefully selecting your thread colors, you can create the illusion of light and shadow, making your flowers appear more realistic and three-dimensional. Consider using a range of shades within the same color family to create subtle gradients within your petals and leaves. For example, you might use a light pink shade for the highlights of a petal and a darker pink shade for the shadows. You can also use contrasting colors to create visual interest and draw the eye to specific areas of your design. For instance, a bright yellow center in a purple flower will create a striking contrast that will instantly capture attention. When choosing colors, consider the natural colors of the flowers you’re depicting, but don’t be afraid to experiment with unexpected combinations. “Color is the language of embroidery,” says Mary Corbet of Needle ‘n Thread, a respected embroidery resource. “Learn to speak it fluently, and you’ll be able to create embroidery that is both beautiful and expressive.” You can use online color palettes or color theory resources to help you choose harmonious color combinations. Remember to consider the color of your fabric as well. A dark fabric will make light-colored threads stand out, while a light fabric will allow you to use a wider range of colors. Before committing to your final color choices, try stitching a small sample on a scrap of fabric to see how the colors look together in real life.
Finishing Touches: Preserving Your Embroidered Masterpiece
Once you’ve completed your floral embroidery, it’s important to take the necessary steps to preserve your masterpiece. Start by carefully removing any excess thread or fabric from the back of your embroidery. Trim the fabric around the edges, leaving enough room to finish the edges neatly. If you’re framing your embroidery, you can stretch the fabric over a piece of acid-free foam core board and secure it with pins or staples. Alternatively, you can sew the fabric onto a piece of backing fabric to create a finished edge. If you’re using your embroidery in a garment or other textile project, consider adding a layer of fusible interfacing to the back of the embroidery to protect the stitches and prevent them from unraveling. Hand washing is typically the safest way to clean embroidered pieces. Use cool water and a mild detergent, and avoid rubbing or twisting the fabric. Gently squeeze out any excess water and lay the embroidery flat to dry. Avoid using a machine dryer, as the heat can damage the threads and distort the fabric. “Proper care is essential for preserving the beauty of your embroidery,” advises Jan Messent in “The World of Embroidery.” “Treat your embroidered pieces with care, and they will last for generations to come.” With proper care and attention, your floral embroidery will remain a treasured heirloom for years to come.
In conclusion, combining satin and chain stitches unlocks a beautiful pathway to crafting stunning floral embroidery. We’ve explored the unique characteristics of each stitch, learned how to choose the right materials, mastered essential techniques for transferring designs and combining stitches, and delved into the importance of color choices. Remember that practice is paramount; the more you experiment, the more confident you’ll become in your abilities. The smooth, elegant satin stitch combined with the bold, defined chain stitch creates a visual harmony that brings your floral designs to life. So, gather your threads, choose your fabric, and embark on your creative journey. Don’t be afraid to push boundaries, experiment with colors, and develop your own unique style. Floral embroidery is a rewarding art form that allows you to express your creativity and create beautiful pieces that will be cherished for years to come. The possibilities are endless, and with a little practice and dedication, you’ll be amazed at what you can create. Embrace the process, enjoy the journey, and let your imagination blossom with every stitch!

New brothread 12 Colors Variegated Polyester Embroidery Machine Thread Kit 500M (550Y) Each Spool for Brother Janome Babylock Singer Pfaff Bernina Husqvaran Embroidery and Sewing Machines-Assortment1
$14.99 (as of July 3, 2025 05:32 GMT -04:00 - More infoProduct prices and availability are accurate as of the date/time indicated and are subject to change. Any price and availability information displayed on [relevant Amazon Site(s), as applicable] at the time of purchase will apply to the purchase of this product.)
Mandala Crafts Bonded Nylon Thread Black Heavy Duty Sewing Threads - 1500 YDs Size 69 210D T70 Tex 70 Thread for Leather Jeans Weaving Outdoor Marine Upholstery Threads
$9.99 (as of July 2, 2025 07:59 GMT -04:00 - More infoProduct prices and availability are accurate as of the date/time indicated and are subject to change. Any price and availability information displayed on [relevant Amazon Site(s), as applicable] at the time of purchase will apply to the purchase of this product.)
UV Resistant - Heavy Duty Outdoor Thread for Hand or Machine Sewing - Simthread 100% Polyester Bonded Thread Tex 69 (12wt) - 1500 Yards NP-Black
$9.99 (as of July 2, 2025 07:59 GMT -04:00 - More infoProduct prices and availability are accurate as of the date/time indicated and are subject to change. Any price and availability information displayed on [relevant Amazon Site(s), as applicable] at the time of purchase will apply to the purchase of this product.)New brothreads - 40 Options- Various Assorted Color Packs of Polyester Embroidery Machine Thread Huge Spool 5000M for All Embroidery Machines -1Black+1White
$11.99 (as of July 2, 2025 13:06 GMT -04:00 - More infoProduct prices and availability are accurate as of the date/time indicated and are subject to change. Any price and availability information displayed on [relevant Amazon Site(s), as applicable] at the time of purchase will apply to the purchase of this product.)
Embroidery Thread Floss 140 Colors Friendship Bracelet String Making Bracelets Cross Stitch Kit Supplies Thin Yarn Sewing Patterns Cotton Strings Crochet Braces Wrap Colored Rainbow Crafts
$8.47 (as of July 2, 2025 07:59 GMT -04:00 - More infoProduct prices and availability are accurate as of the date/time indicated and are subject to change. Any price and availability information displayed on [relevant Amazon Site(s), as applicable] at the time of purchase will apply to the purchase of this product.)
Webbing Cutting Machine, Automatic Hot and Cold Tape Cutter for Elastic Band Self Adhesive Tape Ribbon Zipper
$449.99 (as of July 1, 2025 13:06 GMT -04:00 - More infoProduct prices and availability are accurate as of the date/time indicated and are subject to change. Any price and availability information displayed on [relevant Amazon Site(s), as applicable] at the time of purchase will apply to the purchase of this product.)
BLUEBIRD Fabric Paint, White, 3.4 Fl Oz, Permanent Fabric Paints for Clothes, Furniture Upholstery
$6.99 (as of July 2, 2025 11:04 GMT -04:00 - More infoProduct prices and availability are accurate as of the date/time indicated and are subject to change. Any price and availability information displayed on [relevant Amazon Site(s), as applicable] at the time of purchase will apply to the purchase of this product.)
Smartstitch S-1001 Upgraded Embroidery Machine with 10 Needles, 1200SPM Max Speed, 7" Touch Screen, 9.5"x14.2" Embroidery Area, New Gen of Commercial Embroidery Machine for Flat, Hat, T-shirt and more
$3,959.10 (as of July 1, 2025 13:06 GMT -04:00 - More infoProduct prices and availability are accurate as of the date/time indicated and are subject to change. Any price and availability information displayed on [relevant Amazon Site(s), as applicable] at the time of purchase will apply to the purchase of this product.)
Brother PE800 Embroidery Machine, 138 Built-in Designs, 5" x 7" Hoop Area, Large 3.2" LCD Touchscreen, USB Port, 11 Font Styles
$1,143.24 (as of July 1, 2025 13:06 GMT -04:00 - More infoProduct prices and availability are accurate as of the date/time indicated and are subject to change. Any price and availability information displayed on [relevant Amazon Site(s), as applicable] at the time of purchase will apply to the purchase of this product.)