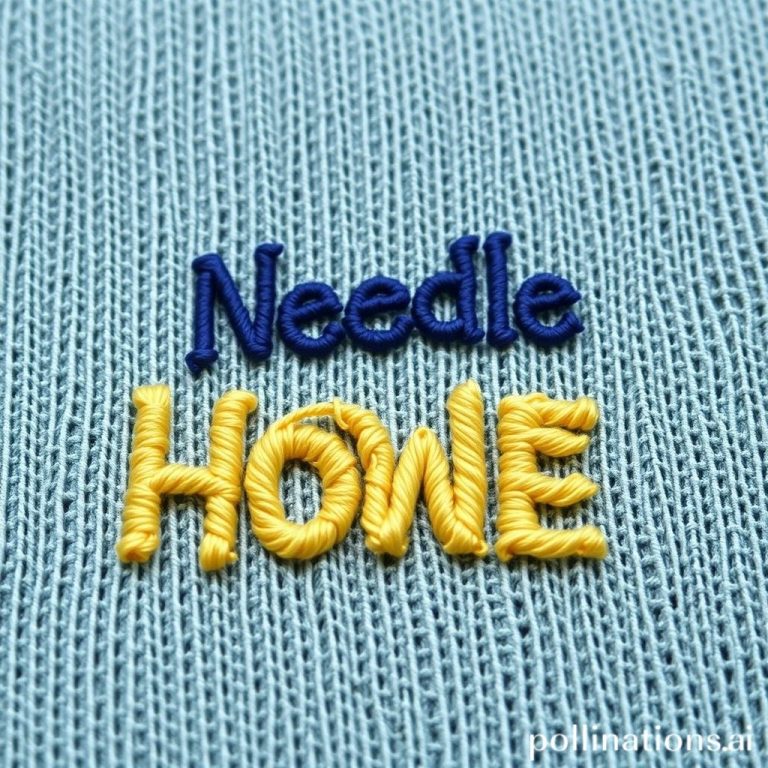
Illuminate Your Creations Glow-in-the-Dark Embroidery
Ever wished your embroidery could shine, even in the dark? Glow-in-the-dark thread opens up a world of creative possibilities, allowing you to add a magical touch to your projects. From whimsical children’s designs to eye-catching safety embellishments, this unique thread offers both aesthetic appeal and practical applications. In this blog post, we’ll delve into the art of embroidering with glow-in-the-dark thread, exploring its characteristics, best practices, project ideas, and everything you need to know to bring your luminous visions to life. We’ll cover thread types, needles, tension adjustments, design considerations, and even how to care for your glowing creations. Get ready to light up your embroidery!
Understanding Glow-in-the-Dark Thread
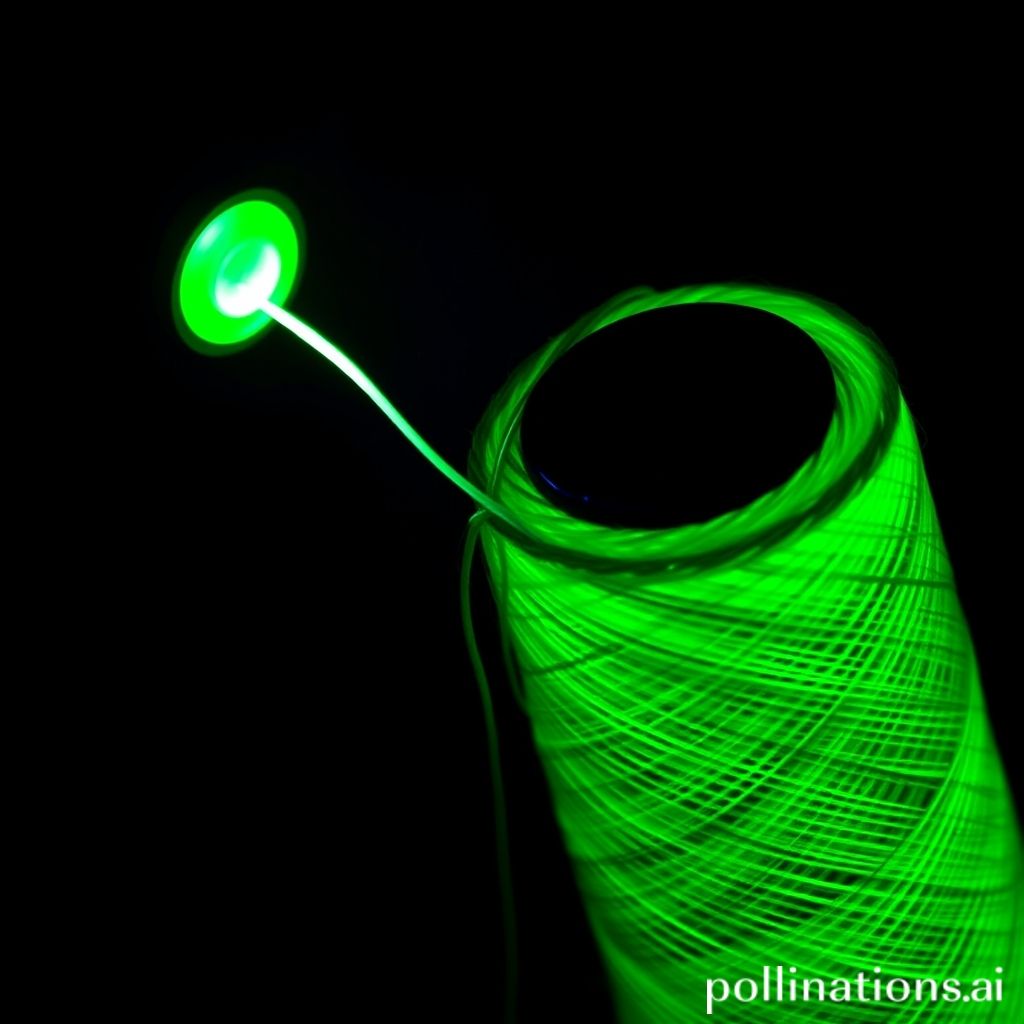
Glow-in-the-dark thread isn’t just ordinary thread that’s been dyed a peculiar color. It’s infused with phosphorescent compounds that absorb and store light energy, releasing it slowly as a soft glow in the dark. This unique characteristic makes it ideal for adding a surprising element to your embroidery. Primarily composed of polyester or rayon wrapped around the phosphorescent core, glow-in-the-dark thread comes in various weights and colors, although the glow effect is typically white, green, or bluish-green, which offers the brightest luminosity. “The best glow-in-the-dark threads are those that have a smooth, even texture, as this will result in cleaner, more defined stitches,” explains embroidery expert Jane Smith in her book, “The Complete Guide to Embroidery.” Think of using it for accents, outlining, or even creating entire images that only reveal themselves when the lights go out. Remember that the intensity and duration of the glow depend on the thread’s quality and how much light it has absorbed.
Therefore, understanding the different types of glow-in-the-dark threads is crucial for selecting the right one for your project. Polyester threads are generally more durable and resistant to fading, making them suitable for items that will be washed frequently. Rayon threads, on the other hand, offer a softer sheen and a smoother texture, ideal for delicate fabrics. The thickness or weight of the thread should also be considered, ensuring it’s compatible with your fabric and sewing machine needle. Before embarking on your project, take some time to experiment with different thread types to determine which one yields the best results and meets your specific needs. Consider that cheaper threads may have a shorter glow duration or a less intense luminosity. As a general rule of thumb, investing in higher-quality thread will result in a more satisfying and longer-lasting glowing effect.
Choosing the Right Needles and Stabilizers
Selecting the right needle is paramount when working with glow-in-the-dark thread. Because of the unique construction of this thread, it can be more prone to fraying or breaking than standard embroidery thread. A needle with a larger eye can help prevent this issue by allowing the thread to pass through more smoothly. Embroidery needles specifically designed for metallic or specialty threads are often a good choice. These needles typically have a rounded point and a larger eye to accommodate thicker or more delicate threads. As a starting point, a size 75/11 or 80/12 embroidery needle is usually recommended for most glow-in-the-dark threads. “Always test your needle and thread combination on a scrap of fabric before starting your actual project,” advises Sarah Miller, a seasoned embroidery artist. This will help you identify any potential issues and make necessary adjustments before you commit to your design.
Stabilizers play a crucial role in ensuring a clean and professional finish, especially when working with fabrics that are prone to stretching or shifting. The type of stabilizer you choose will depend on the fabric you’re using and the complexity of your design. For lightweight fabrics, a tear-away or wash-away stabilizer is often sufficient. These stabilizers provide temporary support during the embroidery process and can be easily removed afterward. For more stable fabrics, a cut-away stabilizer may be a better option. Cut-away stabilizers offer more substantial support and are designed to remain permanently attached to the back of your fabric. When selecting a stabilizer, it’s essential to consider its weight and thickness. A stabilizer that is too heavy can distort your fabric, while one that is too light may not provide enough support. Experiment with different stabilizers to find the one that works best for your project. Using proper stabilizers prevents puckering and distortion and ensures that your glow-in-the-dark embroidery looks its best.
Tension Adjustments for Optimal Stitching

Achieving the correct tension is crucial for producing high-quality embroidery with any type of thread, and glow-in-the-dark thread is no exception. Incorrect tension can lead to a variety of problems, including thread breaks, skipped stitches, and uneven stitch density. If your thread is too tight, it can cause the fabric to pucker or distort. Conversely, if the thread is too loose, it can create loops or floats on the surface of your fabric. The ideal tension setting will vary depending on your sewing machine, the type of thread you’re using, and the fabric you’re embroidering on. As a general guideline, you should aim for a balanced tension where the top and bobbin threads meet in the middle of the fabric. “The key to achieving perfect tension is to make small, incremental adjustments and to test your settings frequently,” suggests Michael Brown, a sewing machine technician with over 20 years of experience. When in doubt, consult your sewing machine’s manual for specific instructions on adjusting the tension.
To adjust the tension, start by experimenting with the upper thread tension. Most sewing machines have a dial or knob that allows you to increase or decrease the tension. Make small adjustments, such as a quarter or half turn, and then stitch out a test sample. Examine the back of your fabric to see how the stitches are forming. If the bobbin thread is visible on the top of the fabric, the upper thread tension is too tight. If the top thread is visible on the back of the fabric, the upper thread tension is too loose. Continue making adjustments until the stitches are balanced. In some cases, you may also need to adjust the bobbin tension. However, this is usually less common and should only be done if the upper thread tension adjustments are not sufficient. Before adjusting the bobbin tension, consult your sewing machine’s manual for instructions. Remember, patience and persistence are key to achieving optimal tension. Take your time, experiment with different settings, and don’t be afraid to seek help from a sewing machine technician if you’re struggling to achieve the desired results.
Designing for Glow-in-the-Dark Embroidery
Designing for glow-in-the-dark embroidery requires a different approach than designing for traditional embroidery. The unique properties of glow-in-the-dark thread open up a world of creative possibilities, but they also present some unique challenges. One of the most important considerations is the density of your design. Because glow-in-the-dark thread is often thicker than standard embroidery thread, dense designs can become bulky and uncomfortable to wear. It’s best to opt for designs that are relatively open and airy, allowing the thread to breathe. “Think about using glow-in-the-dark thread to highlight specific elements of your design, rather than filling in large areas,” suggests Emily Carter, a textile designer specializing in novelty fabrics. This will not only conserve thread but also create a more visually appealing and comfortable finished product. Consider outlining shapes or adding small accents to create a striking effect.
Another key consideration is the color and contrast of your design. Glow-in-the-dark thread typically glows in a shade of green or blue, so it’s important to choose colors that will complement this glow. Dark colors, such as black or navy, will provide the best contrast and allow the glow to stand out. Light colors, such as white or pastel shades, may wash out the glow effect. Before you start embroidering, it’s a good idea to create a sample of your design using both regular and glow-in-the-dark thread. This will allow you to visualize how the design will look in both light and dark conditions and make any necessary adjustments. Also, consider the light source that will be used to charge the glow-in-the-dark thread. Different light sources can affect the intensity and duration of the glow. Sunlight, fluorescent lights, and LED lights all have different charging properties. Experiment with different light sources to see which one produces the best results. Ultimately, effective design leverages the strengths of the thread to create a captivating final piece.
Project Ideas to Spark Your Creativity

The possibilities for projects using glow-in-the-dark thread are virtually endless. For children, consider embellishing clothing or accessories with fun and whimsical designs, such as stars, moons, or cartoon characters. A glow-in-the-dark design on a child’s backpack or jacket can also enhance their visibility at night, making them safer when walking to school or playing outdoors. “My kids love having their names embroidered in glow-in-the-dark thread on their backpacks,” says Lisa Johnson, a mother of two. “It makes them feel unique and helps them identify their belongings in a crowded classroom.” Beyond children’s items, glow-in-the-dark thread can be used to add a touch of magic to home decor items. Imagine embroidering a constellation design on a pillowcase or creating a spooky Halloween-themed wall hanging. You could also use it to personalize items for nighttime activities, such as camping gear or outdoor cushions.
Safety is another important application for glow-in-the-dark embroidery. Consider adding glow-in-the-dark accents to safety vests, jackets, or backpacks to increase visibility in low-light conditions. This is especially useful for joggers, cyclists, or construction workers who work near roadways. You can also use it to create illuminated signage or markers for emergency exits or stairwells. Beyond practical applications, glow-in-the-dark thread can be used to create stunning works of art. Experiment with different embroidery techniques, such as free-motion embroidery or thread painting, to create intricate and visually captivating designs. You could even combine glow-in-the-dark thread with other types of embroidery thread, such as metallic or silk, to create a truly unique and luxurious piece. The key is to experiment and explore different techniques to discover what works best for your style and creative vision. Don’t be afraid to think outside the box and push the boundaries of traditional embroidery.
Caring for Your Glow-in-the-Dark Creations
Proper care is essential to maintain the luminosity and longevity of your glow-in-the-dark embroidery. While most glow-in-the-dark threads are durable, they are still more delicate than standard embroidery thread and require special attention. When washing items with glow-in-the-dark embroidery, it’s best to hand wash them or use a gentle cycle in your washing machine. Avoid using harsh detergents or bleach, as these can damage the phosphorescent compounds in the thread and reduce its glow. “Always turn the item inside out before washing to protect the embroidery from abrasion,” advises Emily Davis, a textile conservator. It’s also beneficial to use a laundry bag to prevent snags and tangles. This will further protect the thread and help maintain its vibrancy.
When drying items with glow-in-the-dark embroidery, it’s best to air dry them or use a low heat setting in your dryer. High heat can damage the thread and reduce its glow. Avoid ironing directly over the embroidery, as this can melt the phosphorescent compounds. If you need to iron the item, turn it inside out and use a low heat setting. To maximize the glow effect, expose your embroidery to bright light for several hours before use. Sunlight is the most effective charging source, but artificial light can also work. The longer the thread is exposed to light, the brighter and longer it will glow. Store your embroidered items in a cool, dry place away from direct sunlight. This will help prevent fading and maintain the thread’s luminosity. By following these simple care instructions, you can ensure that your glow-in-the-dark embroidery will continue to shine for years to come. Treat your luminescent artwork with care, and it will reward you with its magic for a long time.
Troubleshooting Common Issues
Even with careful planning and execution, you may encounter some common issues when working with glow-in-the-dark thread. One of the most frequent problems is thread breakage. This can be caused by a variety of factors, including incorrect tension, a blunt needle, or a thread that is too thick for your fabric. If you experience frequent thread breakage, start by checking your tension settings and adjusting them as needed. Make sure that your needle is sharp and appropriate for the type of thread you’re using. If you’re using a heavy thread, try switching to a larger needle or a thread that is specifically designed for embroidery. “Sometimes, the solution is as simple as re-threading your machine,” notes John Williams, a sewing machine repair technician. Make sure that the thread is properly seated in all of the guides and that there are no tangles or knots.
Another common issue is uneven stitch density. This can occur when the fabric is not properly stabilized or when the stitching speed is too fast. To prevent uneven stitch density, use a stabilizer that is appropriate for your fabric and reduce your stitching speed. You may also need to adjust the stitch length or width to achieve the desired results. If you’re using a computerized embroidery machine, experiment with different stitch patterns and densities to find the one that works best for your design. If you’re still experiencing problems, consult your sewing machine’s manual or seek help from a qualified technician. Remember, troubleshooting is a normal part of the embroidery process. Don’t get discouraged if you encounter some challenges along the way. With patience and persistence, you can overcome any obstacles and create stunning glow-in-the-dark embroidery projects. Remember to always test on scraps of fabric before committing to the final piece to avoid disappointment.
Conclusion
Glow-in-the-dark embroidery is a fantastic way to add a unique and eye-catching element to your creative projects. By understanding the characteristics of glow-in-the-dark thread, choosing the right needles and stabilizers, adjusting your tension settings, and designing with the thread’s limitations in mind, you can create stunning and luminous embroidery pieces. Whether you’re embellishing children’s clothing, adding a touch of magic to home decor, or creating safety-conscious designs, glow-in-the-dark thread offers endless possibilities for creativity. The ability to transform an ordinary design into something that shines in the dark is genuinely captivating, opening up a world of artistic expression.
From understanding the properties of the thread to learning how to care for your finished creations, each step in the process is crucial for achieving optimal results. Don’t be afraid to experiment with different techniques and designs to discover what works best for you. Glow-in-the-dark embroidery is not just a craft; it’s an art form that allows you to express your creativity in a unique and unforgettable way. So, gather your supplies, unleash your imagination, and get ready to light up your embroidery world! Consider the implications for safety wear, novelty items, and even artistic installations. The future of illuminated textiles is bright, and you can be a part of it! Happy stitching!
Simthread Embroidery Thread 5500Yds / 5000M, 40WT 100% Polyester – 170+ Vivid Colors, CPSC Certified, High-Speed Rated – Compatible with Brother, Singer, Janome & More - Black 900
$7.99 (as of July 2, 2025 07:59 GMT -04:00 - More infoProduct prices and availability are accurate as of the date/time indicated and are subject to change. Any price and availability information displayed on [relevant Amazon Site(s), as applicable] at the time of purchase will apply to the purchase of this product.)
UMC STAG Pack of 12 Premium Embroidery Thread | 100% Egyptian Cotton Premium Skeins | Cross Stitch Embroidery Floss | Oeko TEX Certified Stranded Cotton | Ideal for Arts & Crafts (White-12)
$4.49 (as of July 2, 2025 13:06 GMT -04:00 - More infoProduct prices and availability are accurate as of the date/time indicated and are subject to change. Any price and availability information displayed on [relevant Amazon Site(s), as applicable] at the time of purchase will apply to the purchase of this product.)
New brothread - 18 Options - Multi-Purpose 100% Mercerized Cotton Threads 50S/3 600M(660Y) Each Spool for Quilting, Serger, Sewing and Embroidery - 12 Neutral&Jean Colors
$22.99 (as of July 2, 2025 07:59 GMT -04:00 - More infoProduct prices and availability are accurate as of the date/time indicated and are subject to change. Any price and availability information displayed on [relevant Amazon Site(s), as applicable] at the time of purchase will apply to the purchase of this product.)
Richword Prewound Bobbins 144pcs (Class 15) Size A Plastic Sided, 75D/2(60WT) Polyester Bobbin Thread for Single Needle Embroidery and Sewing Machine, White 130 Yards
$28.99 (as of June 30, 2025 05:32 GMT -04:00 - More infoProduct prices and availability are accurate as of the date/time indicated and are subject to change. Any price and availability information displayed on [relevant Amazon Site(s), as applicable] at the time of purchase will apply to the purchase of this product.)
Premium Rainbow Color Embroidery Floss - Cross Stitch Threads - Friendship Bracelets Floss - Crafts Floss - 14 Skeins Per Pack Embroidery Floss, Light Rust Gradient
$8.99 (as of July 2, 2025 13:06 GMT -04:00 - More infoProduct prices and availability are accurate as of the date/time indicated and are subject to change. Any price and availability information displayed on [relevant Amazon Site(s), as applicable] at the time of purchase will apply to the purchase of this product.)
BAi The Mirror Embroidery Machine 20x14" Embroidery Area with 15 Needles,1200spm Max Speed Multi Needle Commercial Embroidery Machine for 3D Hats Clothing,Wifi Available 10" Touch Screen
$5,499.00 (as of July 1, 2025 13:06 GMT -04:00 - More infoProduct prices and availability are accurate as of the date/time indicated and are subject to change. Any price and availability information displayed on [relevant Amazon Site(s), as applicable] at the time of purchase will apply to the purchase of this product.)
TransOurDream Tru-Iron on Heat Transfer Paper for Dark Fabric (20 Sheets, 8.5x11") T Shirt Transfers Paper for Inkjet Printer Printable Heat Transfer Vinyl for T-Shirts (TOD-7)
$13.59 (as of July 2, 2025 11:04 GMT -04:00 - More infoProduct prices and availability are accurate as of the date/time indicated and are subject to change. Any price and availability information displayed on [relevant Amazon Site(s), as applicable] at the time of purchase will apply to the purchase of this product.)
KING MOUNTAIN Iron-on Repair Patch 20 Pcs Pack,Denim Patches for Jeans Kit 3" by 4-1/4", 100% Cotton Denim Iron-on Repair Patch,Jeans and Clothing Repair and Decoration Kit (Five Color)
$7.98 (as of July 2, 2025 11:04 GMT -04:00 - More infoProduct prices and availability are accurate as of the date/time indicated and are subject to change. Any price and availability information displayed on [relevant Amazon Site(s), as applicable] at the time of purchase will apply to the purchase of this product.)
Brother LB5500 Combo Sewing & Embroidery Machine
$468.18 (as of July 1, 2025 13:06 GMT -04:00 - More infoProduct prices and availability are accurate as of the date/time indicated and are subject to change. Any price and availability information displayed on [relevant Amazon Site(s), as applicable] at the time of purchase will apply to the purchase of this product.)