Stitch Style: Upcycle Your Wardrobe with Embroidery
Is your closet overflowing with clothes you no longer wear? Before you consign them to the donation bin, consider giving them a vibrant new life! Upcycling is a fantastic way to reduce textile waste, express your creativity, and create truly unique pieces. And what better way to personalize and transform old garments than with the timeless art of embroidery?
In a world increasingly conscious of sustainability, upcycling old clothes is not just a trend, but a necessity. The fashion industry is a major contributor to environmental pollution, with textile waste being a significant concern. “The fashion industry is the second-largest consumer of water worldwide,” reports the United Nations Environment Programme, “and is responsible for 8-10% of global carbon emissions.” Embroidered embellishments allow you to breathe new life into forgotten items, turning them into cherished pieces that reflect your personal style and reduce your environmental footprint. This blog post will explore the exciting world of upcycling old clothes with embroidery, providing you with inspiration, techniques, and tips to create stunning and sustainable fashion.
We’ll delve into the basics of selecting suitable garments, explore various embroidery techniques perfect for upcycling, offer creative design ideas, guide you through the practical steps of preparing and stitching, and provide essential tips for maintaining your embroidered creations. Get ready to unleash your inner artist and transform your wardrobe with the magic of embroidery!
Finding the Perfect Garment for Your Embroidered Vision
The first step in upcycling with embroidery is selecting the right garments. Not all fabrics are created equal when it comes to embroidery. Look for sturdy, natural fibers like cotton, denim, linen, and wool. These materials can withstand the tension of embroidery stitches without puckering or tearing. Avoid very delicate or stretchy fabrics, as they can be more challenging to work with. However, with proper stabilization techniques, even some knits can be successfully embroidered.
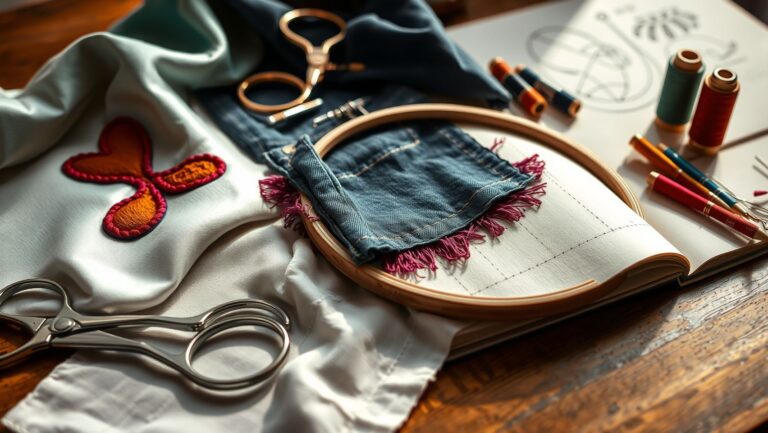
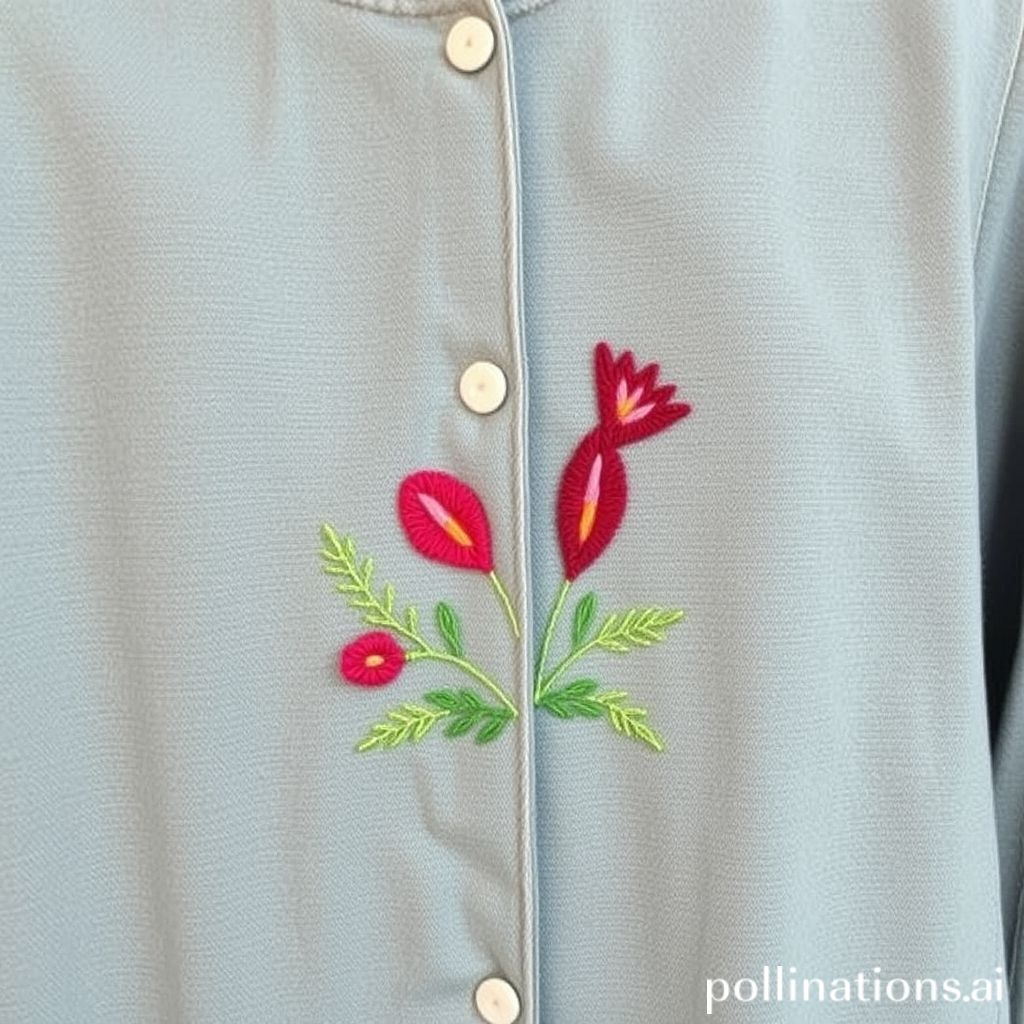
Consider the garment’s existing condition. Are there any stains, tears, or worn areas you want to conceal with your embroidery? Strategically placed embroidery can be a fantastic way to cover imperfections and give the garment a new lease on life. Think about the garment’s style and how you can enhance it with your design. A simple denim jacket can be transformed into a statement piece with bold floral embroidery, while a plain t-shirt can be elevated with a delicate monogram or geometric pattern.
Don’t be afraid to experiment with different types of garments. Old shirts, dresses, jeans, bags, and even shoes can be upcycled with embroidery. The key is to choose items that you love and that have potential for improvement. According to a report by ThredUp, “Extending the life of clothing by just nine extra months of active use would reduce carbon, water and waste footprints by around 20-30% each.” By choosing to upcycle, you’re actively contributing to a more sustainable fashion cycle.
Before you start stitching, thoroughly wash and iron the garment to ensure a smooth and even surface. This will make it easier to transfer your design and prevent the fabric from shrinking after embroidery. Now you are ready to move on to the design and selecting your embroidery technique.
Embroidery Techniques for Upcycling: A Stitch for Every Style
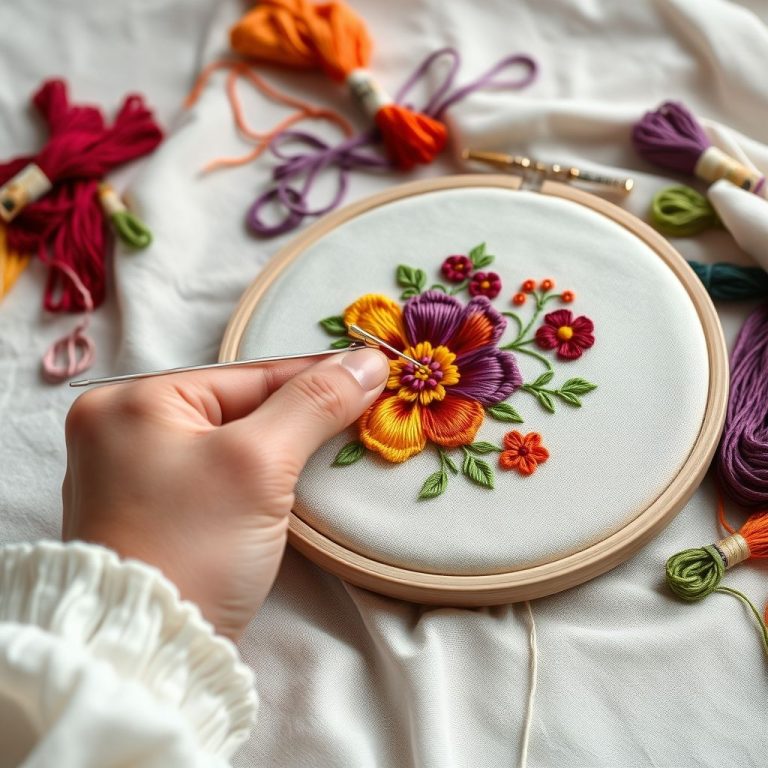
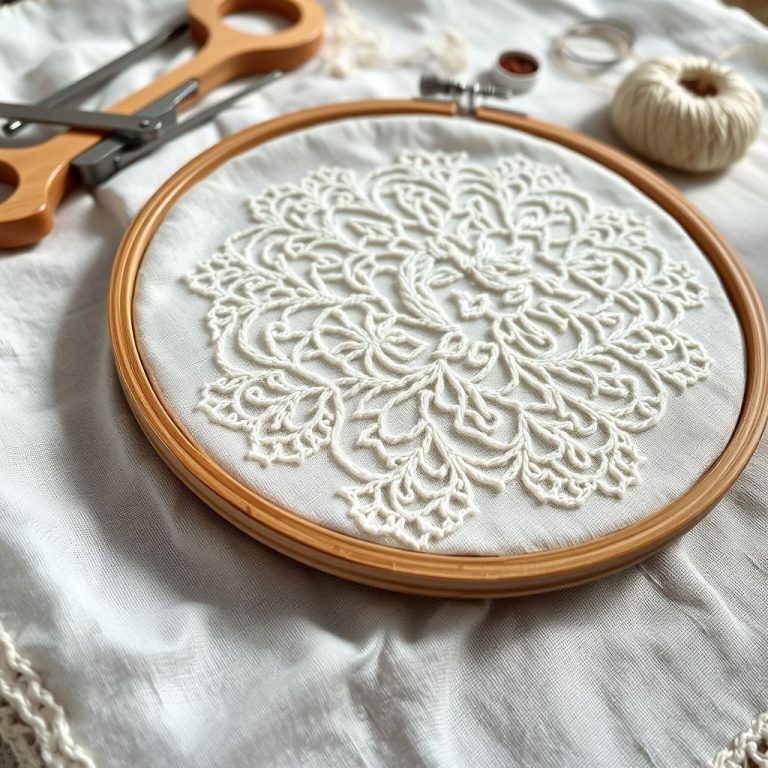
Embroidery offers a vast array of techniques, each with its unique aesthetic and level of difficulty. For beginners, simple stitches like running stitch, back stitch, and satin stitch are excellent starting points. These stitches can be used to create outlines, fill in shapes, and add texture to your designs. As you gain confidence, you can explore more advanced techniques like French knots, bullion knots, and chain stitch, which add dimension and intricacy to your embroidery.
Surface embroidery, where the stitches are worked on the surface of the fabric, is a popular choice for upcycling projects. This technique allows you to create a wide range of designs, from floral motifs to geometric patterns. Counted thread embroidery, such as cross-stitch and blackwork, can also be used to add a touch of vintage charm to old garments. These techniques involve following a grid pattern to create precise and symmetrical designs.
Consider the fabric of your garment when choosing an embroidery technique. For thicker fabrics like denim, you can use heavier threads and bolder stitches. For thinner fabrics, opt for lighter threads and more delicate stitches to avoid damaging the fabric. Experiment with different thread colors and textures to create unique and eye-catching effects. According to the Embroiderers’ Guild of America, “Embroidery has been around for centuries, with evidence of embroidered clothing and textiles dating back to ancient civilizations.” This rich history offers a wealth of inspiration for your upcycling projects.
Another technique to consider is needle painting, where you blend different shades of thread to create realistic images. This technique is particularly well-suited for upcycling projects where you want to add a touch of artistic flair. Select the stitch that will give your selected garment the look you are hoping to achieve, practice on scrap fabric if needed, and then begin to execute your design.
Design Inspiration: Unleashing Your Creative Potential
The possibilities are endless when it comes to design inspiration for upcycling with embroidery. Look to nature for inspiration, incorporating floral motifs, leaf patterns, and animal designs into your projects. Vintage embroidery patterns can also be a great source of inspiration, adding a touch of nostalgia and charm to your creations. Consider the overall style of your garment and choose a design that complements it.
Personalize your embroidery with monograms, initials, or meaningful quotes. This is a great way to make your upcycled garments truly unique and special. Use embroidery to express your interests and passions, incorporating themes related to your hobbies, travels, or favorite books. Create abstract designs using geometric shapes, bold colors, and unexpected stitch combinations. “Creativity is contagious, pass it on,” Albert Einstein once said. Let your creativity flow freely and don’t be afraid to experiment with different ideas.
Browse online platforms like Pinterest and Instagram for embroidery inspiration. There are countless examples of stunning upcycling projects that can spark your imagination. Pay attention to the color palettes, stitch combinations, and overall composition of these designs. Consider the scale of your design in relation to the garment. A large, bold design can make a statement on a denim jacket, while a smaller, more delicate design might be better suited for a t-shirt.
Remember that your embroidery design doesn’t have to be perfect. Embrace imperfections and celebrate the handmade quality of your creations. The beauty of upcycling lies in its unique and individual character. Develop your design ideas on paper and then choose the method of transfer to your chosen garment.
Preparing Your Garment and Transferring Your Design
Before you start stitching, it’s essential to prepare your garment properly. First, ensure that the fabric is clean, dry, and ironed. This will provide a smooth and even surface for embroidery. Next, stabilize the fabric to prevent it from stretching or puckering during stitching. This can be achieved using an embroidery hoop or stabilizer fabric. An embroidery hoop provides tension to the fabric, making it easier to create neat and even stitches. Stabilizer fabric is a non-woven material that is adhered to the back of the fabric to provide extra support. There are various types of stabilizers available, depending on the fabric and the type of embroidery you’re doing.
Once you have stabilized your fabric, it’s time to transfer your design. There are several methods you can use to transfer your design, including tracing, using an iron-on transfer pen, or using a water-soluble stabilizer. Tracing involves placing your design over the fabric and tracing it with a pencil or fabric marker. This method is best suited for light-colored fabrics. An iron-on transfer pen allows you to transfer your design directly onto the fabric using heat. This method is quick and easy, but it’s important to use a transfer pen that is specifically designed for fabric. Water-soluble stabilizer is a type of stabilizer that dissolves in water, leaving no residue on the fabric. This method is ideal for delicate fabrics or when you want to avoid any visible markings.
Choose the method that works best for you and carefully transfer your design onto the fabric. Ensure that the design is accurately positioned and that all the details are clearly visible. Secure the fabric in your embroidery hoop or attach the stabilizer fabric to the back of the fabric. Now you’re ready to start stitching!
Remember that the success of your embroidery project depends on proper preparation. Take your time and pay attention to detail to ensure that your fabric is stable and your design is accurately transferred. Make sure you have all of your supplies on hand and at your finger tips, so that you are ready to start stitching.
Stitching Techniques: Bringing Your Design to Life
With your garment prepped and design transferred, it’s time for the magic to happen – the stitching! Start by choosing your threads. Embroidery floss comes in a vast array of colors and materials, from cotton and silk to metallic and novelty threads. Select threads that complement your design and the fabric of your garment. Cut a length of thread that is comfortable to work with, typically around 18 inches. Thread your needle and tie a knot at the end.
Begin stitching by bringing the needle up from the back of the fabric and following the lines of your design. Use consistent stitch lengths and tension to create neat and even stitches. Refer to your design as you stitch, paying attention to the details and the overall composition. Don’t be afraid to experiment with different stitch combinations and thread colors to add depth and dimension to your embroidery. As author and embroidery artist, Trish Burr, states, “Embroidery is the art of decorating fabric using needle and thread.” This decoration becomes a beautiful collaboration between fabric, thread, and your own artistic vision.
When you reach the end of a thread, secure it by weaving it through the back of your stitches. Trim any excess thread. Continue stitching until you have completed your design. Once you have finished stitching, remove the fabric from the embroidery hoop and trim any excess stabilizer fabric. Gently press the embroidered area from the back to set the stitches. Avoid ironing directly on the embroidery, as this can flatten the stitches and damage the threads.
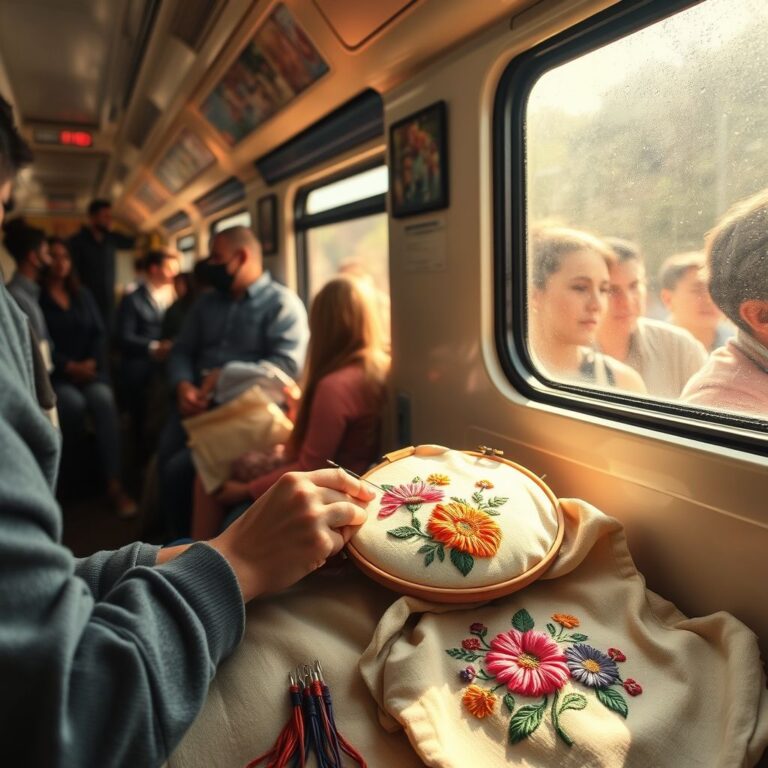
Take your time and enjoy the process of stitching. Embroidery is a meditative and rewarding craft that allows you to express your creativity and create beautiful and unique pieces of art. Remember to start small, with simple designs and basic stitches, and gradually work your way up to more complex projects. The finished product can be worn, given as gifts, or displayed as a work of art.
Caring for Your Embroidered Upcycled Creations
Proper care is essential to ensure that your embroidered upcycled creations last for years to come. Hand washing is the gentlest way to clean embroidered garments. Use a mild detergent and lukewarm water. Gently agitate the garment in the water and rinse thoroughly. Avoid wringing or twisting the garment, as this can damage the embroidery stitches. Instead, gently squeeze out the excess water and lay the garment flat to dry. If you prefer to machine wash your embroidered garments, use a gentle cycle and place the garment in a mesh laundry bag to protect the embroidery. Avoid using bleach or harsh detergents, as these can fade the colors and damage the fibers.
When ironing your embroidered garments, turn them inside out and iron on a low setting. Place a pressing cloth between the iron and the embroidery to protect the stitches. Avoid ironing directly on the embroidery, as this can flatten the stitches and damage the threads. Store your embroidered garments in a cool, dry place away from direct sunlight. This will help to prevent fading and discoloration. If you notice any loose threads, trim them carefully with sharp scissors. Avoid pulling on the threads, as this can damage the embroidery.
By following these simple care tips, you can keep your embroidered upcycled creations looking their best for years to come. With proper care, your upcycled garments will not only be beautiful and unique, but also sustainable and long-lasting. Investing a little time in preserving your handiwork ensures that the time you spent stitching was worthwhile.
Conclusion: Stitching Towards a More Sustainable Future
Upcycling old clothes with embroidery is a powerful way to combine creativity, sustainability, and personal style. By breathing new life into forgotten garments, you can reduce textile waste, express your individuality, and create truly unique pieces that reflect your values. From selecting the perfect garments to mastering various embroidery techniques, this guide has provided you with the essential knowledge and inspiration to embark on your upcycling journey.
Remember that the possibilities are endless when it comes to design inspiration. Let your creativity flow freely and don’t be afraid to experiment with different ideas. The beauty of upcycling lies in its unique and individual character. Each stitch tells a story, transforming discarded fabrics into wearable art.
Upcycling with embroidery is not just a craft; it’s a conscious choice to contribute to a more sustainable future. By extending the life cycle of clothing, we can reduce our environmental impact and create a more circular fashion system. As consumers, we have the power to make a difference through our choices. By embracing upcycling, we can create a wardrobe that is not only stylish and unique, but also environmentally responsible. So, gather your old clothes, pick up your needle and thread, and start stitching towards a more sustainable and stylish future. Let the art of embroidery transform your wardrobe and the world around you, one stitch at a time.

New brothread Set of 2 White Bobbin Thread/Bottom Thread 60WT Huge Spool 5000M (5500Y) for Embroidery and Sewing Machines
$14.99 (as of July 3, 2025 05:32 GMT -04:00 - More infoProduct prices and availability are accurate as of the date/time indicated and are subject to change. Any price and availability information displayed on [relevant Amazon Site(s), as applicable] at the time of purchase will apply to the purchase of this product.)
Simthread 6 Polyester White Machine Embroidery Threads 1000M(1100Yards) for Brother, Babylock, Janome, Pfaff, Singer, Bernina and Other Home Machines (White)
$14.99 (as of July 3, 2025 05:32 GMT -04:00 - More infoProduct prices and availability are accurate as of the date/time indicated and are subject to change. Any price and availability information displayed on [relevant Amazon Site(s), as applicable] at the time of purchase will apply to the purchase of this product.)
2-Pack - BLACK & WHITE - Coats & Clark Dual Duty All-Purpose Thread - One 400 Yard Spool each of BLACK & White
$7.44 (as of July 3, 2025 07:59 GMT -04:00 - More infoProduct prices and availability are accurate as of the date/time indicated and are subject to change. Any price and availability information displayed on [relevant Amazon Site(s), as applicable] at the time of purchase will apply to the purchase of this product.)
Mandala Crafts Bonded Nylon Thread Black Heavy Duty Sewing Threads - 1500 YDs Size 69 210D T70 Tex 70 Thread for Leather Jeans Weaving Outdoor Marine Upholstery Threads
$9.99 (as of July 3, 2025 07:59 GMT -04:00 - More infoProduct prices and availability are accurate as of the date/time indicated and are subject to change. Any price and availability information displayed on [relevant Amazon Site(s), as applicable] at the time of purchase will apply to the purchase of this product.)
COATS Dual Duty All-Purpose Thread, 400 Yards/1 Spool of Yarn, Black
$5.45 (as of July 3, 2025 07:59 GMT -04:00 - More infoProduct prices and availability are accurate as of the date/time indicated and are subject to change. Any price and availability information displayed on [relevant Amazon Site(s), as applicable] at the time of purchase will apply to the purchase of this product.)
JUKI MO-6714S Industrial 4-Thread Overlock Sewing Machine
$1,849.00 (as of July 1, 2025 13:06 GMT -04:00 - More infoProduct prices and availability are accurate as of the date/time indicated and are subject to change. Any price and availability information displayed on [relevant Amazon Site(s), as applicable] at the time of purchase will apply to the purchase of this product.)
QIANMOON (No Table) 550W Industrial Sewing Machine, Upholstery Sewing Machine with Motor,with Motor and Sewing Machine, Excluding Desk, for Tailors & Drapery Manufacturers (No Table)
$299.00 (as of July 1, 2025 13:06 GMT -04:00 - More infoProduct prices and availability are accurate as of the date/time indicated and are subject to change. Any price and availability information displayed on [relevant Amazon Site(s), as applicable] at the time of purchase will apply to the purchase of this product.)
Heavy Duty Sewing Machine with Servo Motor, 550W Commercial Sewing Machine Electric Sewing Machine with 14 Needles,Industrial Sewing Machine for Commercial, Max. 3500 Stitches/min,Not Include Table
$495.00 (as of July 1, 2025 13:06 GMT -04:00 - More infoProduct prices and availability are accurate as of the date/time indicated and are subject to change. Any price and availability information displayed on [relevant Amazon Site(s), as applicable] at the time of purchase will apply to the purchase of this product.)
XKDOUS Safety Pins - 150 Pcs Assorted Sizes Silver Pins Bulk - Small & Large Heavy Duty for Clothes, Sewing, Craft
$3.99 (as of July 2, 2025 11:04 GMT -04:00 - More infoProduct prices and availability are accurate as of the date/time indicated and are subject to change. Any price and availability information displayed on [relevant Amazon Site(s), as applicable] at the time of purchase will apply to the purchase of this product.)