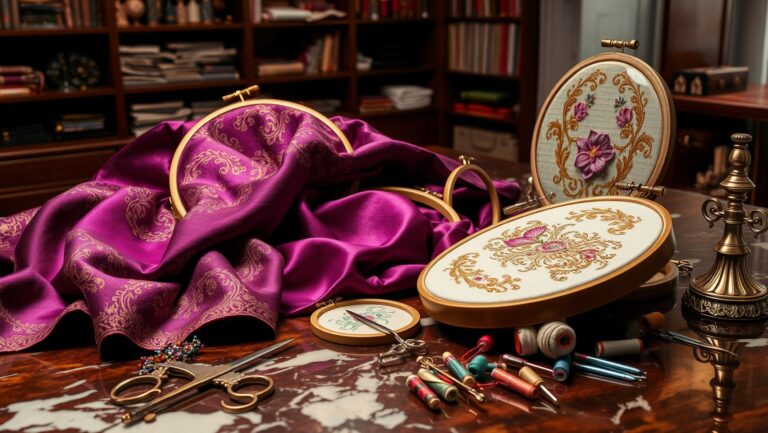
Left-Handed Embroidery: Conquer the Craft
Are you a left-handed creative soul yearning to dive into the world of embroidery, but feeling a bit… twisted? You’re not alone! Many lefties find that traditional embroidery instructions and techniques seem designed exclusively for right-handed individuals. But fear not! Embroidery is a craft for everyone, regardless of hand dominance. While it may seem daunting at first, with a few adjustments and a little understanding, you can absolutely create stunning embroidered masterpieces. The key is to adapt, not to struggle. In this blog post, we’ll unravel the mysteries of embroidery for left-handed stitchers, providing you with practical tips, tricks, and adaptations that will transform your stitching experience from frustrating to fulfilling. We’ll explore everything from needle threading and hoop positioning to stitch direction and pattern transfer. Get ready to embrace your left-handedness and unlock your embroidery potential!
Needle Threading and Knotting for Lefties
Let’s start with the basics: threading the needle and tying a knot. Even these seemingly simple tasks can feel awkward if you’re trying to mirror a right-handed demonstration. For needle threading, consider using a needle threader – a small, inexpensive tool that simplifies the process immensely, regardless of your dominant hand. There are different types of needle threaders, from wire-loop versions to those with a small hook. Experiment to find the one that feels most comfortable for you. When it comes to knotting, remember that the goal is to secure the thread end. Don’t worry about mirroring the exact hand movements you see in tutorials. Instead, focus on achieving a secure knot that won’t slip through the fabric. Practice creating knots using your left hand to manipulate the thread and needle. You might find that tying the knot in reverse feels more natural. The important thing is to find a method that is comfortable and consistent for you. As Susan Beal, author of “Super Crafty,” notes, “Don’t be afraid to experiment and adapt techniques to suit your own unique style and comfort level.” Embrace the freedom to find what works best for you; there’s no one-size-fits-all approach in embroidery.
One common challenge lefties face is the perceived “wrong” direction of the thread. A thread that seems to twist the wrong way for a right-hander is perfectly normal for you! Learn to recognize how your knots should look and feel when properly secured. If you’re still struggling, try holding the needle in your right hand and the thread in your left while tying your knot. This can sometimes provide a better sense of control and allow you to visualize the knotting process more effectively. Don’t be discouraged if it takes a few tries to get it right. Patience and practice are key to mastering any new skill, and embroidery is no exception. Remember, even the most experienced embroiderers started somewhere, and they all faced their own unique challenges along the way.
Hoop Positioning and Fabric Handling
Positioning your embroidery hoop correctly is crucial for comfortable and efficient stitching. Right-handed embroiderers often hold the hoop in their left hand and stitch with their right. As a left-handed stitcher, you’ll likely find it more comfortable to hold the hoop in your right hand and stitch with your left. Experiment with different holding positions to find what feels most natural and provides the best control. Some left-handed stitchers prefer to angle the hoop slightly to the right, while others prefer a more straight-on approach. The ideal position will depend on your individual anatomy and stitching style. You can also consider using a stand for your hoop, which will free up both of your hands. This can be especially helpful for larger projects or for stitchers who experience hand fatigue. Hoop stands come in various styles, from tabletop versions to floor-standing models, so you can choose one that suits your needs and workspace.
Fabric handling is another important aspect to consider. When stitching, you’ll need to manipulate the fabric to create smooth, even stitches. As a left-handed stitcher, you may find it helpful to rotate the fabric in a clockwise direction. This will allow you to work from left to right, which is generally more comfortable for left-handed individuals. Pay attention to how the fabric feels in your hands as you stitch. Are you able to maintain a consistent tension? Is the fabric puckering or pulling? Adjust your grip and technique as needed to ensure that you’re creating even, well-formed stitches. According to embroidery expert Mary Corbet of NeedlenThread.com, “The key to successful embroidery is to maintain a consistent tension and to work with the fabric, not against it.” Remember, embroidery should be a relaxing and enjoyable experience. If you’re feeling frustrated or uncomfortable, take a break and reassess your technique. Don’t be afraid to experiment and find what works best for you.
Mastering Stitch Direction: Left to Right
One of the most significant adjustments for left-handed embroiderers is adapting to the stitch direction. Traditional embroidery instructions often assume a right-to-left stitching direction. However, as a left-handed stitcher, you’ll naturally find it more comfortable to stitch from left to right. This means you’ll need to reverse the order of the steps in some stitches, such as the back stitch or stem stitch. For example, when working a back stitch, instead of bringing the needle up and then back to create the stitch, you’ll bring the needle up and then forward. Similarly, with the stem stitch, you’ll slant the stitches in the opposite direction. This might seem confusing at first, but with practice, it will become second nature. Don’t be afraid to experiment and practice on a scrap piece of fabric until you feel comfortable with the reversed stitch direction.
Many online resources offer tutorials specifically for left-handed embroiderers. These tutorials often provide visual demonstrations of the reversed stitch direction, which can be incredibly helpful. Look for tutorials that use clear and concise language and that show the hand movements in detail. You can also try recording yourself performing the stitches and then reviewing the video to identify any areas where you can improve. Remember, the goal is to find a stitching direction that feels natural and comfortable for you. If you’re struggling to adapt to the reversed stitch direction, consider using a different stitch altogether. There are many different embroidery stitches to choose from, and some may be more easily adapted for left-handed stitchers than others. For instance, the chain stitch or the satin stitch can be worked in either direction, making them a good option for beginners. As embroidery artist Trish Burr states, “There are no hard and fast rules in embroidery. The most important thing is to have fun and to create something that you love.”
Pattern Transfer Techniques: Mirror Images
Transferring patterns onto fabric can also present a unique challenge for left-handed embroiderers. Traditional transfer methods often assume a right-handed orientation, which can result in a pattern that is mirrored when stitched. To avoid this issue, you’ll need to reverse the pattern before transferring it to the fabric. One simple way to do this is to use a light box or window to trace the pattern onto a piece of tracing paper. Then, flip the tracing paper over and retrace the pattern onto the fabric. This will create a mirrored image that will be correctly oriented when stitched. Another option is to use a computer and printer to reverse the pattern digitally. Simply open the pattern image in an image editing program and use the “flip horizontally” or “mirror” function. Then, print the reversed pattern and transfer it to the fabric using your preferred method. There are also specialized transfer papers available that allow you to print directly onto the paper and then iron the pattern onto the fabric. Be sure to follow the manufacturer’s instructions carefully to ensure a successful transfer.
When transferring patterns, it’s important to use a method that is accurate and precise. A faint or blurry pattern can make it difficult to stitch accurately, leading to errors and frustration. Use a fine-tipped pencil or a water-soluble pen to trace the pattern onto the fabric. This will allow you to create clear, crisp lines that are easy to follow. If you’re using a transfer paper, test it on a scrap piece of fabric first to ensure that it doesn’t leave any permanent marks. According to the Embroiderers’ Guild of America, “A well-transferred pattern is the foundation of a successful embroidery project.” Take your time and pay attention to detail to ensure that your pattern is accurately transferred before you begin stitching. This will save you time and frustration in the long run and will help you create a beautiful and professional-looking finished product.
Tools and Adaptations for Comfort
Ergonomics are vital for comfortable and sustainable embroidery, especially when adapting to left-handed techniques. Consider tools designed for ergonomic comfort. Some companies offer ergonomic embroidery scissors with angled handles to reduce strain on your wrist. Similarly, adjustable hoop stands can help you maintain a comfortable posture while stitching. Experiment with different types of embroidery needles. Some needles have larger eyes or specialized tips that can make them easier to thread and manipulate. Also, don’t underestimate the importance of good lighting. Proper lighting can reduce eye strain and make it easier to see the details of your work. Invest in a good-quality task light that provides bright, even illumination.
Remember to take frequent breaks to stretch your hands and wrists. Prolonged periods of repetitive motion can lead to carpal tunnel syndrome or other repetitive strain injuries. Set a timer to remind yourself to take a break every 20-30 minutes. During your breaks, perform simple hand and wrist stretches to relieve tension. Listen to your body and don’t push yourself too hard. Embroidery should be a relaxing and enjoyable hobby, not a source of pain or discomfort. “Embroidery is a marathon, not a sprint,” advises designer Anna Maria Horner. “Pace yourself, take breaks, and enjoy the process.” Consider using a cushion or pillow to support your arms or wrists while you stitch. This can help reduce strain and improve your posture. You can also try using a weighted lap desk to stabilize your hoop and provide additional support. The key is to find a setup that is comfortable and that allows you to stitch for extended periods without experiencing pain or discomfort.
Left-Handed Resources and Communities
The good news is that the internet is brimming with resources specifically tailored for left-handed crafters, including embroiderers. Search online for left-handed embroidery tutorials, patterns, and communities. YouTube is a treasure trove of video tutorials demonstrating various techniques from a left-handed perspective. Many embroidery blogs and forums also have dedicated sections for left-handed stitchers where you can ask questions, share tips, and connect with other lefties. Don’t be afraid to reach out to the online embroidery community for support and guidance. There are many experienced embroiderers who are happy to share their knowledge and expertise. Look for online groups or forums that are specifically for left-handed crafters. These groups can provide a supportive and encouraging environment where you can learn from others and share your own experiences.
Consider attending local embroidery workshops or classes. While these classes may be geared towards right-handed stitchers, you can still learn valuable techniques and skills. Don’t be afraid to ask the instructor for assistance in adapting the techniques for left-handed use. Many instructors are happy to provide individualized instruction and support. You can also try connecting with other left-handed embroiderers in your local community. Check your local craft stores or community centers for embroidery groups or clubs. These groups can provide a great opportunity to meet other left-handed stitchers, share tips and ideas, and learn from each other. “The best way to learn is to surround yourself with people who are passionate about the same things as you are,” says fiber artist Liesl Gibson. “Find your tribe and let them inspire and support you.”
Embrace Your Uniqueness: Left-Handed Style
Finally, remember that being left-handed is not a disadvantage in embroidery; it’s simply a different way of approaching the craft. Embrace your uniqueness and find your own style and techniques. Don’t try to force yourself to conform to right-handed standards. Instead, focus on developing your own skills and creating your own unique works of art. The beauty of embroidery lies in its versatility and adaptability. There are no hard and fast rules, and there’s no one right way to do things. Experiment with different stitches, techniques, and materials to find what works best for you. Don’t be afraid to break the rules and create something that is truly your own.
Ultimately, the most important thing is to enjoy the process of creating. Embroidery should be a relaxing and rewarding hobby that brings you joy and satisfaction. So, embrace your left-handedness, grab your needle and thread, and start stitching! “The only limit to your creativity is your imagination,” says textile designer Kaffe Fassett. “So, let your imagination run wild and create something amazing!” Don’t be afraid to make mistakes. Mistakes are a natural part of the learning process, and they can often lead to new discoveries and insights. Embrace your mistakes as opportunities for growth and learning, and don’t be afraid to experiment and try new things. With practice and perseverance, you’ll be amazed at what you can create. And remember, every stitch is a step closer to your own unique embroidery masterpiece.
Conclusion: Stitch On, Lefties!
Embroidery, while often perceived as a right-handed domain, is absolutely accessible and enjoyable for left-handed stitchers. The key takeaways are adaptation, experimentation, and embracing your unique approach. From threading needles and knotting threads to manipulating fabric and reversing stitch directions, the techniques discussed provide a solid foundation for left-handed embroiderers. Remember to seek out left-handed specific resources, connect with online communities, and prioritize ergonomic comfort to ensure a sustainable and enjoyable crafting experience.
By adapting techniques, reversing patterns, and finding tools that suit your left-handedness, you can unlock your full embroidery potential. Don’t be discouraged by the challenges you may encounter along the way. Instead, view them as opportunities to learn and grow. As you continue your embroidery journey, remember that there is no one right way to do things. The most important thing is to find what works best for you and to create something that you love. So, go ahead, pick up your needle and thread, and start stitching your own unique masterpieces. The world of embroidery is waiting to be explored, and your left-handed perspective is a valuable asset. Embrace it, celebrate it, and let it guide you to create beautiful and meaningful works of art. Happy stitching, fellow lefties! Now go forth and create!
