Hat Embroidery: A Beginner’s Guide to Custom Caps
Ever looked at a beautifully embroidered hat and thought, “I want to do that!”? Embroidered hats are everywhere, from trendy streetwear to personalized gifts, and the good news is, you can create your own. While it might seem intimidating, hat embroidery is a surprisingly accessible craft, even for beginners. The unique shape and construction of hats present some challenges, but with the right techniques and equipment, you can transform a simple cap into a personalized work of art. Think about the possibilities: custom logos for your business, unique gifts for friends, or simply a way to express your creativity. This guide will walk you through everything you need to know to get started, from choosing the right materials to mastering the basic stitches.
This guide will demystify the process. We’ll cover essential equipment, stabilizer selection, hooping techniques specific to hats, and various embroidery methods, including hand embroidery and machine embroidery. We’ll also delve into design considerations and offer tips for avoiding common pitfalls. By the end of this guide, you’ll have the knowledge and confidence to embark on your own hat embroidery journey. Let’s get started and turn those plain caps into eye-catching statement pieces!
Choosing the Right Hat for Embroidery
The foundation of any successful embroidery project is the material you’re working with, and that’s especially true for hats. Not all hats are created equal, and some are significantly easier to embroider than others. Consider the fabric, construction, and overall shape when making your selection. A stiff, tightly woven fabric like cotton twill or canvas is generally ideal. These materials provide a stable surface for the stitches and minimize the risk of puckering or distortion. Avoid very thin or stretchy fabrics like jersey knit, as they can be challenging to stabilize and may not hold the embroidery well. As Barbara Kingsolver wisely stated, “The very least you can do in your life is figure out what you hope for. And the most you can do is live inside that hope. Not admire it from a distance, but live right in it, under its roof.” Similarly, choose a hat that embodies the potential for your embroidered design, setting the stage for a successful project.
The hat’s construction also plays a crucial role. Hats with a structured crown (the front panels are reinforced) are generally easier to embroider than unstructured hats. The stiffening provides additional support and helps maintain the hat’s shape during the stitching process. Consider the seams and any decorative elements already present on the hat. Avoid areas with thick seams, as they can be difficult to stitch through and may create uneven embroidery. The design itself should also influence your hat choice. Simpler designs work well on most hats, while more intricate designs may require a hat with a larger, flatter surface area. Consider the “bill” or brim of the hat. Curved bills can be more challenging to hoop and embroider than flat bills, especially for beginners. Choose a hat that complements your design and skill level to ensure a satisfying embroidery experience. Remember, a well-chosen hat is half the battle won!
Essential Embroidery Supplies and Equipment
Having the right tools can make all the difference in the success of your hat embroidery project. While hand embroidery requires a relatively small set of supplies, machine embroidery involves a more significant investment in equipment. Let’s start with the basics that are essential for both methods. First, you’ll need embroidery needles. The size and type of needle will depend on the fabric of your hat and the type of thread you’re using. A universal needle size 75/11 is a good starting point for most cotton twill hats. Next, you’ll need embroidery thread. Cotton and rayon threads are popular choices for their vibrant colors and durability. However, polyester thread is more colorfast and resistant to fading, making it a good option for hats that will be exposed to the sun. As author and artist Austin Kleon aptly puts it, “Start copying what you love. Copy copy copy copy. At the end of the copy you will find yourself.” Similarly, starting with proven embroidery supplies will lead you to discover your own preferences and style.
Stabilizer is another crucial component. Stabilizer provides support to the fabric during stitching, preventing puckering and distortion. There are various types of stabilizer available, including cut-away, tear-away, and wash-away. For hats, a cut-away stabilizer is often the best choice, as it provides the most support and remains permanently attached to the back of the embroidery. A good quality embroidery hoop is essential for hand embroidery. Choose a hoop that is the right size for your design and that holds the fabric taut. For machine embroidery, you’ll need a specialized hat hoop or a cap frame. These hoops are designed to fit the curved shape of a hat and provide a secure grip during stitching. Other essential supplies include scissors, a seam ripper, a water-soluble marking pen, and a light box (optional). With the right tools at your disposal, you’ll be well-equipped to tackle any hat embroidery project.
Mastering the Art of Hat Hooping
Hooping a hat is arguably the most challenging aspect of hat embroidery, especially for beginners. The curved shape and rigid structure of a hat make it difficult to secure in a standard embroidery hoop. A proper hooping technique is crucial for preventing fabric distortion, ensuring accurate stitch placement, and avoiding damage to the hat. The first step is to choose the right hoop. As mentioned earlier, a specialized hat hoop or cap frame is essential for machine embroidery. These hoops are designed with a curved shape that conforms to the hat’s contour and provides a secure grip. For hand embroidery, you can use a standard embroidery hoop, but you’ll need to be extra careful to avoid stretching or distorting the fabric. “The details are not the details,” Charles Eames famously said. “They make the design.” Similarly, meticulous hooping is essential to the overall quality and impact of your hat embroidery design.
Before hooping, flatten the area where you plan to embroider as much as possible. This can be done by gently pressing the area with your fingers or using a pressing cloth and a warm iron (be careful not to scorch the fabric). Insert the hat into the hoop, aligning the center of the design with the center of the hoop. Ensure that the fabric is taut but not stretched. Over-stretching can distort the design and damage the hat. If you’re using a hat hoop for machine embroidery, follow the manufacturer’s instructions for securing the hat. Most hat hoops have adjustable straps or clamps that hold the hat in place. Once the hat is hooped, double-check that the fabric is smooth and free of wrinkles. Use your fingers to gently smooth out any imperfections. If you’re using a water-soluble marking pen to transfer your design, do so after hooping. This will prevent the design from shifting or distorting during the hooping process. Remember, patience and practice are key to mastering the art of hat hooping. Don’t be discouraged if you don’t get it right the first time. With a little persistence, you’ll be hooping hats like a pro in no time!
Hand Embroidery Techniques for Hats
Hand embroidery offers a unique and personal touch to hat customization. While it may take longer than machine embroidery, it allows for greater control over the design and stitching, resulting in a truly one-of-a-kind creation. Before you begin, it’s essential to choose the right stitches for your design and the fabric of your hat. Simple stitches like the back stitch, stem stitch, and satin stitch are excellent choices for outlining and filling in shapes. More decorative stitches, such as the French knot and lazy daisy stitch, can add texture and dimension to your design. As Maya Angelou wrote, “You can’t use up creativity. The more you use, the more you have.” Applying different hand embroidery stitches to your hat can open up new creative pathways.
When working on a curved surface like a hat, it’s crucial to maintain even tension and avoid pulling the fabric too tightly. This can distort the design and create puckering. Use a smaller hoop to focus on a specific area of the design at a time. This will give you more control and prevent the fabric from shifting. Start with the outline of your design and then fill in the details. This will help you maintain accuracy and ensure that the design is well-defined. When stitching, use short, even stitches to create a smooth and consistent line. Avoid long stitches, as they are more likely to snag or loosen over time. If you’re using multiple colors of thread, plan your stitching sequence carefully to minimize the number of thread changes. This will save you time and reduce the risk of tangling. Remember to secure your threads properly at the beginning and end of each stitching session. A simple knot or a few small back stitches will prevent the threads from unraveling. Hand embroidery on hats is a rewarding and fulfilling craft. With a little practice and patience, you can create stunning and personalized designs that will be cherished for years to come.
Machine Embroidery Tips and Tricks for Hats
Machine embroidery offers a faster and more efficient way to customize hats, especially for intricate designs or large quantities. However, it also requires a certain level of expertise and attention to detail to achieve professional-looking results. Before you start, it’s essential to digitize your design properly. Digitizing is the process of converting an image into a format that the embroidery machine can read. A poorly digitized design can result in inaccurate stitch placement, thread breaks, and overall poor quality. Use a reputable digitizing software program and pay attention to details such as stitch density, pull compensation, and underlay. As Steve Jobs wisely stated, “Details matter, it’s worth waiting to get it right.” Applying this philosophy to your machine embroidery digitizing will ensure a high-quality end product.
When choosing thread for machine embroidery on hats, consider the fabric and the design. Polyester thread is a good option for its durability and colorfastness. Use a needle size appropriate for the thread and fabric. A 75/11 needle is a good starting point for most cotton twill hats. Adjust the machine’s tension settings to ensure that the stitches are balanced and even. Uneven tension can cause thread breaks, looping, and other problems. Start with a test stitch on a scrap piece of fabric before embroidering on the hat. This will allow you to fine-tune the machine’s settings and identify any potential problems. When embroidering on a curved surface like a hat, use a slow stitching speed. This will give the machine more time to adjust to the changing angle of the fabric and prevent skipped stitches. Use a stabilizer that is appropriate for the fabric and the design. Cut-away stabilizer is generally the best choice for hats, as it provides the most support and remains permanently attached to the back of the embroidery. After embroidering, trim away any excess stabilizer and remove any loose threads. Machine embroidery on hats can be a challenging but rewarding endeavor. With the right tools, techniques, and a little patience, you can create stunning and personalized hats that will impress.
Design Considerations for Hat Embroidery
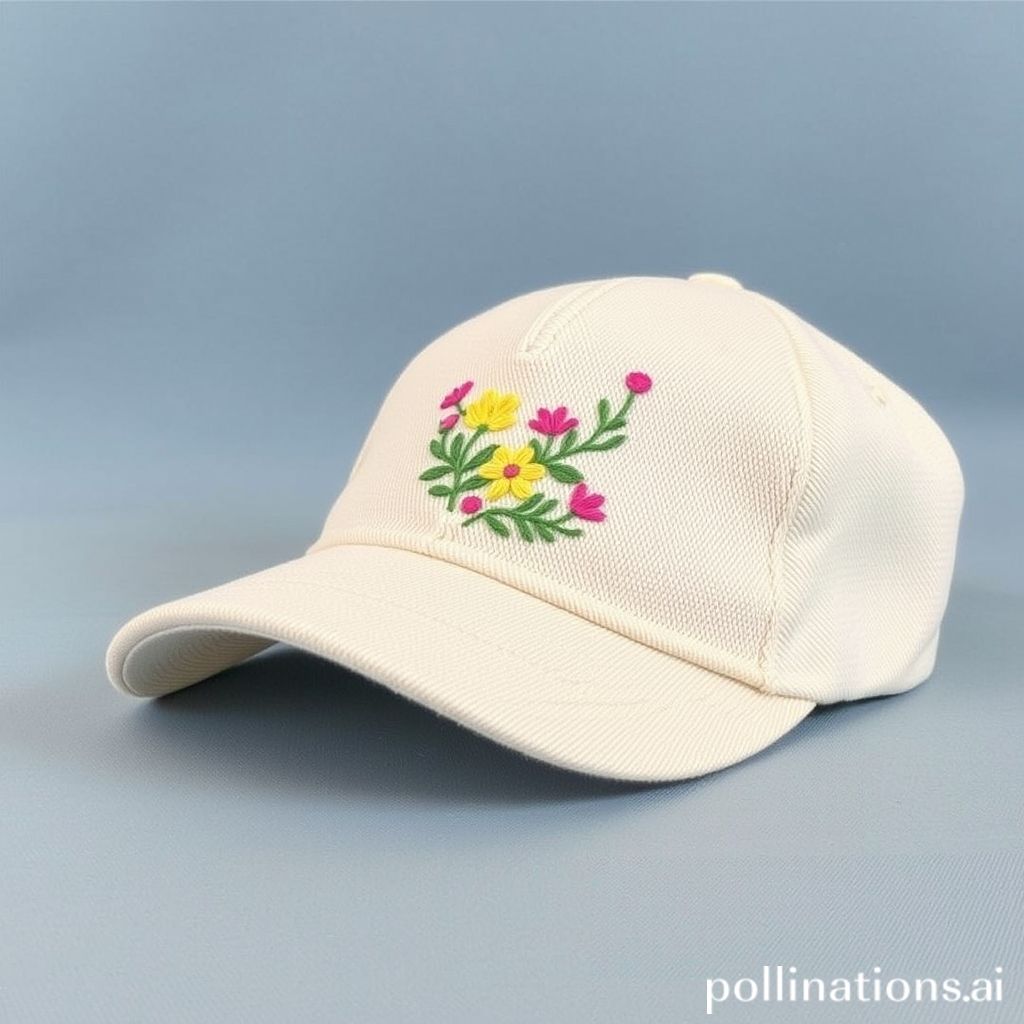
The design you choose for your hat embroidery project is just as important as the materials and techniques you use. A well-designed embroidery can transform a plain hat into a stylish and eye-catching accessory, while a poorly designed embroidery can detract from the hat’s overall appearance. Consider the size and placement of the design. A design that is too large can overwhelm the hat and make it uncomfortable to wear. A design that is too small may get lost and be difficult to see. As Coco Chanel famously said, “Elegance is when the inside is as beautiful as the outside.” This applies to hat embroidery as well; the design and placement should work in harmony with the hat’s structure and shape.
The placement of the design is also crucial. The most common placement is on the front of the hat, but you can also embroider on the sides or back. Consider the shape and style of the hat when choosing the placement. For example, a design on the side of a baseball cap may look awkward, while a design on the back of a beanie can be a stylish and unexpected touch. Think about the colors you want to use in your design. Choose colors that complement the hat’s fabric and your personal style. Consider the contrast between the thread colors and the hat fabric. High contrast colors will make the design stand out, while low contrast colors will create a more subtle effect. Before you start embroidering, sketch out your design on paper or use a digital design tool. This will help you visualize the finished product and make any necessary adjustments. Consider the complexity of the design. Intricate designs with lots of details may be difficult to embroider on a hat, especially for beginners. Simpler designs are generally easier to execute and can be just as effective. The design possibilities are endless, from monograms and logos to floral patterns and whimsical illustrations. Let your creativity guide you and create a design that reflects your personal style and interests.
Troubleshooting Common Hat Embroidery Problems
Even with careful planning and execution, hat embroidery can sometimes present challenges. Thread breaks, puckering, and skipped stitches are just a few of the common problems that can arise. The key to success is to identify the problem early and take steps to correct it. Thread breaks are one of the most frustrating issues in embroidery. They can be caused by a variety of factors, including incorrect thread tension, a dull needle, or a poorly digitized design. As Thomas Edison famously said, “I have not failed. I’ve just found 10,000 ways that won’t work.” Think of each embroidery mishap as a learning opportunity, guiding you towards a better understanding of the craft.
Puckering occurs when the fabric is pulled too tightly during stitching, creating a wrinkled or distorted appearance. This can be caused by incorrect stabilizer, improper hooping, or excessive stitch density. To prevent puckering, use a stabilizer that is appropriate for the fabric and the design. Ensure that the hat is hooped properly and that the fabric is taut but not stretched. Reduce the stitch density if necessary. Skipped stitches occur when the needle fails to catch the thread, leaving gaps in the embroidery. This can be caused by a bent needle, incorrect needle size, or a machine timing issue. Inspect the needle carefully and replace it if it is bent or damaged. Make sure you’re using the correct needle size for the thread and fabric. Consult your machine’s manual for troubleshooting tips. If you encounter a problem that you can’t resolve on your own, don’t hesitate to seek help from a qualified embroidery technician. With a little troubleshooting and problem-solving skills, you can overcome any challenge and create beautiful embroidered hats.
Final Thoughts: Embrace the Art of Hat Embroidery
Embarking on the journey of hat embroidery is an investment in creativity and personal expression. We’ve covered a lot, from selecting the right hat and essential supplies to mastering hooping techniques, understanding hand and machine embroidery, and designing with intention. You now possess the foundational knowledge to transform simple caps into personalized works of art. Remember, the key to successful hat embroidery lies in patience, practice, and a willingness to experiment. Don’t be afraid to try new techniques, explore different designs, and make mistakes along the way. Each stitch, whether perfect or not, contributes to the learning process and brings you closer to mastering this rewarding craft. The ability to adorn a simple hat with intricate designs is more than just a skill; it’s a form of storytelling, a way to express your individuality, and a means to create unique and meaningful gifts.
The world of hat embroidery is constantly evolving, with new techniques and technologies emerging all the time. Stay curious, continue learning, and embrace the challenges that come your way. As you hone your skills, you’ll discover your own unique style and develop a deep appreciation for the art of embroidery. Ultimately, the most important thing is to enjoy the process and let your creativity shine. So, grab a hat, gather your supplies, and start stitching. The possibilities are endless, and the results are sure to be rewarding. From personalizing your own wardrobe to creating custom merchandise for your business, hat embroidery offers a versatile and fulfilling creative outlet. Now, go forth and create something amazing!
Simthread All Purpose Thread Polyester 400 Yards (1 White 1 Black)
$5.99 (as of May 18, 2025 04:08 GMT -04:00 - More infoProduct prices and availability are accurate as of the date/time indicated and are subject to change. Any price and availability information displayed on [relevant Amazon Site(s), as applicable] at the time of purchase will apply to the purchase of this product.)
New brothread 40 Brother Colors 500m Each Embroidery Machine Thread with Clear Plastic Storage Box for Embroidery Sewing Machine
$25.49 (as of May 18, 2025 04:09 GMT -04:00 - More infoProduct prices and availability are accurate as of the date/time indicated and are subject to change. Any price and availability information displayed on [relevant Amazon Site(s), as applicable] at the time of purchase will apply to the purchase of this product.)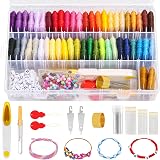
PAXCOO 488Pcs String Bracelet Making Kit, Friendship Bracelet String Kit with 50 Skeins Embroidery Floss Cross Stitch Thread, 400Pcs Friendship Bracelet Beads, 37Pcs Embroidery Tools
$10.99 (as of May 18, 2025 04:08 GMT -04:00 - More infoProduct prices and availability are accurate as of the date/time indicated and are subject to change. Any price and availability information displayed on [relevant Amazon Site(s), as applicable] at the time of purchase will apply to the purchase of this product.)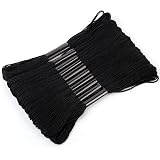
10 Skeins Black Embroidery Floss, 8m Cotton Embroidery Floss - Cross Stitch Thread Set
$3.79 (as of May 18, 2025 04:08 GMT -04:00 - More infoProduct prices and availability are accurate as of the date/time indicated and are subject to change. Any price and availability information displayed on [relevant Amazon Site(s), as applicable] at the time of purchase will apply to the purchase of this product.)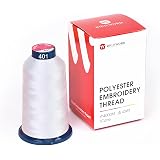
Richword White Embroidery Thread 4000M(4374Y) 40WT Polyester Thread 100 Colors Selected for Commercial Multi Needles and Single Needle Embroidery Machine 0401
$7.99 (as of May 18, 2025 04:09 GMT -04:00 - More infoProduct prices and availability are accurate as of the date/time indicated and are subject to change. Any price and availability information displayed on [relevant Amazon Site(s), as applicable] at the time of purchase will apply to the purchase of this product.)
Smartstitch S-1201 Compact Embroidery Machine with 12 Needles, 1200SPM Max Speed, 7“ Touch Screen, 9.5"x12.6" Embroidery Area, Your First Commercial Embroidery Machine for Flat, Hat, T-shirt and more
$4,999.00 (as of May 18, 2025 03:53 GMT -04:00 - More infoProduct prices and availability are accurate as of the date/time indicated and are subject to change. Any price and availability information displayed on [relevant Amazon Site(s), as applicable] at the time of purchase will apply to the purchase of this product.)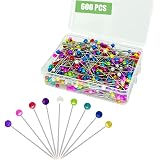
600PCS Sewing Pins Straight Pin for Fabric, Pearlized Ball Head Quilting Pins Long 1.5inch, Multicolor Corsage Stick Pin for Dressmaker, Jewelry DIY Decoration, Craft and Sewing Project
$4.99 (as of May 18, 2025 03:53 GMT -04:00 - More infoProduct prices and availability are accurate as of the date/time indicated and are subject to change. Any price and availability information displayed on [relevant Amazon Site(s), as applicable] at the time of purchase will apply to the purchase of this product.)
Cricut® Value Iron-On, White (12 in x 5 ft)- HTV Heat Transfer Vinyl
$9.99 (as of May 18, 2025 03:53 GMT -04:00 - More infoProduct prices and availability are accurate as of the date/time indicated and are subject to change. Any price and availability information displayed on [relevant Amazon Site(s), as applicable] at the time of purchase will apply to the purchase of this product.)
Juki DDL-8100e ECONOMIC Lockstitch Industrial Sewing Machine, White, Single Needle, Up to 4500 Stitches per Minute, Assembly Required
$859.00 (as of May 18, 2025 03:53 GMT -04:00 - More infoProduct prices and availability are accurate as of the date/time indicated and are subject to change. Any price and availability information displayed on [relevant Amazon Site(s), as applicable] at the time of purchase will apply to the purchase of this product.)