Unlock the Beauty: Bullion Knot Embroidery Secrets
Have you ever gazed at a piece of embroidery and been captivated by the intricate, textured details, wondering how such stunning effects are achieved? Often, the answer lies in the mastery of a single, deceptively simple stitch: the bullion knot. This elongated, coiled stitch adds a touch of elegance and dimension to any project, transforming ordinary fabric into a work of art. It might seem daunting at first, but with a little practice and the right guidance, anyone can unlock its potential. In this guide, we’ll delve into the secrets of mastering the bullion knot, from essential techniques to inspiring project ideas, ensuring you can confidently incorporate this versatile stitch into your own creations. So, grab your needle and thread, and let’s embark on a journey to unravel the beauty of the bullion knot.
Decoding the Bullion Knot Basics
Before diving into complex projects, it’s crucial to understand the fundamental steps of creating a perfect bullion knot. This stitch essentially involves wrapping thread multiple times around the needle and then carefully drawing the needle through the wraps to form a tightly coiled shape. The number of wraps dictates the length of the knot, offering incredible versatility in design. As Mary Thomas states in her “Dictionary of Embroidery Stitches,” “The Bullion Stitch is a long detached stitch…used to represent a grain of wheat or a seed, or to form part of a flower petal or a border.” While seemingly straightforward, mastering the technique requires patience and attention to detail. Common issues include knots that are too loose, too tight, or uneven in length. Practice on scrap fabric is key to developing muscle memory and achieving consistent results.
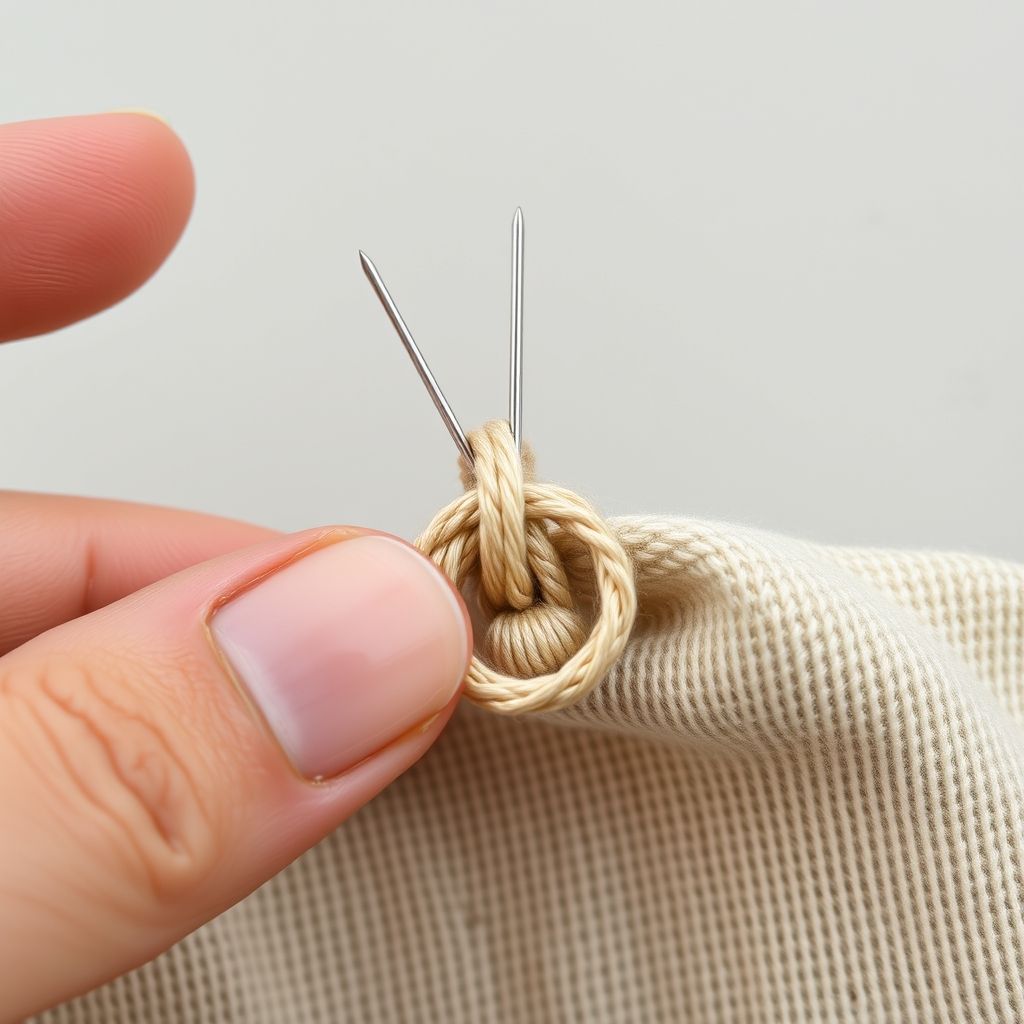
The first step is bringing your needle up from the back of the fabric at point A. Then, insert the needle back down at point B, the desired length of your bullion knot. Don’t pull the thread all the way through yet! Instead, bring the needle back up at point A. Now comes the wrapping. Wrap the thread around the needle as many times as needed to cover the distance between points A and B. The number of wraps will directly influence the length of your finished bullion knot. Ensure the wraps are snug but not overly tight. Here’s where the magic happens: carefully hold the wraps with your fingers as you gently pull the needle through the wraps and fabric. This requires finesse to prevent the knot from unraveling or becoming distorted. Once the needle is through, pull the thread taut, guiding the knot into its final position. Finally, insert the needle back down at point B to secure the bullion knot in place. Repeat these steps, adjusting the length and placement of your knots to create various designs.
A key element to remember is the tension. Too much tension will result in a tight, puckered knot that distorts the fabric. Too little tension, and the knot will be loose and floppy. Finding the perfect balance is essential for achieving a neat and even bullion knot. Experiment with different thread types and needle sizes to discover what works best for you. Fine threads, like embroidery floss or silk, tend to create more delicate knots, while thicker threads can add texture and dimension. Don’t be discouraged if your first few attempts are less than perfect. Like any skill, mastering the bullion knot takes time and practice. The more you experiment, the more comfortable you will become with the technique, and the more refined your results will be.
Thread and Needle Selection for Bullion Knots
The success of your bullion knot embroidery hinges significantly on choosing the right thread and needle. These tools are not interchangeable; each plays a distinct role in achieving a well-formed, aesthetically pleasing knot. Your thread should be strong enough to withstand the wrapping and pulling without breaking, yet pliable enough to create smooth, even coils. Similarly, your needle should be sharp enough to pierce the fabric cleanly but not so thick that it distorts the woven structure. Selecting the appropriate thread and needle combination can dramatically improve the quality and appearance of your bullion knots.
For thread selection, consider the type of fabric you are working with. For finer fabrics like silk or linen, opt for embroidery floss or perle cotton. These threads are smooth, lightweight, and create delicate knots. For heavier fabrics like denim or canvas, you can use thicker threads like tapestry wool or even lightweight yarn. These threads add texture and dimension to your bullion knots, making them stand out against the sturdy fabric. Experiment with different thread weights and textures to see what works best for your project. Color is also an important consideration. Choose threads that complement your fabric and the overall design of your embroidery. Variegated threads can add depth and interest to your bullion knots, creating subtle variations in color and texture.
Needle selection is equally important. A sharp needle is essential for piercing the fabric cleanly and preventing snags. The size of the needle should be appropriate for the thread you are using. If the needle is too small, it will be difficult to pull the thread through the fabric and the wraps. If the needle is too large, it will create large holes in the fabric and distort the shape of the bullion knot. A good rule of thumb is to use a needle that is slightly larger than the thread. This will allow the thread to pass through the eye of the needle easily and prevent it from fraying. Embroidery needles, also known as crewel needles, are specifically designed for embroidery work. They have a long eye that is easy to thread and a sharp point that pierces fabric cleanly. Milliner needles are also a good option for bullion knots, as they are long and slender, making it easier to wrap the thread around the needle. According to Trish Burr, author of “Needle Painting Embroidery: Fresh Ideas for Beginners,” “The right needle makes all the difference. Don’t compromise on quality.”
Mastering Tension: The Key to Perfect Knots

Achieving the perfect bullion knot often boils down to one crucial element: tension. Too much tension and your knot will be tight, distorted, and prone to puckering the surrounding fabric. Too little tension, and your knot will be loose, floppy, and lacking definition. Mastering the art of balanced tension is the key to creating beautiful, well-formed bullion knots that enhance your embroidery projects. This involves not only the tension on the thread as you wrap it around the needle but also the tension as you pull the needle through the wraps and secure the knot.
One common mistake is wrapping the thread too tightly around the needle. While it might seem like a secure way to create a dense knot, excessive tension will actually make it difficult to pull the needle through the wraps and distort the shape of the knot. Instead, aim for a snug but not overly tight wrap. The thread should lie neatly against the needle without being forced or strained. As you wrap, periodically check the tension by gently tugging on the thread. It should move freely without resistance. If you feel any significant tension, loosen your grip and try again. Another important aspect of tension control is maintaining consistent tension throughout the wrapping process. Uneven tension will result in a knot that is misshapen and unbalanced.
As you pull the needle through the wraps, maintain a gentle but firm pressure. Use your fingers to guide the wraps and prevent them from unraveling. Avoid yanking or jerking the needle, as this can distort the shape of the knot and damage the surrounding fabric. Instead, use a slow, steady motion to ease the needle through the wraps. Once the needle is through, gently pull the thread taut, guiding the knot into its final position. Avoid pulling too hard, as this can stretch the knot and distort its shape. Instead, use a light touch to ensure that the knot sits neatly against the fabric. As Mary Corbet of Needle ‘n Thread explains, “Tension is everything. It’s the make-or-break point of a good bullion. Practice controlling that tension and your bullions will improve dramatically.” The secret lies in finding the sweet spot where the knot is secure and well-defined without being overly tight or strained. Practice, patience, and a keen eye for detail are the keys to mastering the art of tension control.
Troubleshooting Common Bullion Knot Problems
Even with the best intentions and careful technique, bullion knots can sometimes present challenges. Common issues include knots that unravel, knots that are too tight or too loose, and knots that are uneven in length or shape. Understanding the causes of these problems and knowing how to troubleshoot them is essential for achieving consistently beautiful results. Don’t be discouraged by imperfections; they are a natural part of the learning process. Instead, view them as opportunities to refine your technique and deepen your understanding of the bullion knot.
One of the most frustrating problems is a bullion knot that unravels. This usually happens when the wraps are not secured properly. To prevent this, make sure you are holding the wraps firmly with your fingers as you pull the needle through. Once the needle is through, pull the thread taut, guiding the knot into its final position. If the knot still unravels, try using a slightly thicker thread or wrapping the thread around the needle more times. A knot that is too tight is usually caused by wrapping the thread too tightly around the needle. This can make it difficult to pull the needle through the wraps and distort the shape of the knot. To fix this, try loosening your grip as you wrap the thread around the needle. Aim for a snug but not overly tight wrap. A knot that is too loose is usually caused by not wrapping the thread enough times around the needle. This can result in a floppy, undefined knot. To fix this, try wrapping the thread around the needle more times. The number of wraps should be enough to cover the distance between the entry and exit points of the needle.
Uneven knots can occur for a variety of reasons, including inconsistent tension or incorrect needle placement. To ensure even knots, pay close attention to your tension as you wrap the thread around the needle. Keep the tension consistent throughout the wrapping process. Also, make sure that you are inserting the needle back down at the same point where you started. This will help to ensure that the knot is even in length and shape. If you are still having trouble with uneven knots, try using a hoop or frame to hold your fabric taut. This will help to prevent the fabric from stretching or distorting as you work. According to embroidery expert, Jane Nicholas, “Practice makes perfect, but understanding the mechanics of the stitch is key to avoiding common errors.” By understanding the causes of common bullion knot problems and knowing how to troubleshoot them, you can overcome these challenges and achieve consistently beautiful results.
Bullion Knot Flowers: A Beginner-Friendly Project
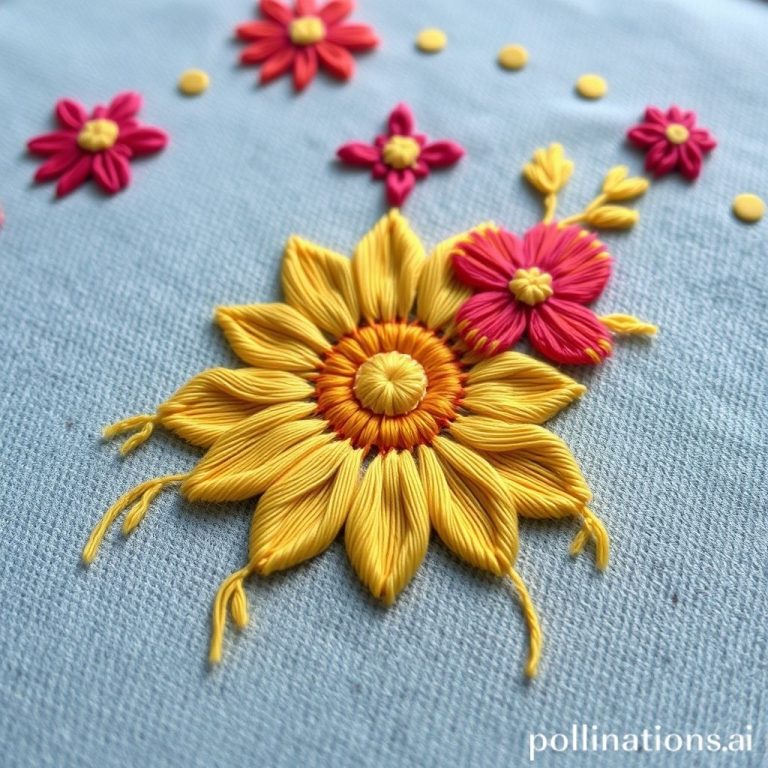
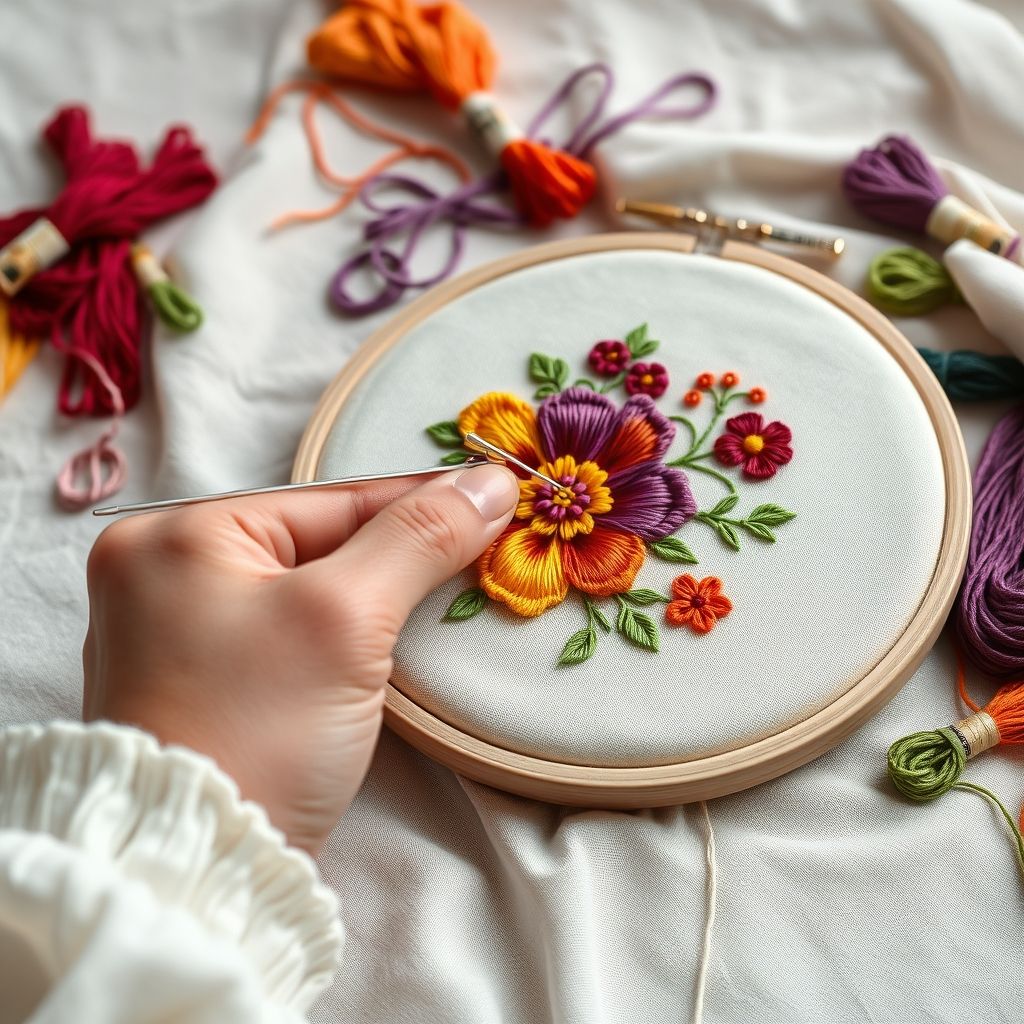
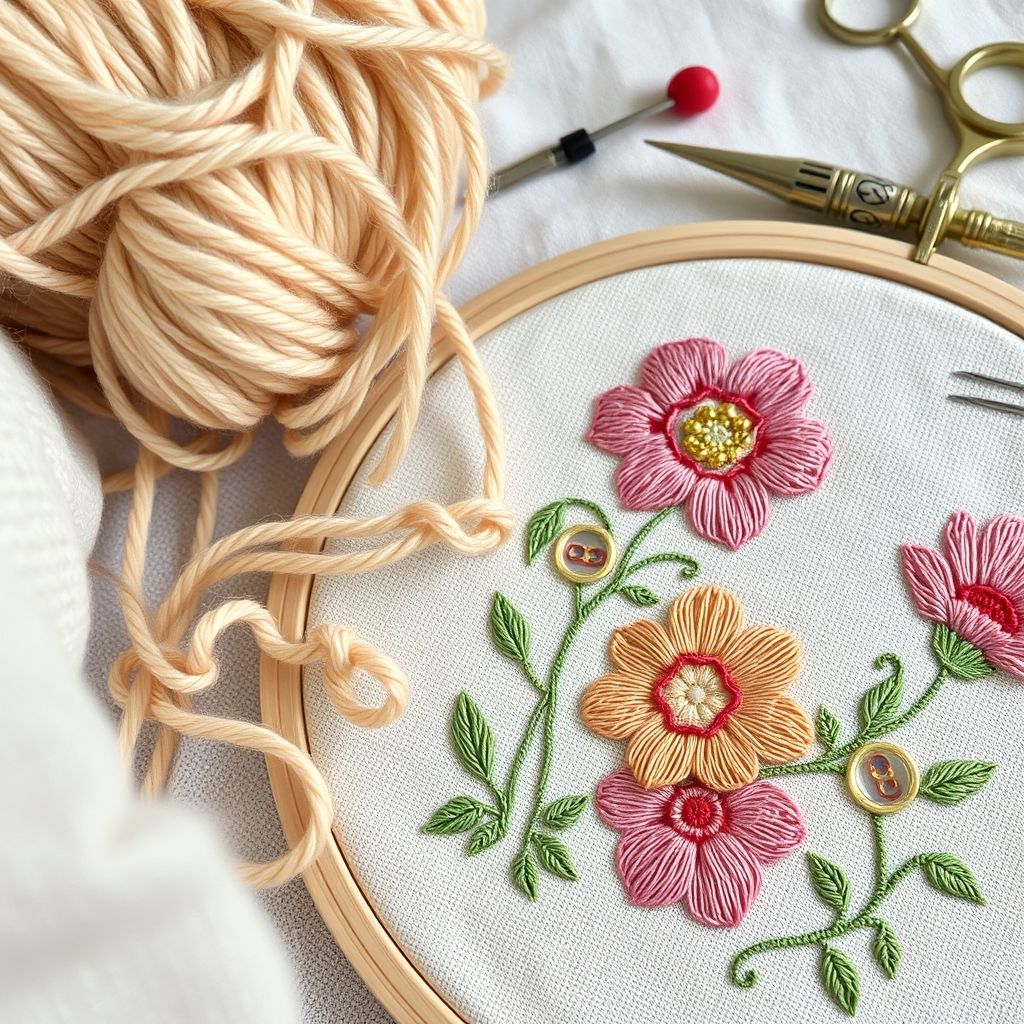
Now that you’ve grasped the fundamentals and learned how to troubleshoot common issues, it’s time to put your skills to the test with a fun and rewarding project: bullion knot flowers. These charming floral embellishments are a perfect way to practice your bullion knot technique while creating a beautiful and versatile design. Whether you’re adorning a tote bag, embellishing a piece of clothing, or creating a framed piece of art, bullion knot flowers add a touch of whimsy and elegance to any project. This project provides a great opportunity to experiment with different thread colors, sizes, and arrangements to create unique and personalized floral designs.
To begin, gather your supplies: embroidery floss in various colors, a piece of fabric, an embroidery needle, and an embroidery hoop (optional but recommended). Start by sketching a simple flower design onto your fabric. You can use a pencil or a water-soluble marker. The design can be as simple as a single circle for the center of the flower or as elaborate as a multi-petaled blossom. Next, choose the color for the center of your flower and create a small, tight bullion knot in the middle of the circle. This will serve as the starting point for your petals. Now, select a color for your petals and begin creating bullion knots around the center. The length of the knots will determine the size and shape of your petals. You can create short, stubby petals by using fewer wraps or long, flowing petals by using more wraps. Overlap the petals slightly to create a full, textured look. Don’t be afraid to experiment with different colors and sizes of petals to create a unique and eye-catching flower.
Once you’ve completed the petals, you can add details such as leaves or stems using other embroidery stitches like the stem stitch or the lazy daisy stitch. You can also add embellishments like beads or sequins to further enhance your design. Remember, the key to creating beautiful bullion knot flowers is to experiment and have fun. Don’t be afraid to try new things and push your creative boundaries. As renowned embroidery artist, Anna Maria Horner, suggests, “Embrace the imperfections. They are what make your work unique and personal.” With a little practice and a lot of imagination, you can create stunning bullion knot flowers that will add a touch of beauty and elegance to any project. This project not only allows you to hone your bullion knot skills but also encourages you to explore the endless possibilities of embroidery design.
Beyond Flowers: Creative Bullion Knot Applications
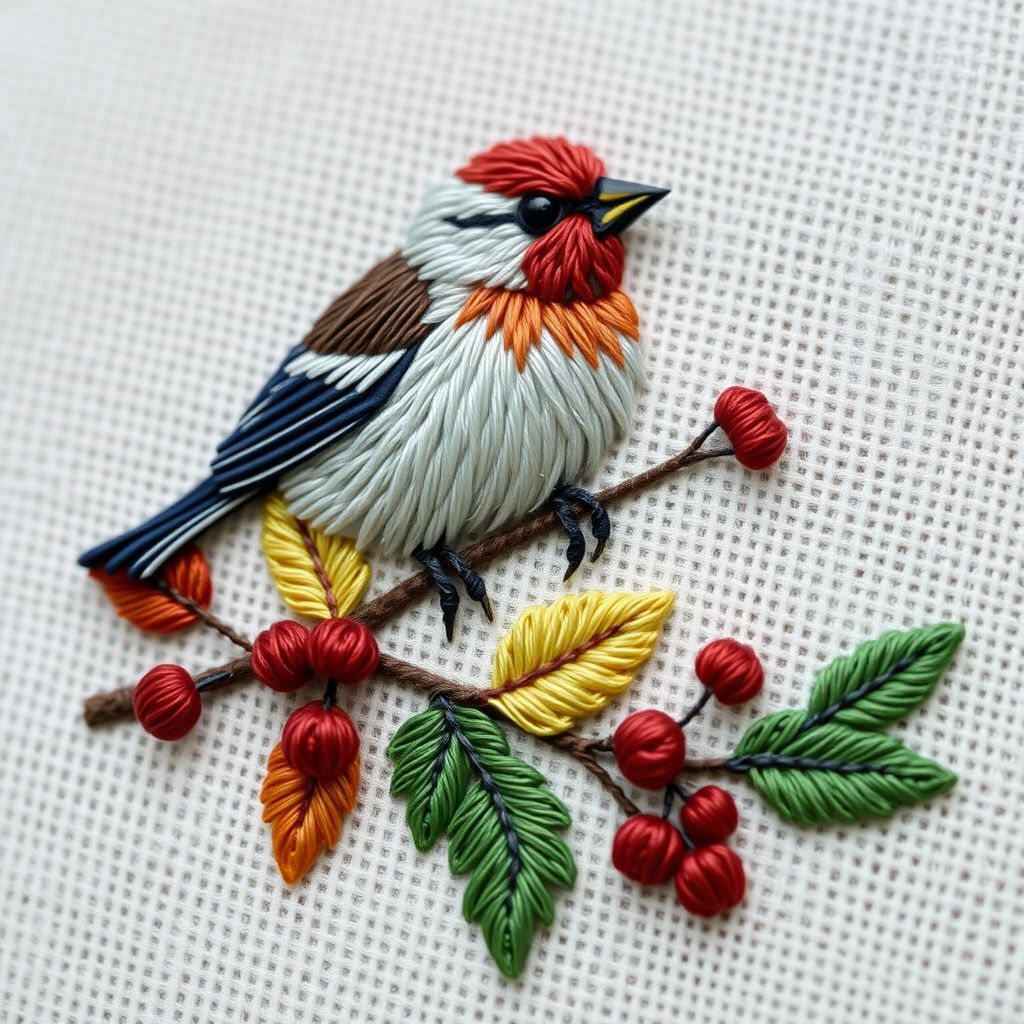
While bullion knot flowers are a popular and beginner-friendly project, the versatility of this stitch extends far beyond floral designs. The bullion knot can be used to create a wide range of textures, patterns, and embellishments, adding a unique and sophisticated touch to any embroidery project. From geometric designs to intricate borders, the possibilities are endless. Exploring these creative applications allows you to unlock the full potential of the bullion knot and elevate your embroidery skills to the next level.
One creative application is using bullion knots to create textured surfaces. By varying the length, density, and direction of the knots, you can create a variety of effects, from subtle ripples to bold, three-dimensional textures. For example, you can create a shaggy texture by using long, loosely wrapped bullion knots or a dense, bumpy texture by using short, tightly wrapped knots. These textured surfaces can be used to create unique backgrounds for your embroidery or to add dimension to specific elements of your design. Another creative application is using bullion knots to create geometric patterns. By arranging the knots in precise rows and columns, you can create intricate geometric designs that are both visually appealing and structurally sound. You can experiment with different shapes, sizes, and colors of knots to create a variety of patterns, from simple stripes to complex tessellations.
Bullion knots can also be used to create decorative borders. By stitching a row of bullion knots along the edge of your fabric, you can create a beautiful and elegant border that adds a finishing touch to your project. You can vary the length and density of the knots to create different border styles, from delicate and refined to bold and dramatic. Furthermore, they can be incorporated into more complex needlework techniques like stumpwork to add three dimensional elements. According to textile artist, Meredith Woolnough, “Experimentation is key to discovering new and exciting ways to use embroidery stitches.” By thinking outside the box and exploring different creative applications, you can unlock the full potential of the bullion knot and create truly unique and stunning embroidery projects. The only limit is your imagination, so dare to experiment and see where the bullion knot can take you.
Care and Preservation of Bullion Knot Embroidery
After investing time and effort into creating beautiful bullion knot embroidery, it’s essential to understand how to properly care for and preserve your work. Proper care will not only ensure that your embroidery remains in pristine condition for years to come but also protect the delicate bullion knots from damage. Factors like washing, storage, and handling can all impact the longevity and appearance of your embroidery. Implementing simple yet effective care practices can significantly extend the lifespan of your cherished creations.
When it comes to washing bullion knot embroidery, hand washing is always the safest option. Machine washing can be too harsh and may damage the delicate knots. Use a mild detergent and cold water to gently wash your embroidery. Avoid rubbing or scrubbing the knots, as this can cause them to unravel or become distorted. Instead, gently swish the embroidery in the water and then rinse thoroughly. To dry your embroidery, gently press it between two clean towels to remove excess water. Avoid wringing or twisting the fabric, as this can damage the knots. Lay the embroidery flat on a clean surface to air dry. Avoid hanging it in direct sunlight, as this can fade the colors. If you need to iron your embroidery, place a soft cloth between the iron and the knots to protect them from the heat. Use a low heat setting and avoid pressing down too hard. Instead, gently glide the iron over the surface of the embroidery.
Proper storage is also crucial for preserving your bullion knot embroidery. Store your embroidery in a clean, dry place away from direct sunlight and moisture. Avoid storing it in plastic bags, as this can trap moisture and cause mold or mildew. Instead, store it in a breathable fabric bag or a acid-free box. If you are storing your embroidery for an extended period of time, consider wrapping it in acid-free tissue paper to protect it from dust and dirt. Handling your embroidery with care is also important. Avoid touching the knots unnecessarily, as this can transfer oils and dirt from your hands. When displaying your embroidery, choose a location that is not exposed to direct sunlight or excessive humidity. According to the Victoria and Albert Museum’s textile conservation guide, “Prevention is always better than cure.” By implementing these simple care and preservation practices, you can ensure that your bullion knot embroidery remains beautiful and cherished for generations to come. The effort to protect your work is well worth the reward of preserving its beauty for years to come.
Conclusion: Embrace the Bullion Knot Journey
Mastering the bullion knot is more than just learning a stitch; it’s embarking on a journey of creative exploration. From understanding the basics of thread and needle selection to troubleshooting common problems and experimenting with diverse applications, each step enhances your embroidery skills and broadens your artistic horizons. We’ve covered essential techniques, explored inspiring project ideas, and discussed the importance of proper care, equipping you with the knowledge and confidence to incorporate this versatile stitch into your own creations. Remember, the key to success lies in practice, patience, and a willingness to embrace imperfections. Each knot you create is a learning experience, a step closer to mastering this elegant stitch and unlocking its full potential.
The bullion knot offers endless possibilities for adding texture, dimension, and sophistication to your embroidery projects. Whether you’re creating delicate floral embellishments, intricate geometric patterns, or bold textured surfaces, the bullion knot can transform ordinary fabric into a work of art. As you continue your bullion knot journey, don’t be afraid to experiment with different thread colors, sizes, and arrangements. Push your creative boundaries and discover new and exciting ways to use this versatile stitch. Explore the works of other embroidery artists for inspiration and guidance, but always strive to develop your own unique style and voice. The world of embroidery is vast and ever-evolving, and the bullion knot is just one of the many tools you can use to express your creativity and bring your artistic visions to life.
Ultimately, the true reward of mastering the bullion knot is the joy of creating something beautiful and unique with your own hands. Each stitch is a testament to your skill, patience, and creativity. So, embrace the journey, celebrate your achievements, and continue to explore the endless possibilities of embroidery. As embroidery expert, Liz Kettle, aptly puts it, “Embroidery is a language of thread. Learn the vocabulary, and you can speak volumes.” By mastering the bullion knot, you’ve added a powerful word to your embroidery vocabulary, empowering you to express yourself in new and exciting ways. Happy stitching!

Gutermann Sew-All Thread 1,094yd, Nu White
$9.27 (as of July 3, 2025 07:59 GMT -04:00 - More infoProduct prices and availability are accurate as of the date/time indicated and are subject to change. Any price and availability information displayed on [relevant Amazon Site(s), as applicable] at the time of purchase will apply to the purchase of this product.)
New brothread 12 Colors Variegated Polyester Embroidery Machine Thread Kit 500M (550Y) Each Spool for Brother Janome Babylock Singer Pfaff Bernina Husqvaran Embroidery and Sewing Machines-Assortment1
$14.99 (as of July 3, 2025 05:32 GMT -04:00 - More infoProduct prices and availability are accurate as of the date/time indicated and are subject to change. Any price and availability information displayed on [relevant Amazon Site(s), as applicable] at the time of purchase will apply to the purchase of this product.)
Simthread - 33 Selections - Various Assorted Color Packs of Polyester Embroidery Machine Thread Huge Spool 5500Y for All Purpose Sewing Embroidery Machines - #001 White
$14.99 (as of July 3, 2025 05:32 GMT -04:00 - More infoProduct prices and availability are accurate as of the date/time indicated and are subject to change. Any price and availability information displayed on [relevant Amazon Site(s), as applicable] at the time of purchase will apply to the purchase of this product.)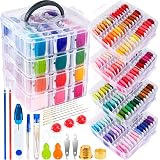
262 Pack Embroidery Thread Floss Kit Including 200 Colors 8 M/Pcs Cross Stitch Sewing Thread with Floss Bins and 62 Pcs Cross Stitch Tool,4-Tier Transparent Storage Box
$27.99 (as of July 2, 2025 13:06 GMT -04:00 - More infoProduct prices and availability are accurate as of the date/time indicated and are subject to change. Any price and availability information displayed on [relevant Amazon Site(s), as applicable] at the time of purchase will apply to the purchase of this product.)
CABODYALS Rainbow Gradient Color Cross Stitch Floss Variegated Embroidery String 6 Strands Colorful Polyester Friendship Bracelet Needlepoint Yarn Thread for Sewing Bracelet Making Knitting Art Crafts
$6.99 (as of July 2, 2025 13:06 GMT -04:00 - More infoProduct prices and availability are accurate as of the date/time indicated and are subject to change. Any price and availability information displayed on [relevant Amazon Site(s), as applicable] at the time of purchase will apply to the purchase of this product.)
Webbing Cutting Machine, Automatic Hot and Cold Tape Cutter for Elastic Band Self Adhesive Tape Ribbon Zipper
$449.99 (as of July 1, 2025 13:06 GMT -04:00 - More infoProduct prices and availability are accurate as of the date/time indicated and are subject to change. Any price and availability information displayed on [relevant Amazon Site(s), as applicable] at the time of purchase will apply to the purchase of this product.)
Brother SE2000 5" x 7" Combo Embroidery & Sewing Machine with Deluxe 130 Thread Spools & Accessories
(as of July 1, 2025 13:06 GMT -04:00 - More infoProduct prices and availability are accurate as of the date/time indicated and are subject to change. Any price and availability information displayed on [relevant Amazon Site(s), as applicable] at the time of purchase will apply to the purchase of this product.)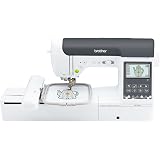
Brother SE2000 Computerized Sewing and Embroidery Machine
$1,299.99 (as of July 1, 2025 13:06 GMT -04:00 - More infoProduct prices and availability are accurate as of the date/time indicated and are subject to change. Any price and availability information displayed on [relevant Amazon Site(s), as applicable] at the time of purchase will apply to the purchase of this product.)
Industrial Sewing Machine,8700 Heavy Duty Sewing Machine With Adjusting Stitch Clamp,Freestanding Straight Line Sewing Machine For Sewing, Repairing Bags, Dollswith Thick Materials Canvas, Etc
$265.00 (as of July 1, 2025 13:06 GMT -04:00 - More infoProduct prices and availability are accurate as of the date/time indicated and are subject to change. Any price and availability information displayed on [relevant Amazon Site(s), as applicable] at the time of purchase will apply to the purchase of this product.)